Automatic Dump During Recording Playback
The SimOne simulation platform also supports automatic Dump through the recording playback feature to achieve temporal consistency across different environmental conditions. Each test case run is recorded by the new web interface, and this recording can be used for automatic Dump during playback.
Why create a playback test case for Dump?
The Dump process places significant load on the simulation hardware — especially writing large amounts of simulation data to disk — so it is generally recommended to Dump one physical-level sensor at a time. If the Ego Vehicle has multiple sensors installed and you need data that is time-synchronized across all sensors, using the same playback test case ensures temporal consistency of the data.
The main steps are as follows:
2.1 Create a Traffic Flow Test Case for Playback
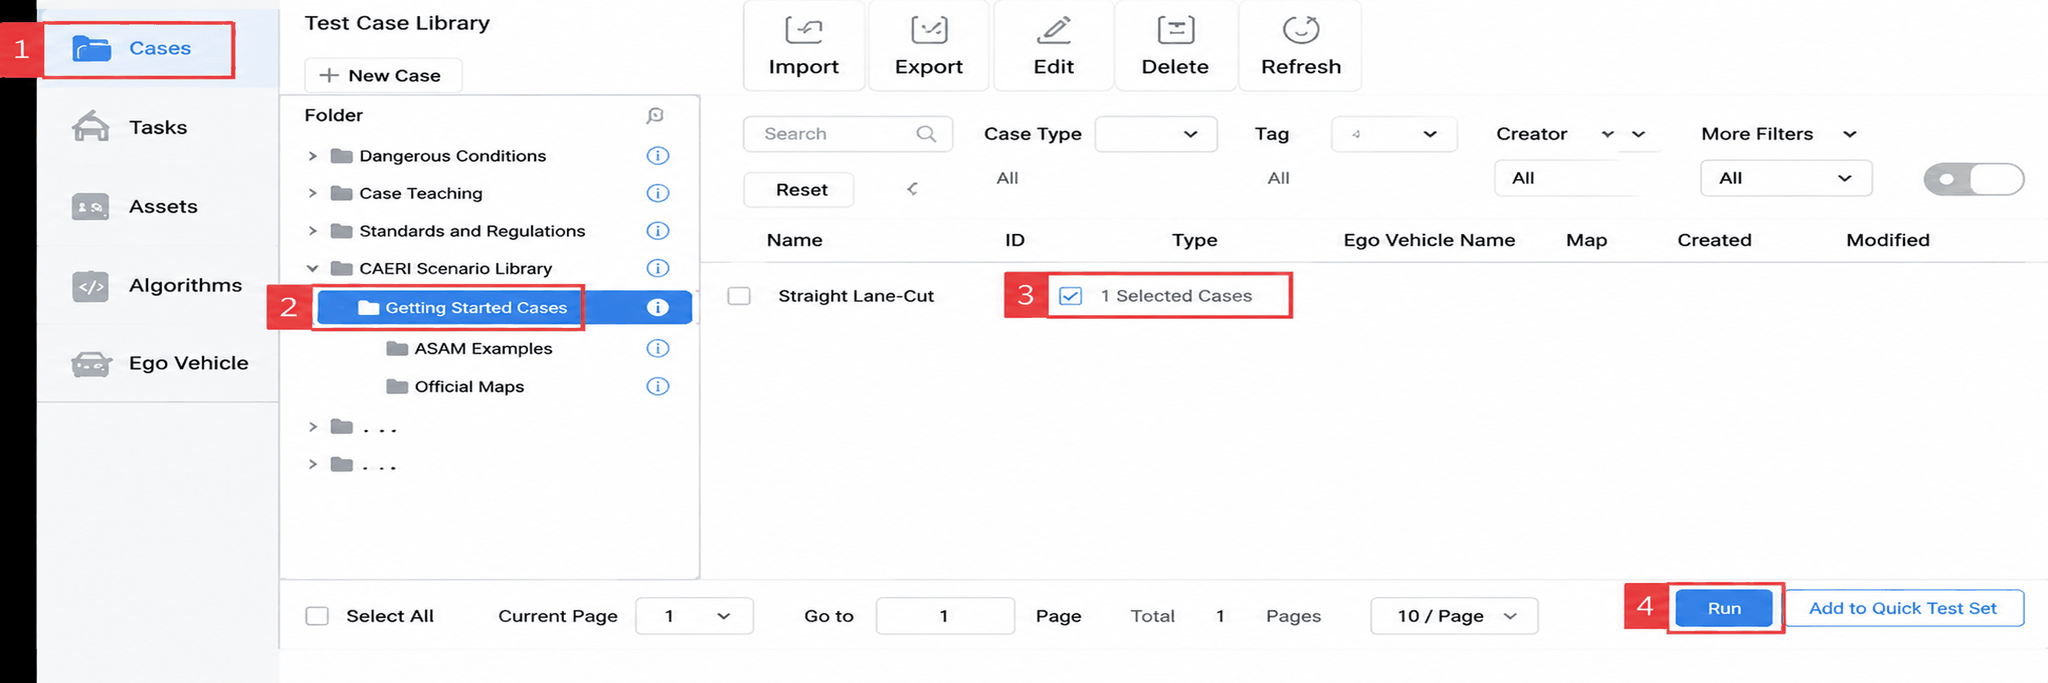
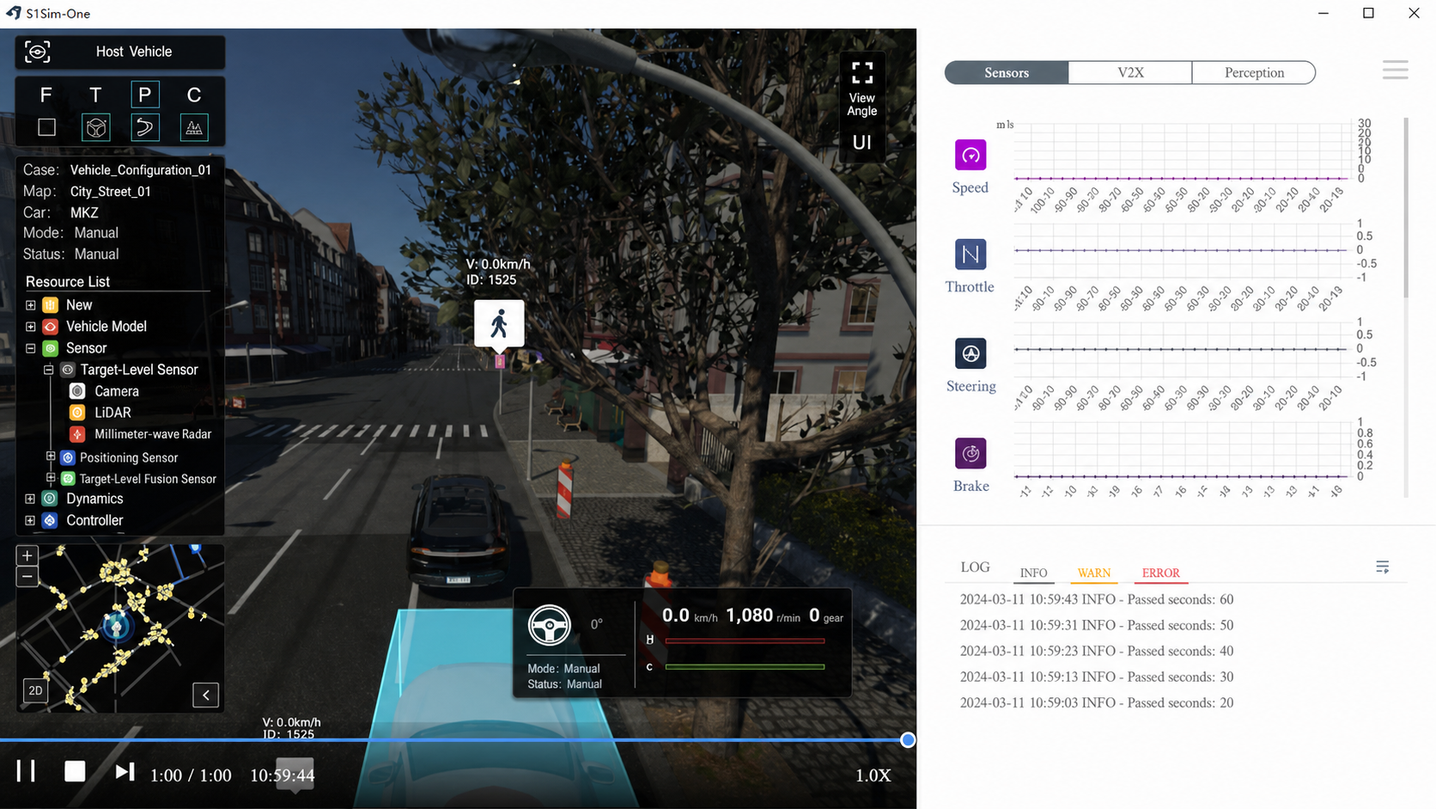
(1)Select the Traffic Flow Test Case from the Starter Test Cases in the built-in Test Case Library for path recording. Check Traffic Flow Test Case and click Run as shown below. Run the pre-edited test case once (without a Camera added to the Ego Vehicle).
- For the test case run, select Manual Control for the Ego Vehicle. The specific operation is shown below.
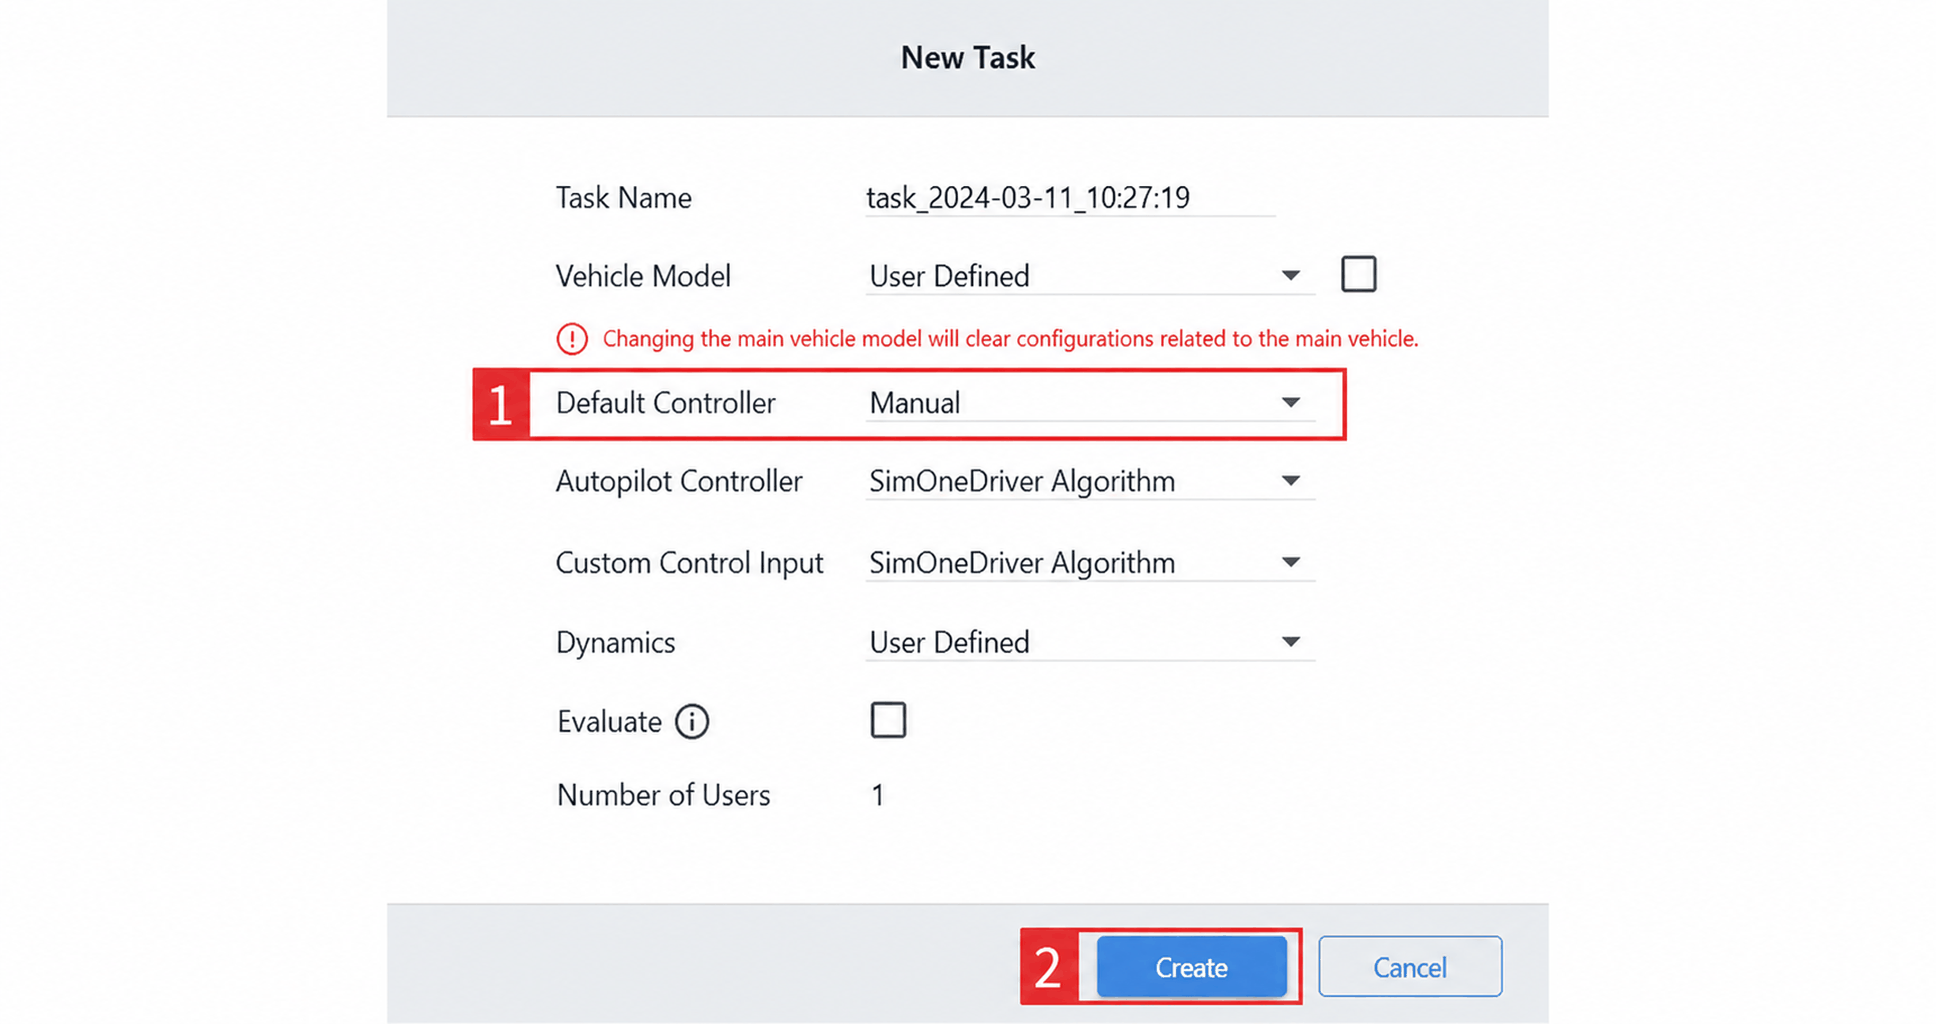
- Click Create. The test case starts running. Drive along the route you need on the map, then stop the test case after a suitable duration.
2.2 Configure the Vehicle for Dump
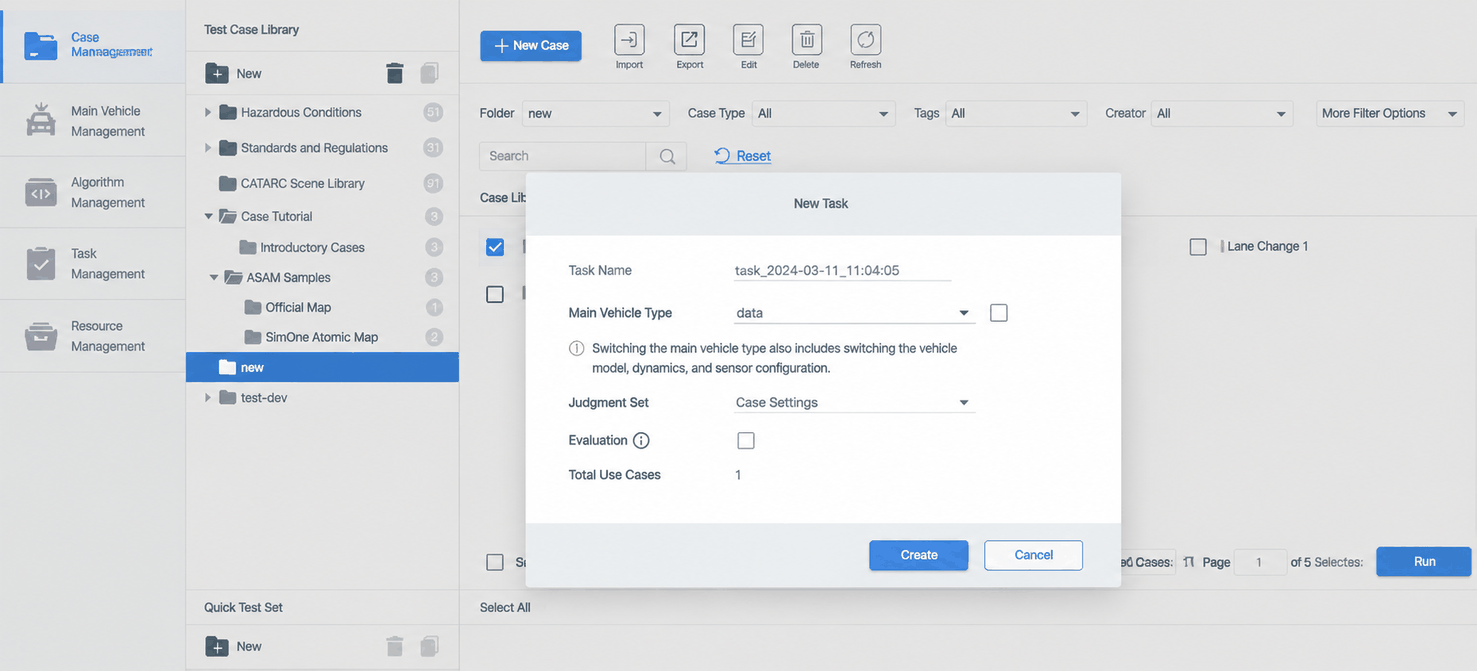
(1)In the Ego Vehicle Management module, create a new Ego Vehicle — you can rename it to data.
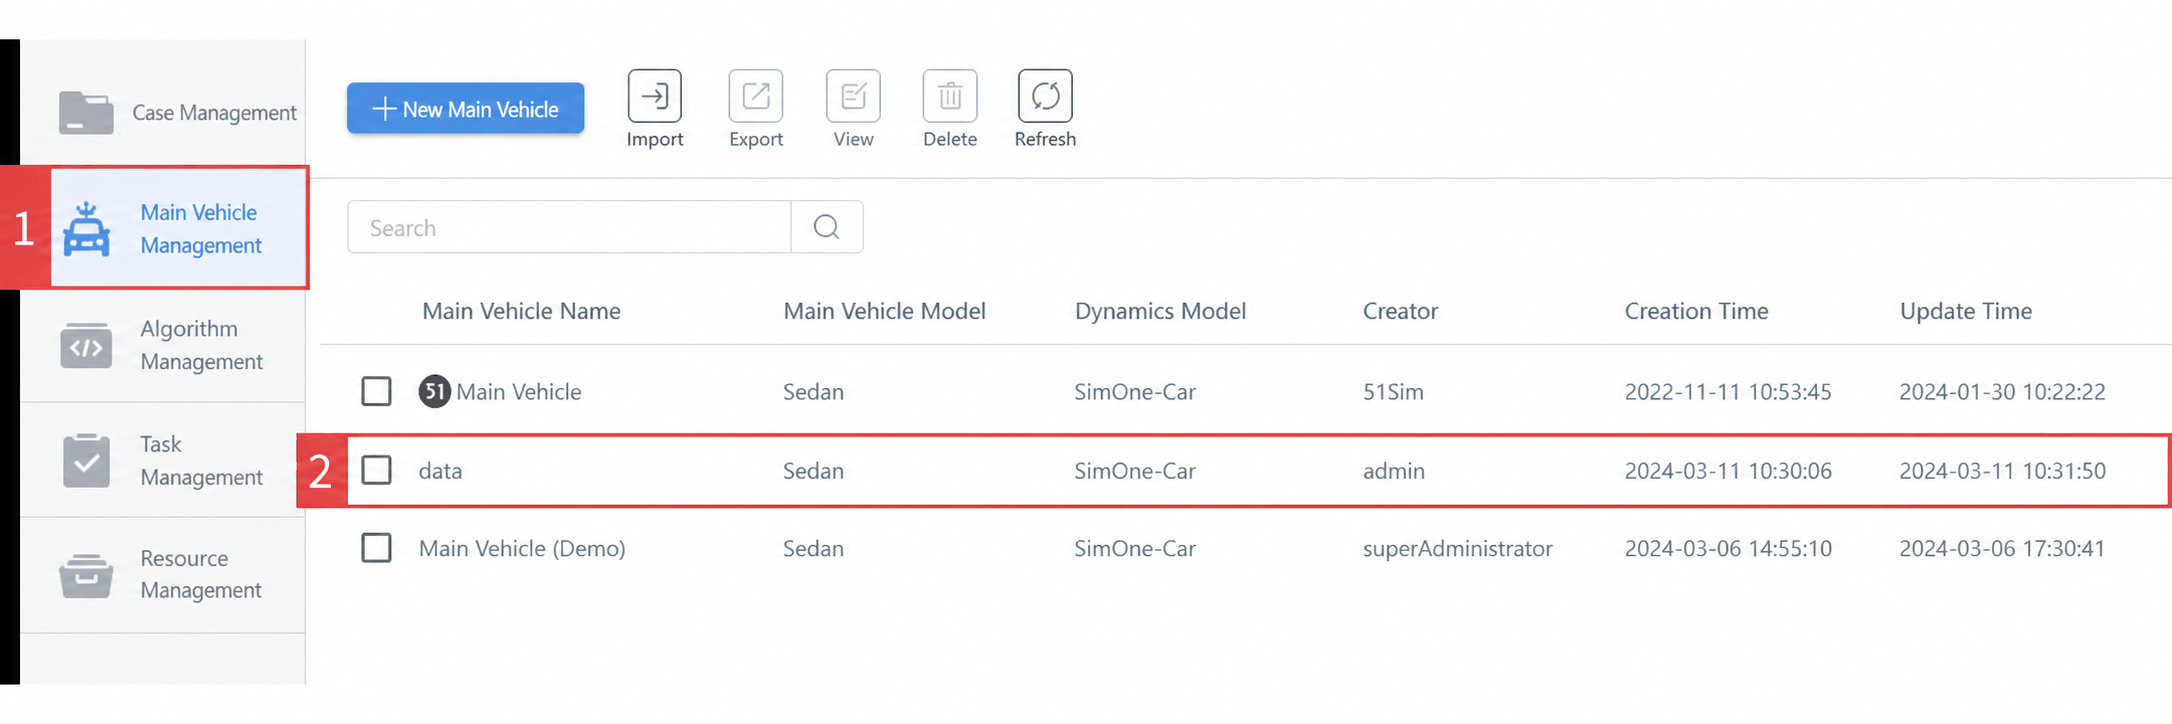
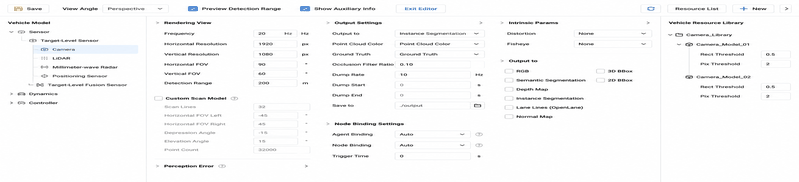
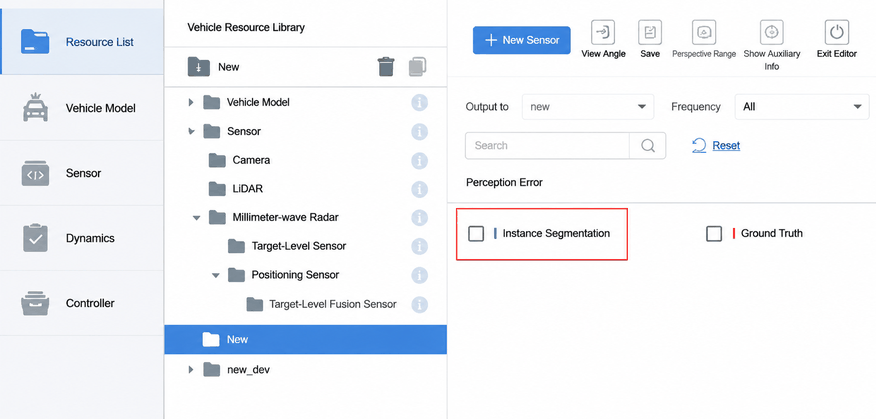
- Camera and LiDAR Dump configuration: Configure this Ego Vehicle with a camera and a LiDAR. Set the Dump parameters as shown below — in the figure, Output Settings → Output to Dump.
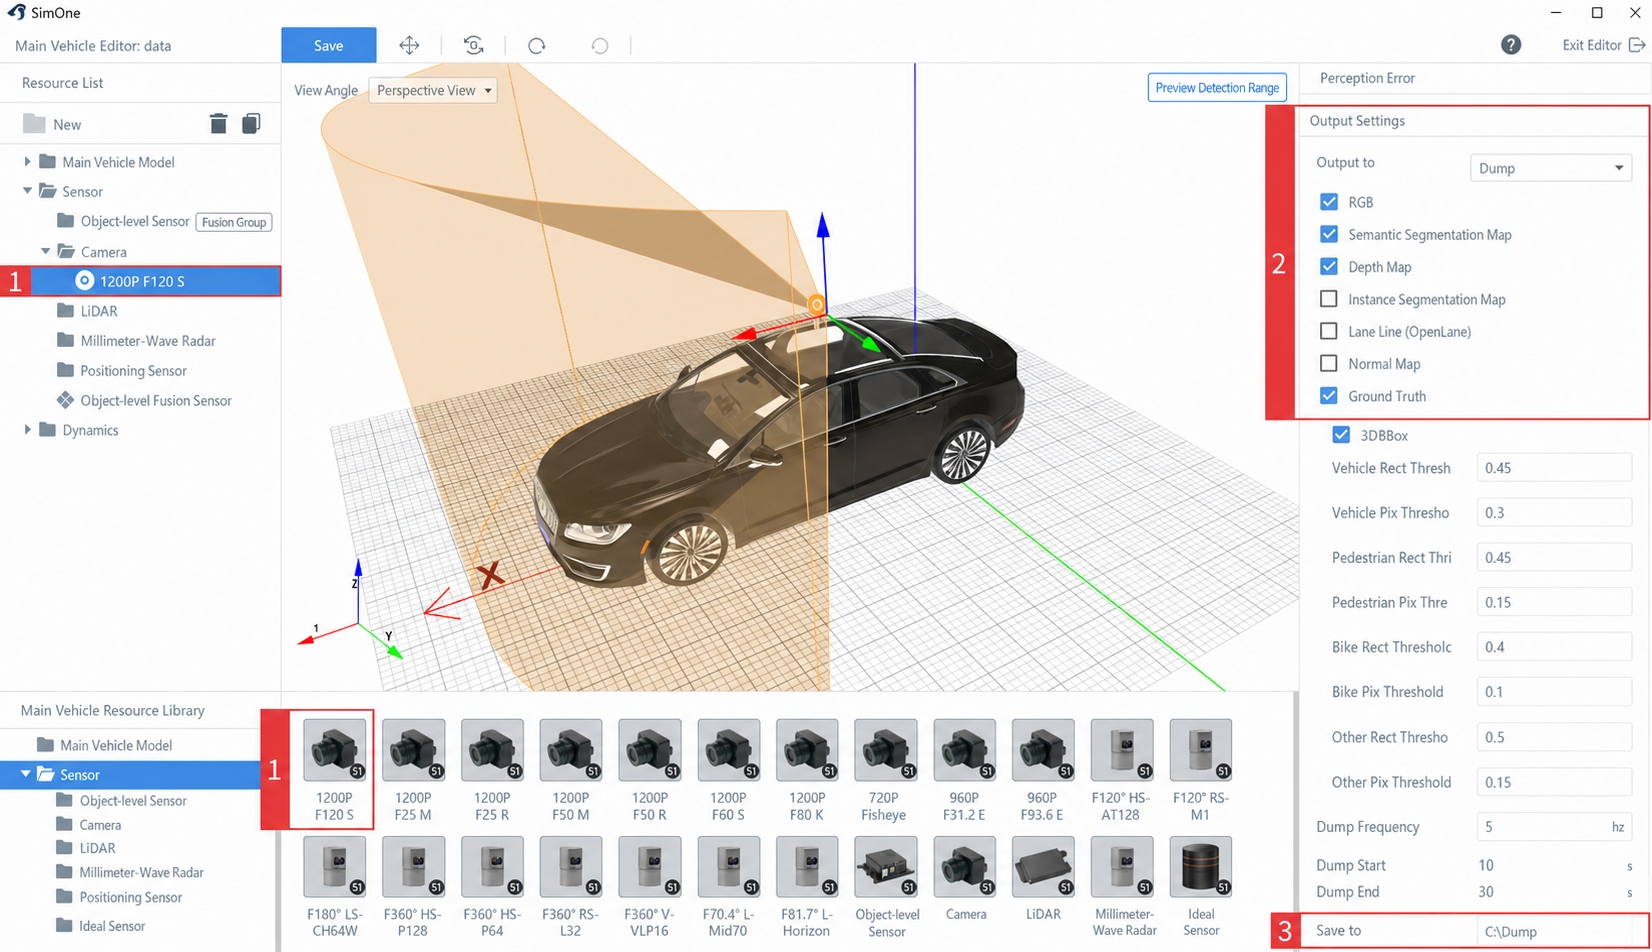
- The options RGB, Semantic Segmentation Map, Depth Map, Instance Segmentation Map, and Ground Truth will then appear below. Select the options you need.
The Dump frame rate for a camera is up to 30 Hz. The Dump time range can be selected from the Recording Playback path based on the desired time segment. In this example, the range is 20 to 25 seconds.
- The Dump output path is set in the parameter settings. The path selected here is C:/Dump. Choose the save path according to your requirements — the system will automatically create the folder.
- To achieve hardware synchronization between the camera and LiDAR data, set the same Dump frame rate and Dump time range for both. The maximum Dump frame rate for LiDAR is 10 Hz, so to achieve multi-sensor hardware synchronization, note the frame rate limitation.
Do all sensors installed on the same vehicle need hardware synchronization?
Currently yes, because real sensors always operate synchronously and customers typically need fused data for perception purposes.
Although the camera and LiDAR have the same frame rate, their simulation processes are handled by different rendering nodes. Simultaneously dumping data not only places significant load on the simulation hardware but also causes serious efficiency degradation due to disk write speed bottlenecks and may even result in partial data loss. Therefore, it is recommended to dump only one sensor's data at a time.
- LiDAR parameter settings are shown below:
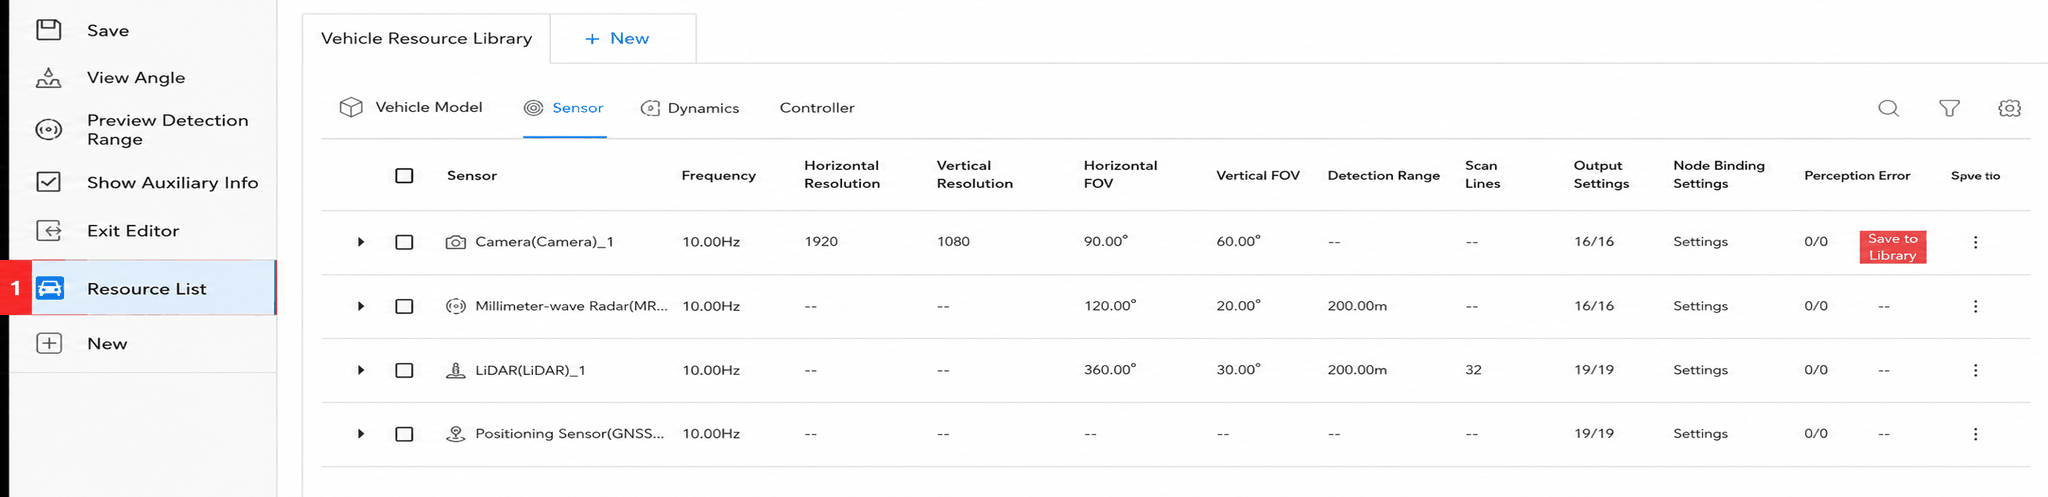
These two sensors cannot be dumped simultaneously. To improve efficiency, when dumping image data, disable the LiDAR by clicking the enable toggle in the upper-right corner of the LiDAR interface. Similarly, disabling the camera requires clicking the same enable toggle.
Once the sensor Dump parameters are configured, you can proceed with Dump.
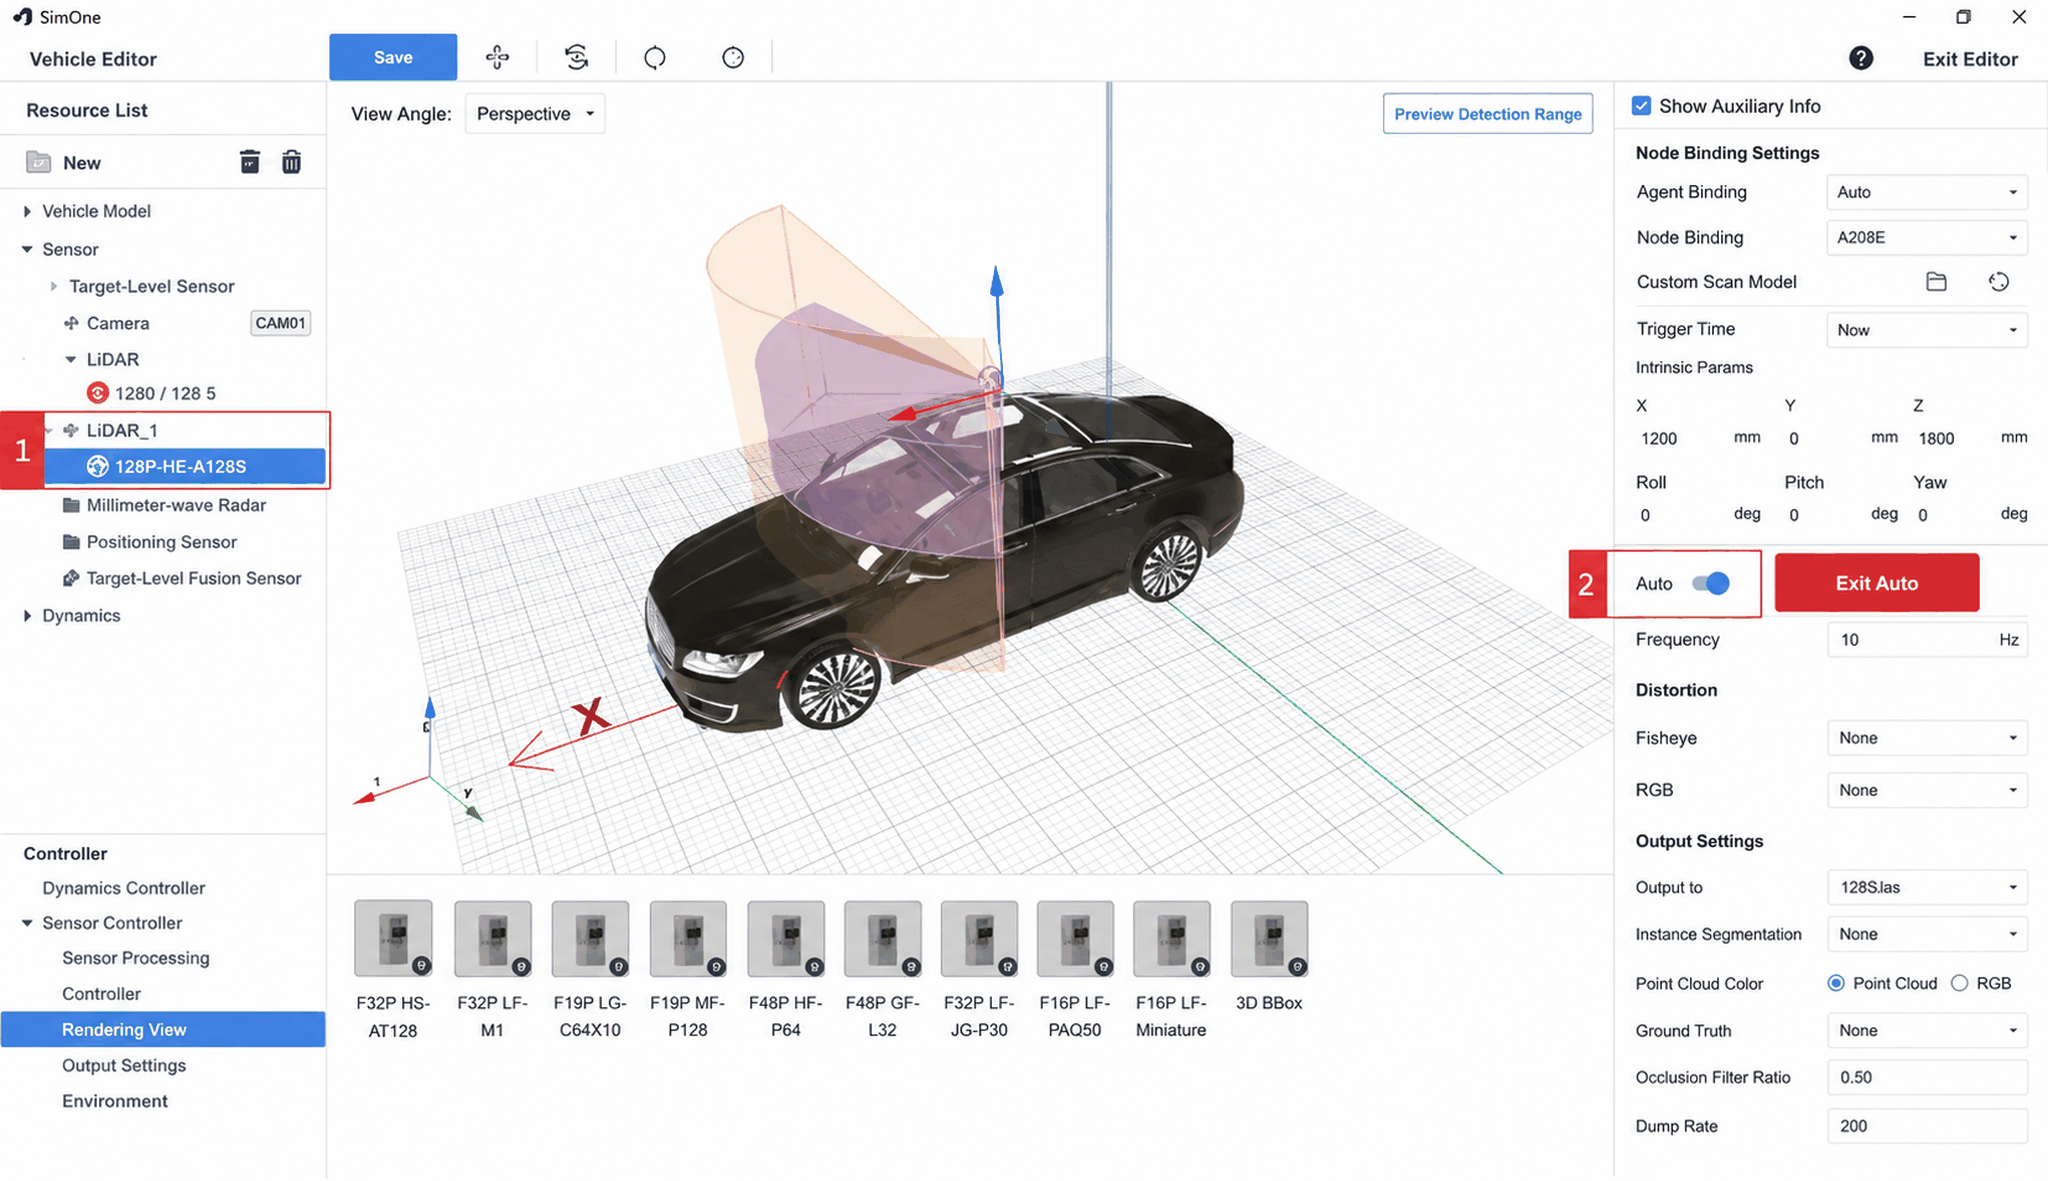
- To configure millimeter-wave radar Dump: Add a millimeter-wave radar to this Ego Vehicle and set the Dump parameters as shown below — the circled area shows where to select the Dump option under the output settings.
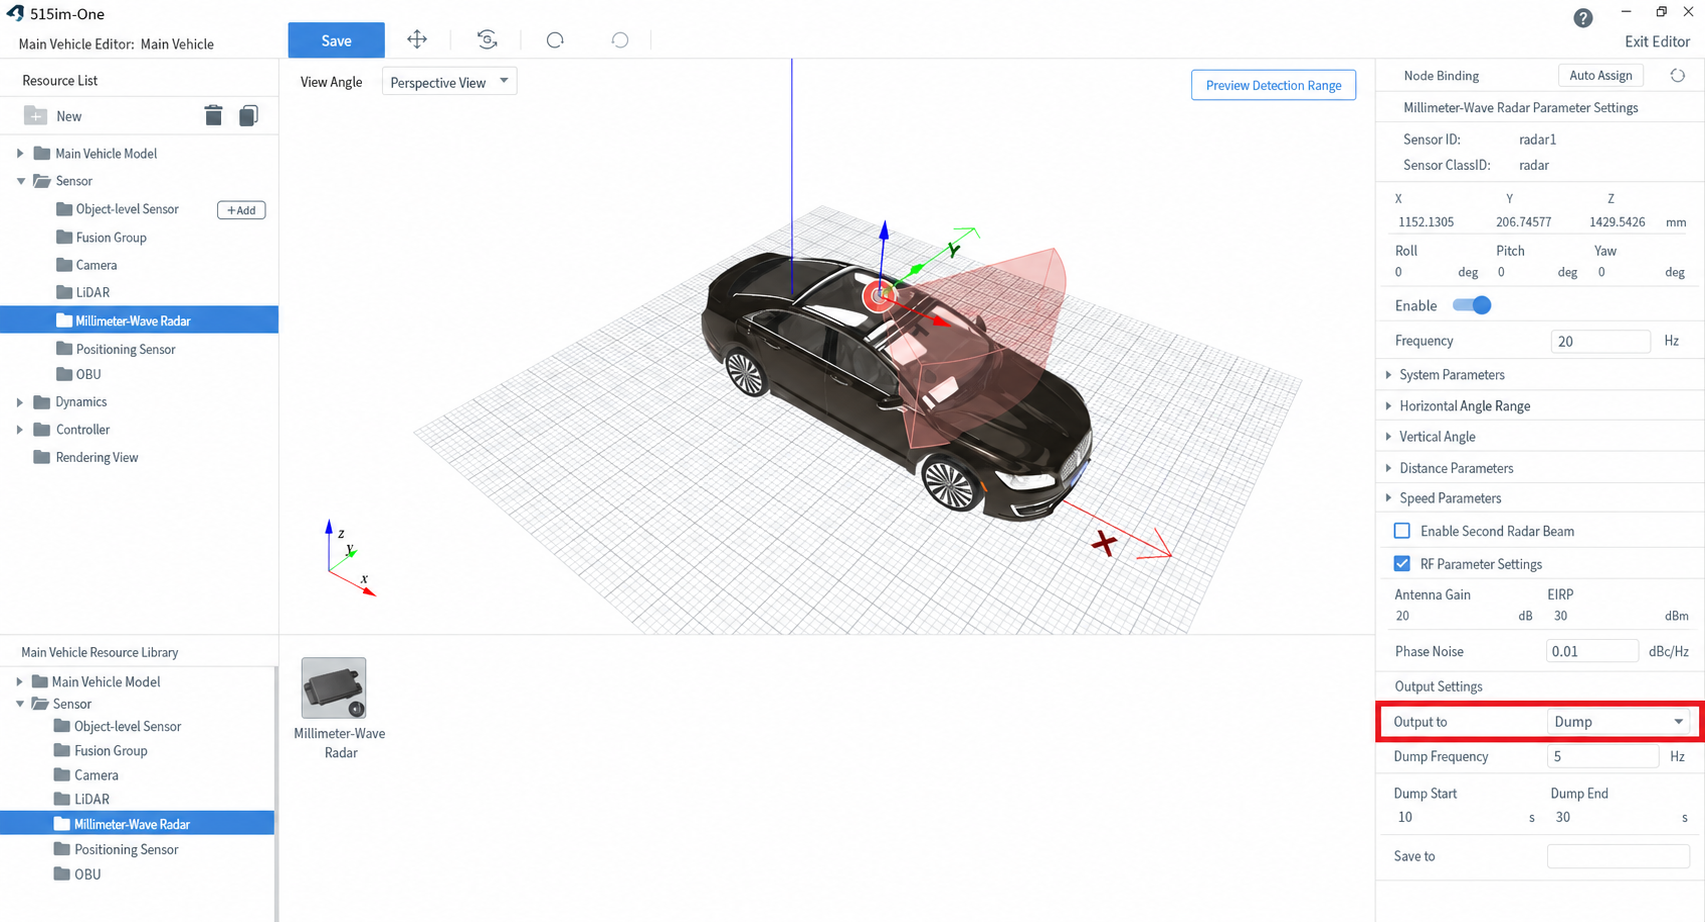
- The frame rate configuration, Dump duration, and Dump save path options will then appear. Configure them according to your requirements, and you can then start the simulation.
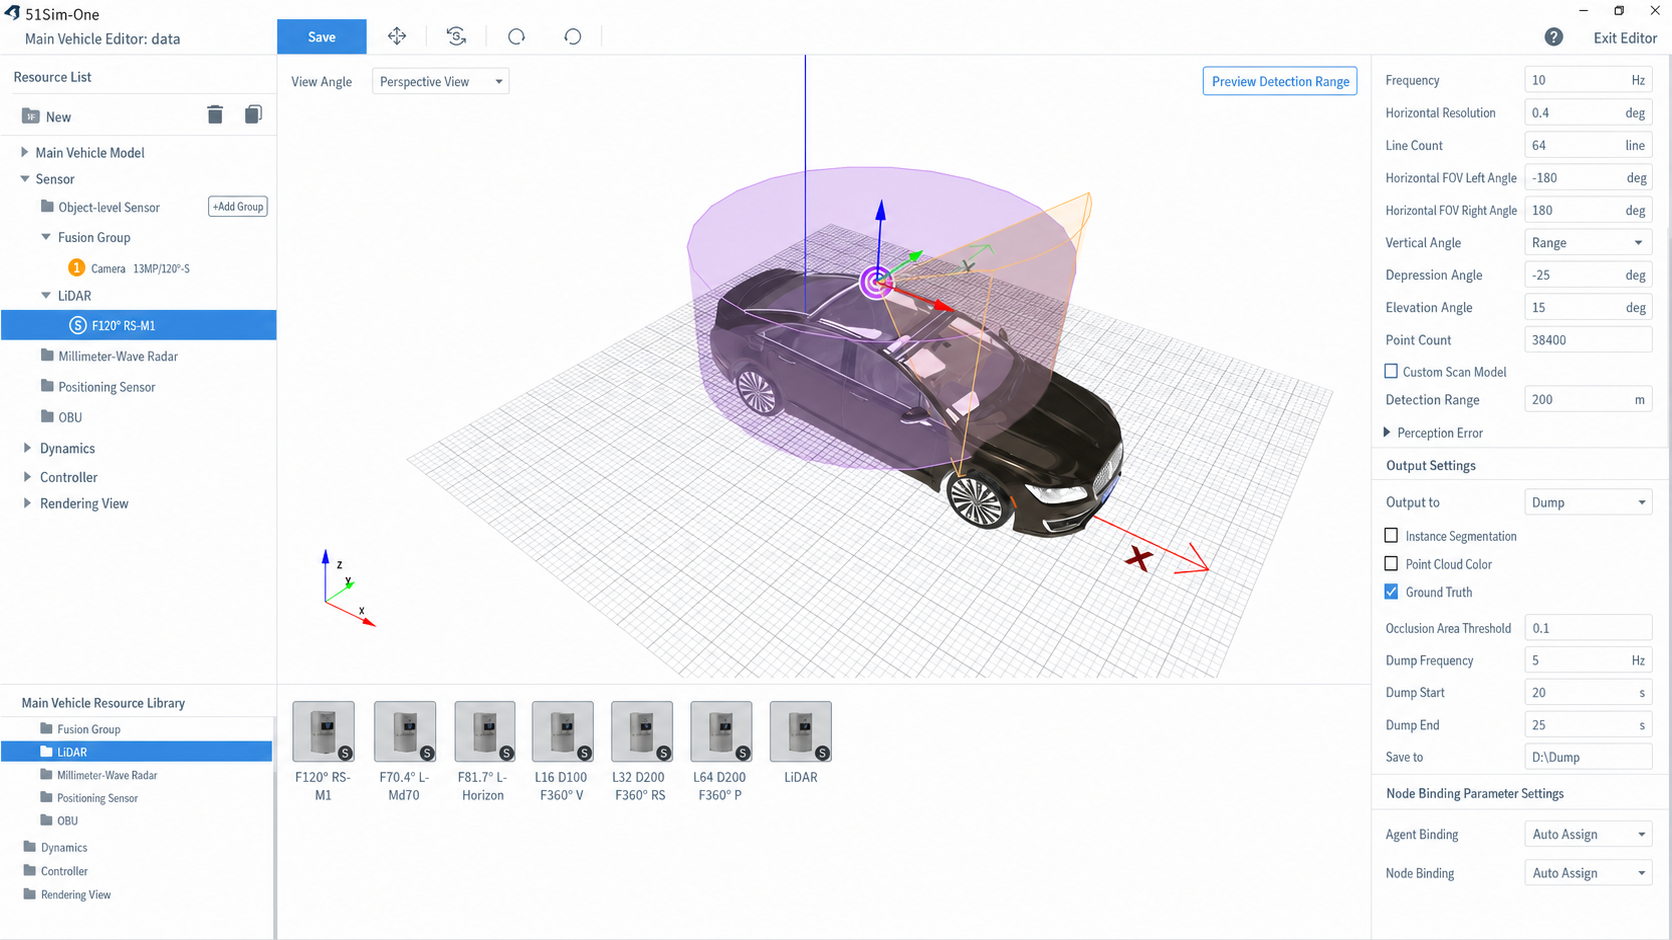
Output to Dump:
DumpHz: Frame rate for automatic Dump
DumpStartTime: Start time for automatic Dump (in seconds)
DumpEndTime: End time for automatic Dump (in seconds)
DumpOutputPath: Directory for storing the Dump output.
This directory must already exist.
2.3 Save as a Playback Test Case
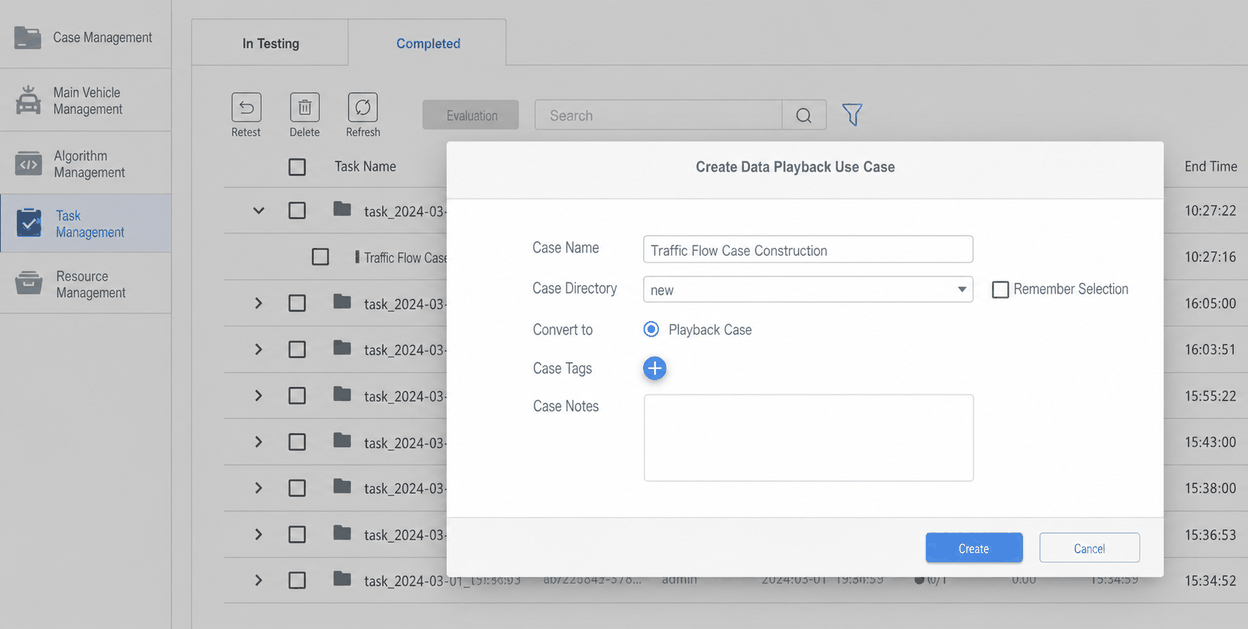
Switch to the Completed tab in the task list, locate the completed task, and click the Save button on the right to save the recording back to the test case library (test cases appear in purple).
2.4 Run the Playback Test Case
The purple-labeled entry in the test case list is the recording playback test case you just created. Run the test case and select the data Ego Vehicle — the one configured with both a camera and LiDAR — to start dumping image or point cloud data. (The camera and LiDAR on data cannot be dumped simultaneously.)
2.5 View the Dump Results
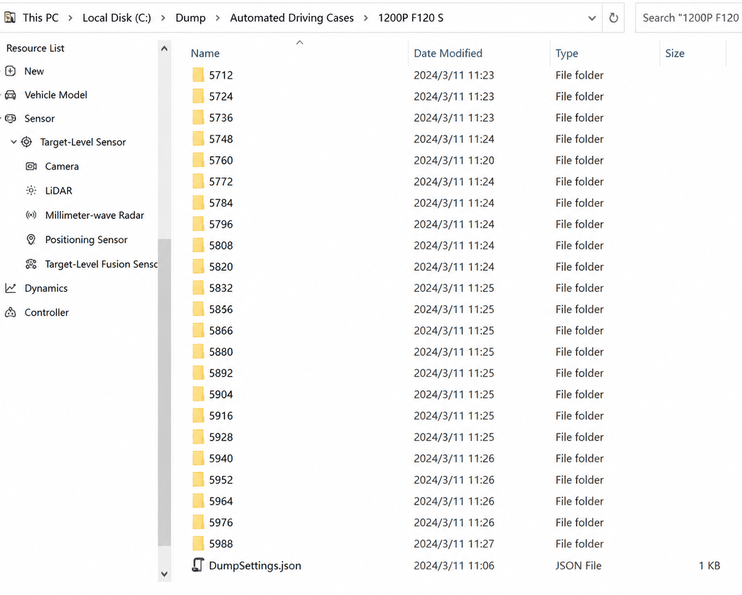
The default output directory for dumped images and point cloud data is C:/Dump, as shown below.