DIL: Driver-in-the-Loop Testing — Multi-Vehicle Interaction
This tutorial currently applies to SimOne – Enterprise Edition only.
How to Build a Multi-Vehicle Interaction Test Case
The multi-vehicle interaction module is an advanced feature that requires a separate paid license.
The steps for creating a multi-vehicle interaction test case are as follows.
1. Configure the Ego Vehicle
(1)Create a new Ego Vehicle for multi-vehicle interaction.
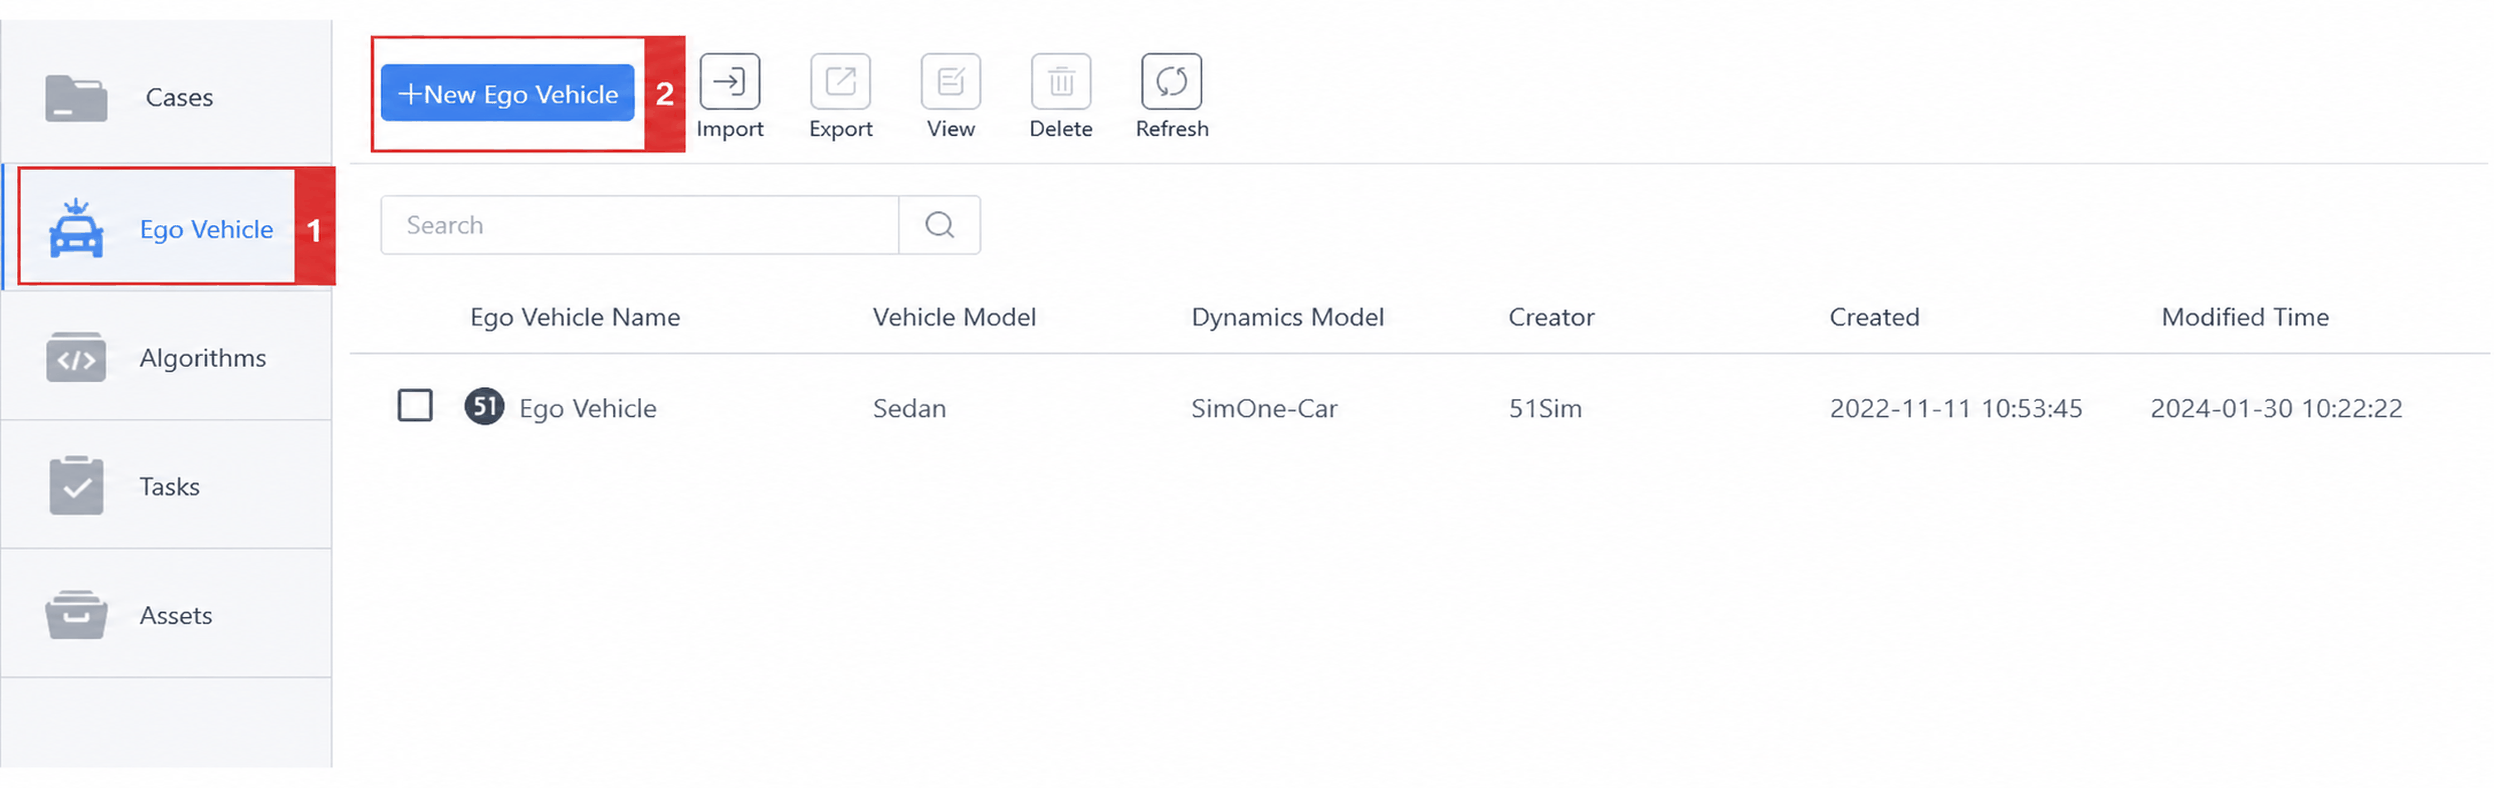
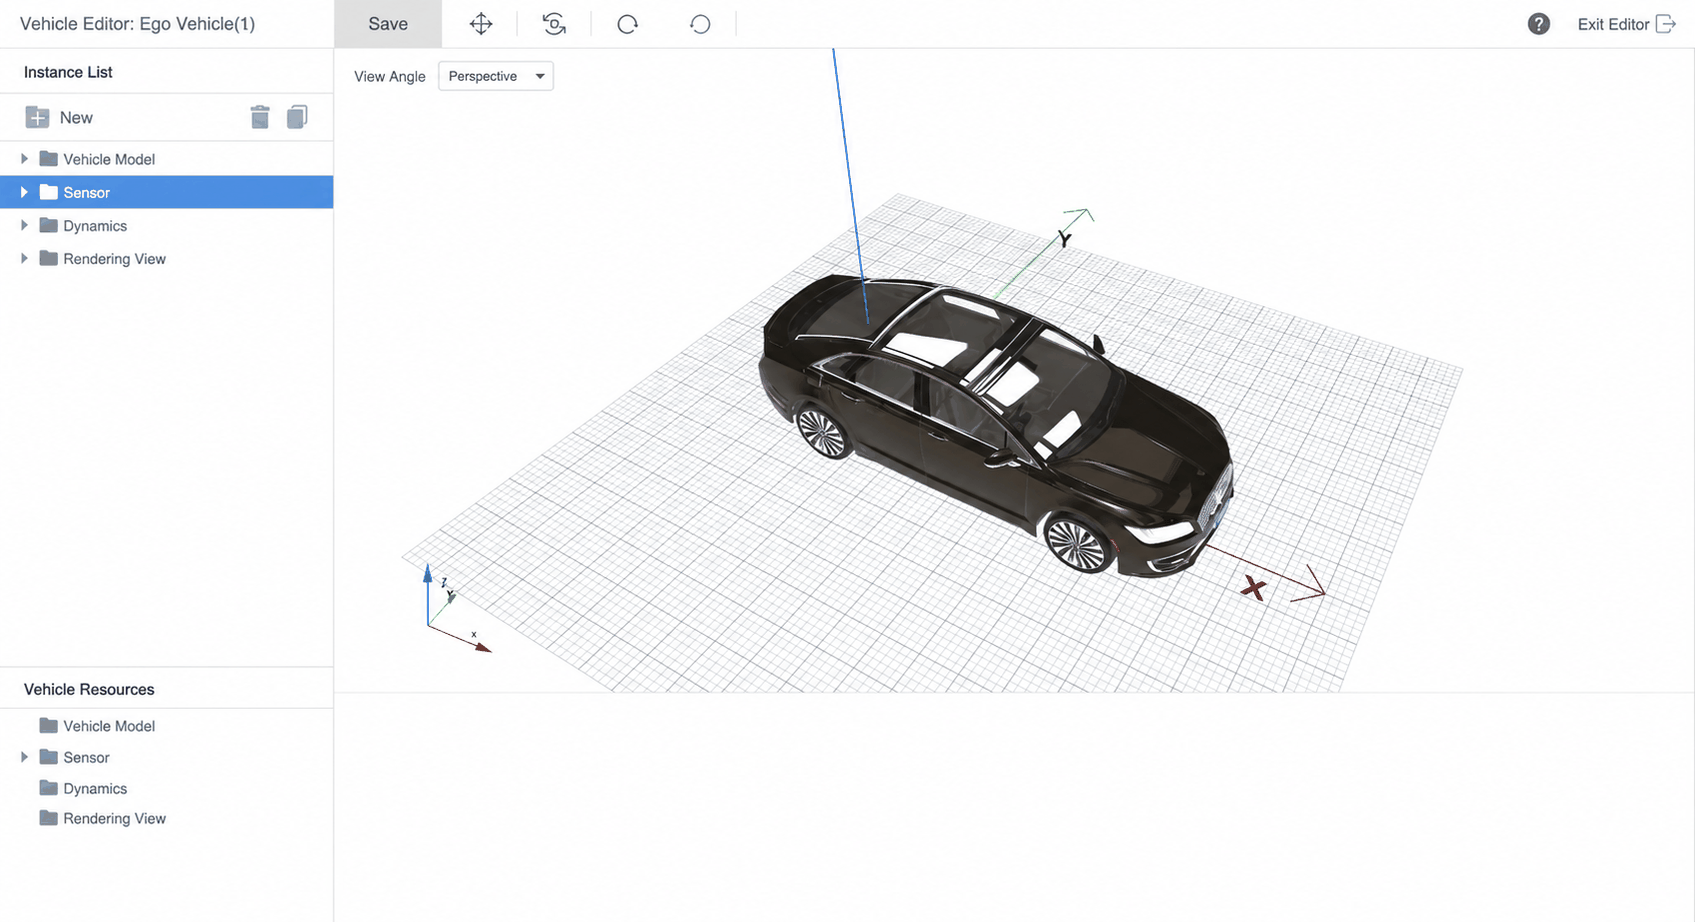
(2)Double-click the new Ego Vehicle to open the Ego Vehicle Editor, and first configure the Ego Vehicle model.
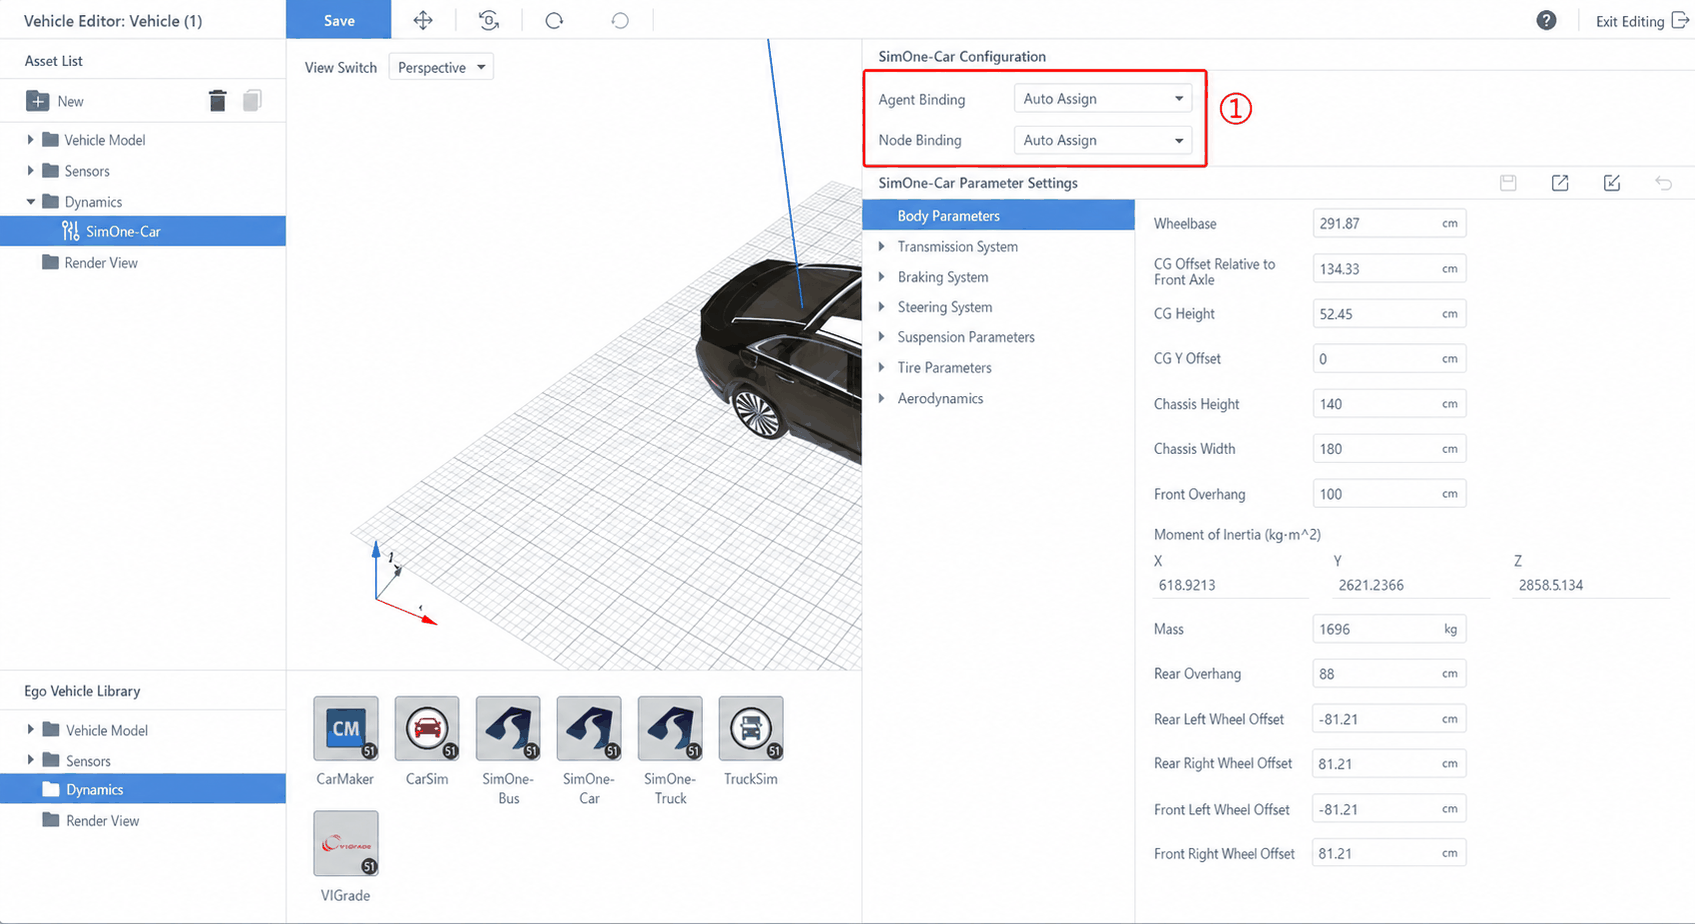
(3)Configure the Dynamics model for the Ego Vehicle and bind the dynamics model node. If you need to assign the dynamics model to a fixed node, bind it in advance (the dynamics node must be configured in the Master Agent resource list beforehand).
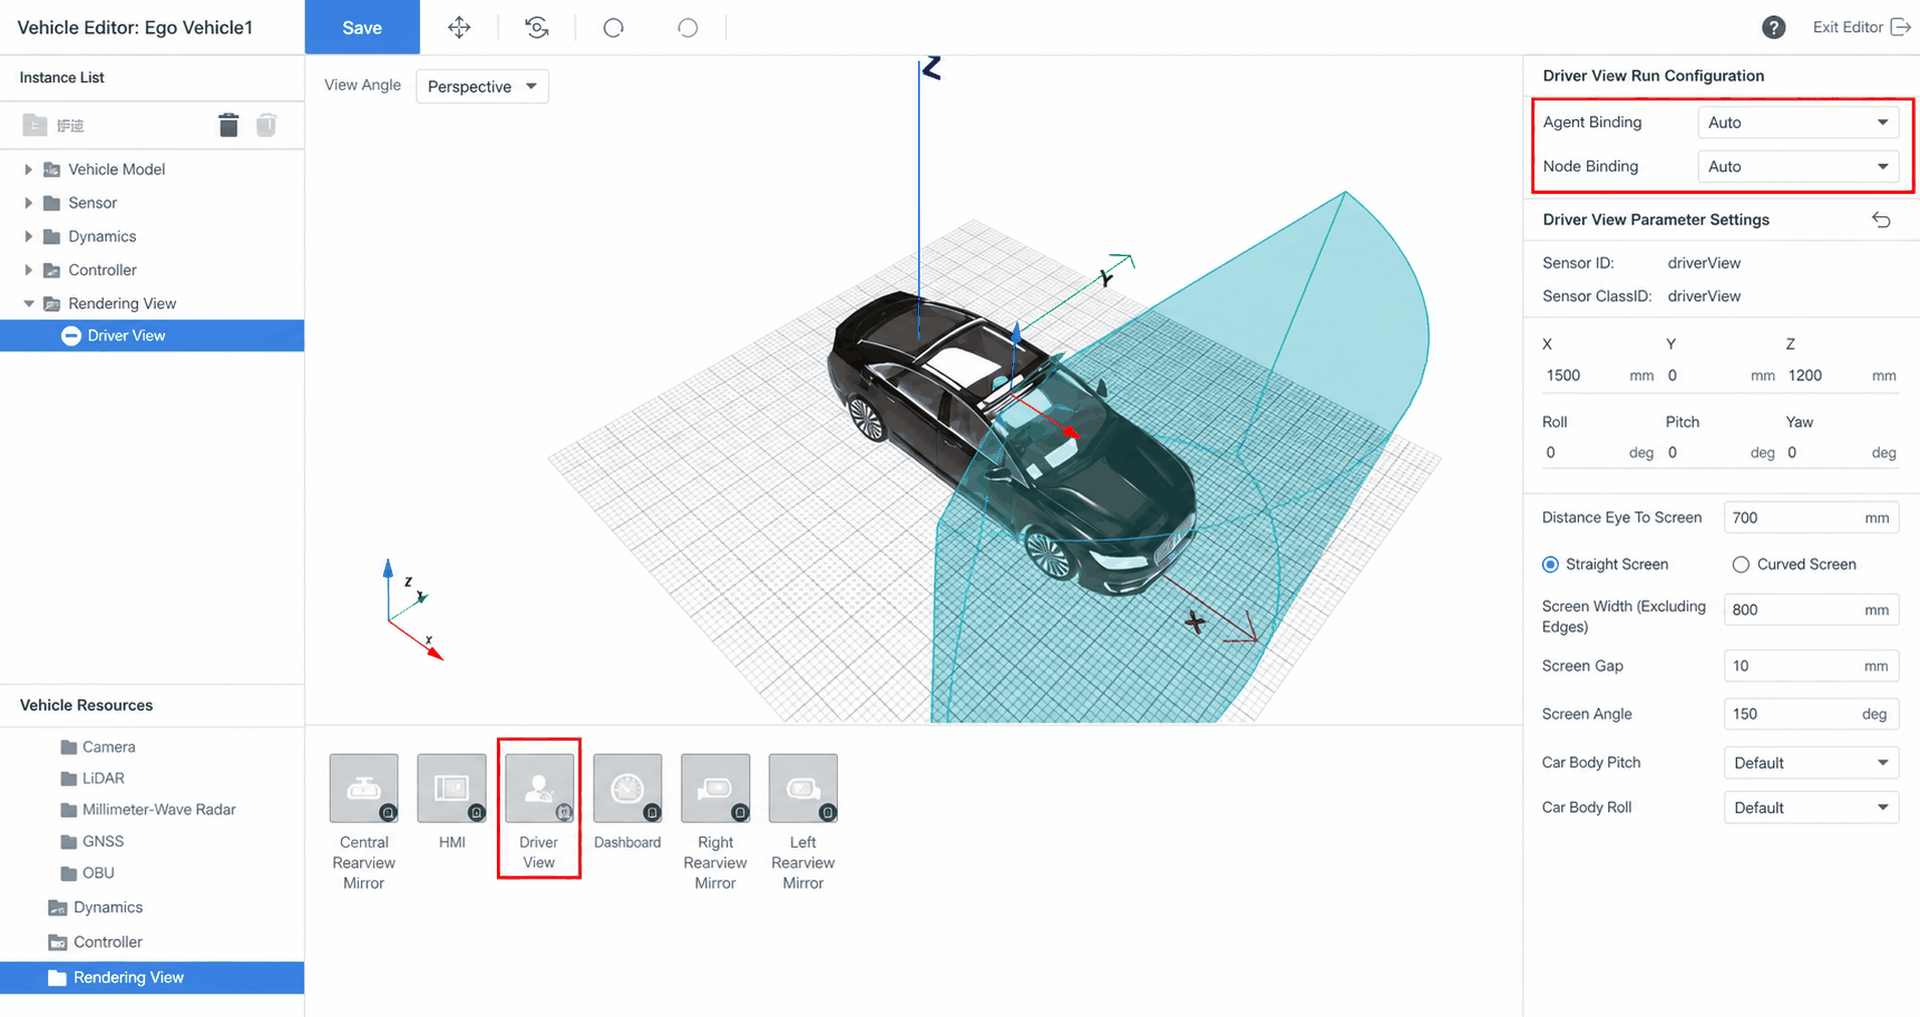
(4)(Optional) Configure a Render Window for the Ego Vehicle. A fixed node binding is required.
2. Configure the Controller
(1)Go to Global Settings → Controller Settings → Create.
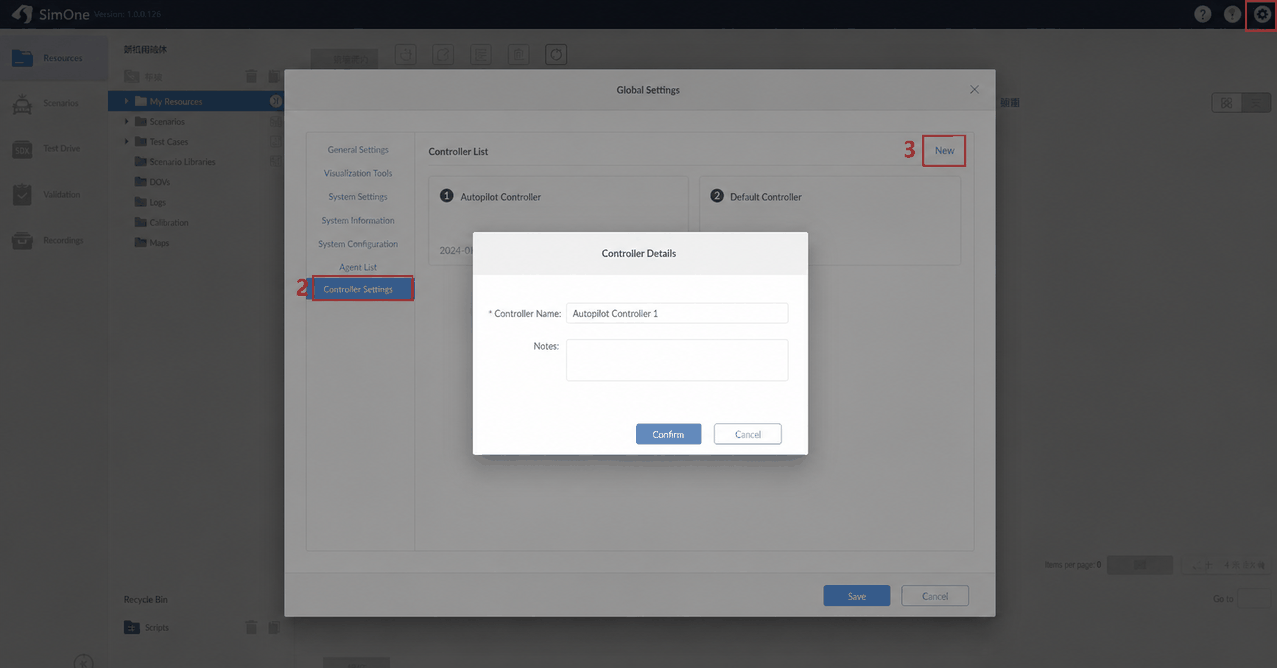
(2)Create one or more controllers.
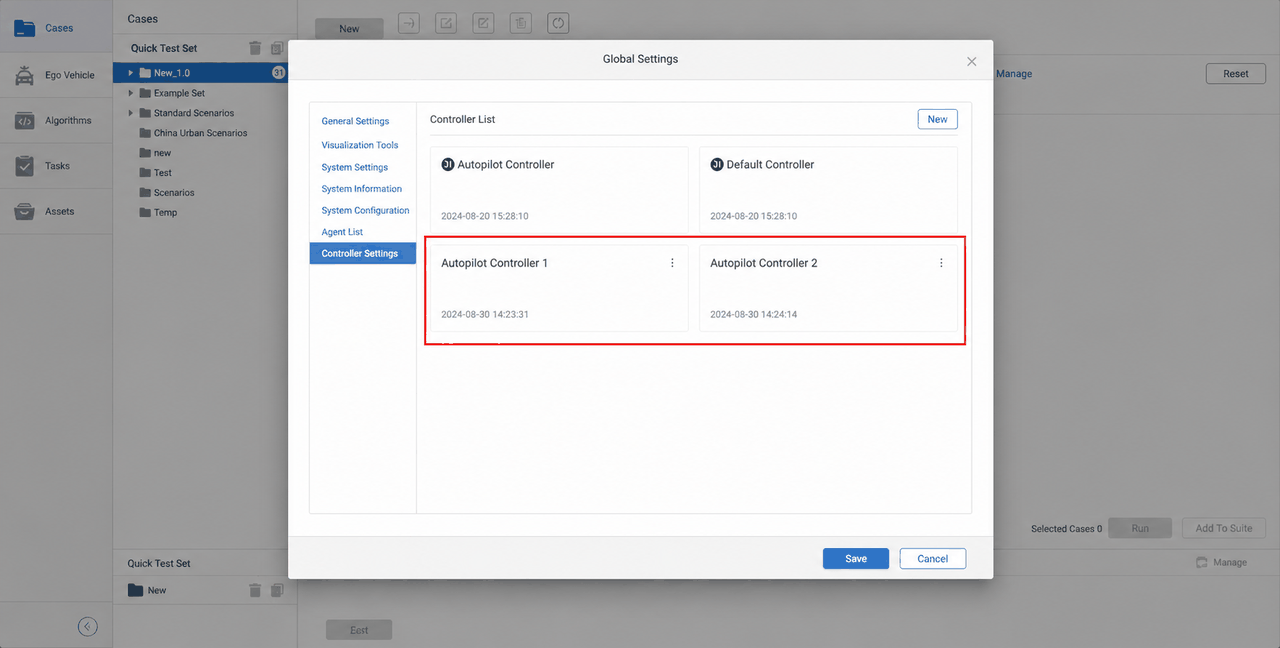
3. Configure the Algorithm
(1)Go to Algorithm Management → Create Algorithm and select Driving Simulator as the integration method.
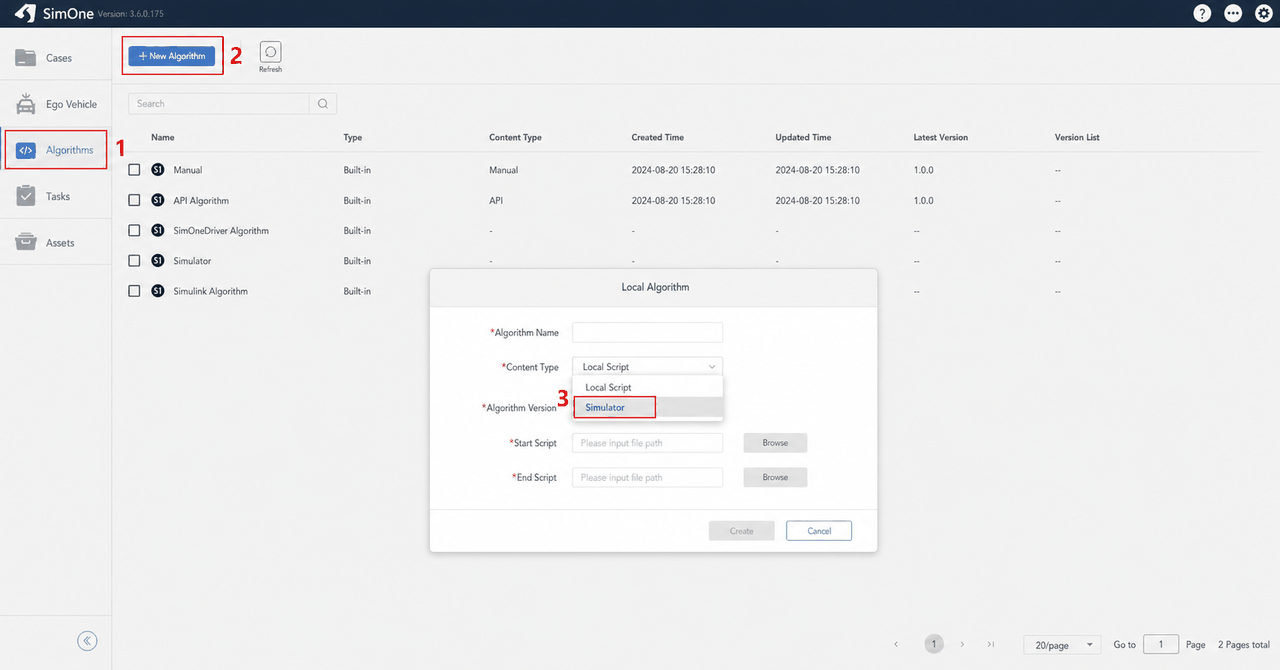
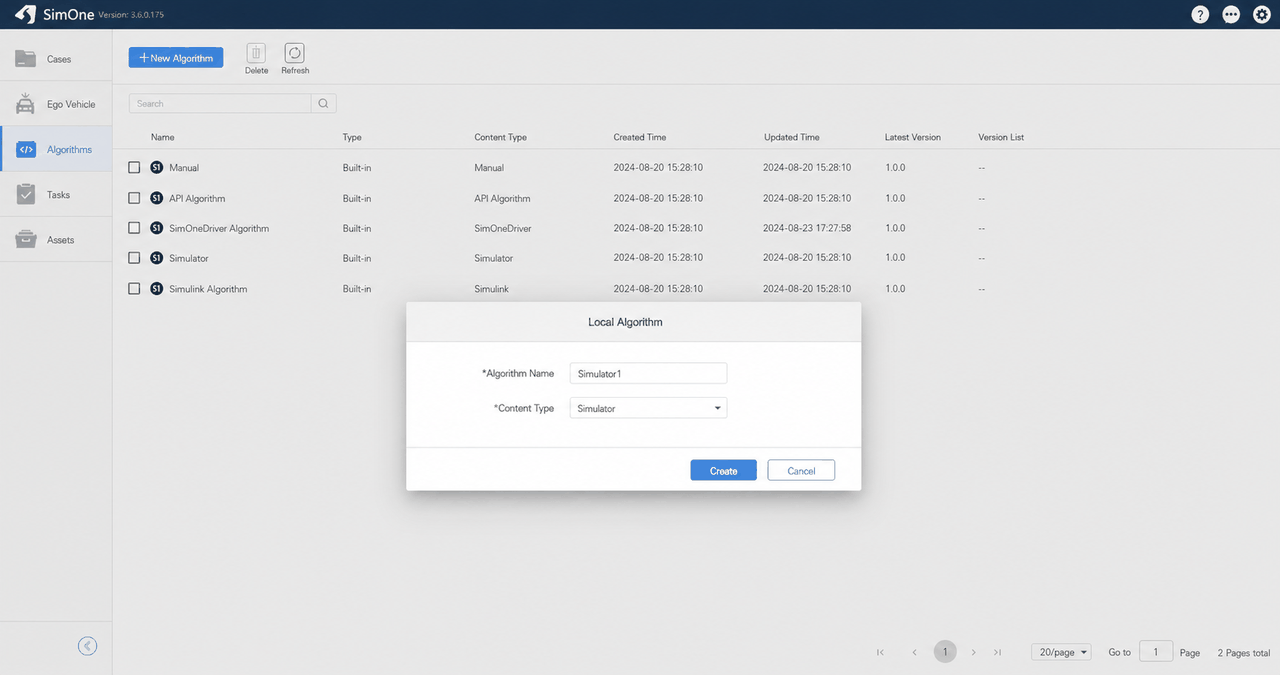
(2)Create one or more driving simulator algorithms.
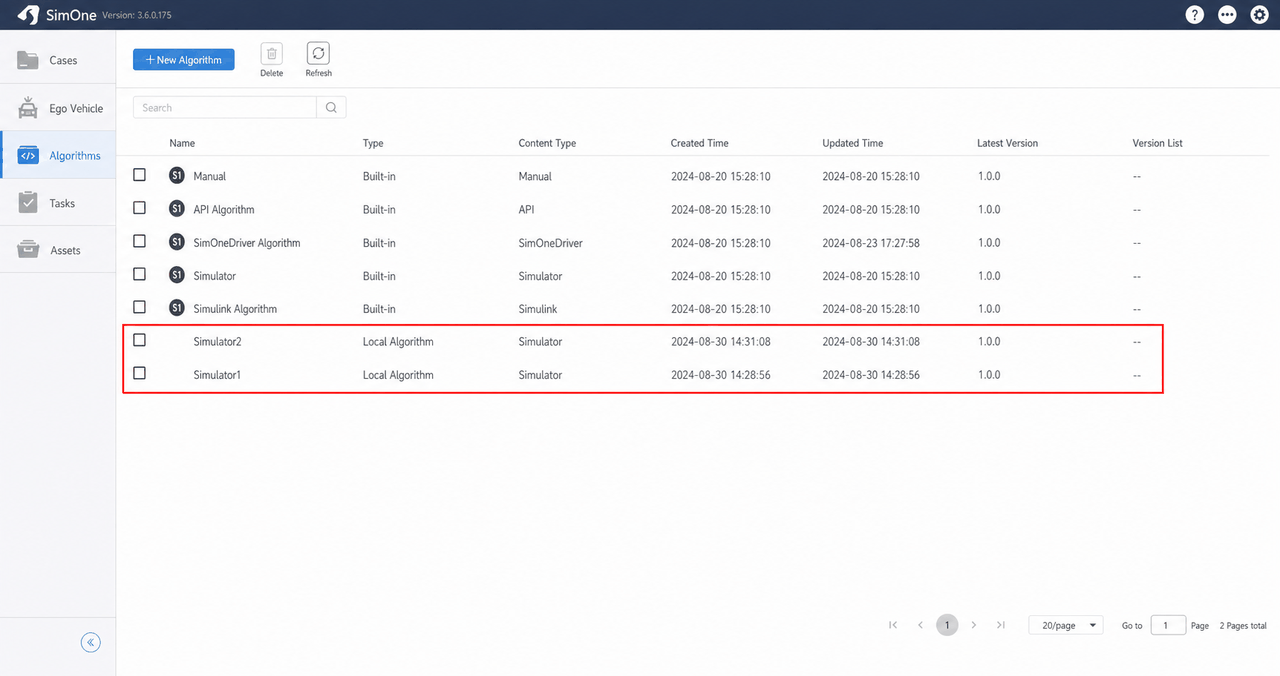
(3)Select a Driving Simulator Algorithm, right-click, and choose Edit.
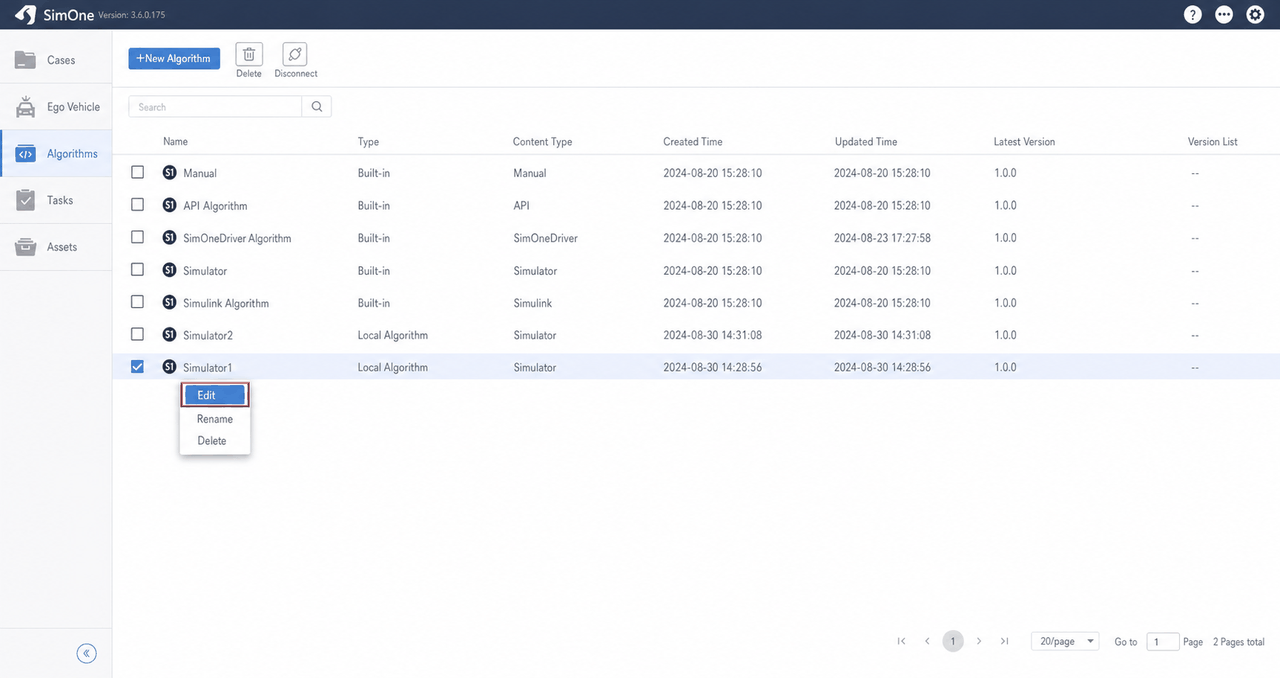
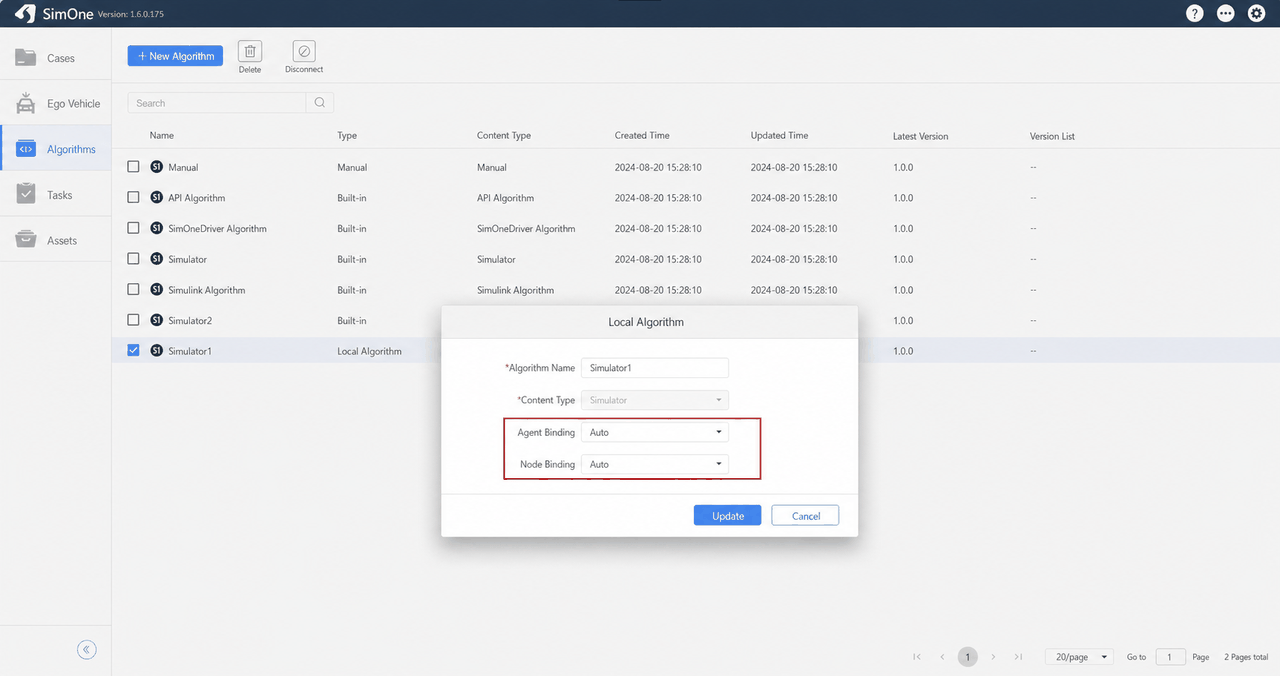
(4)Bind the Agent and Node.
4. Create a Multi-Vehicle Interaction Test Case
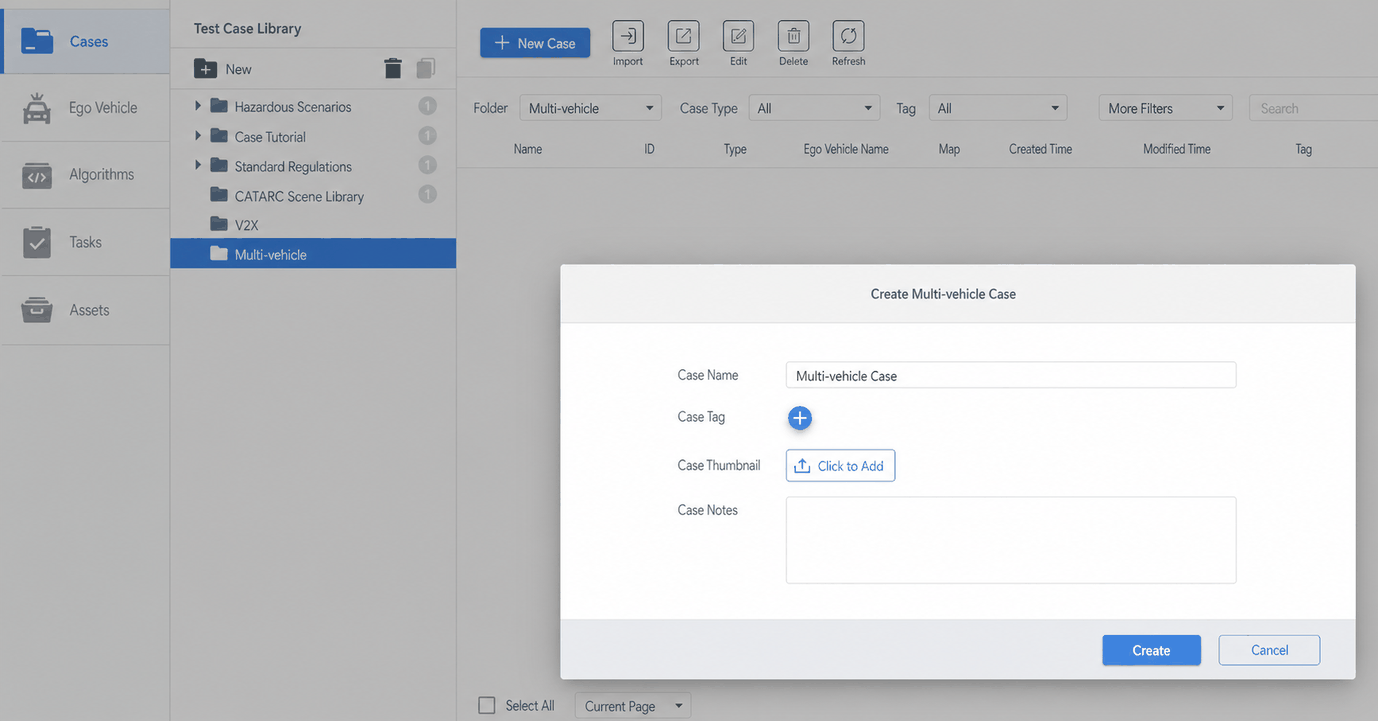
(1)Create a Multi-Vehicle Interaction Test Case, select the multi-vehicle interaction test case type, enter a test case name, and click Create.
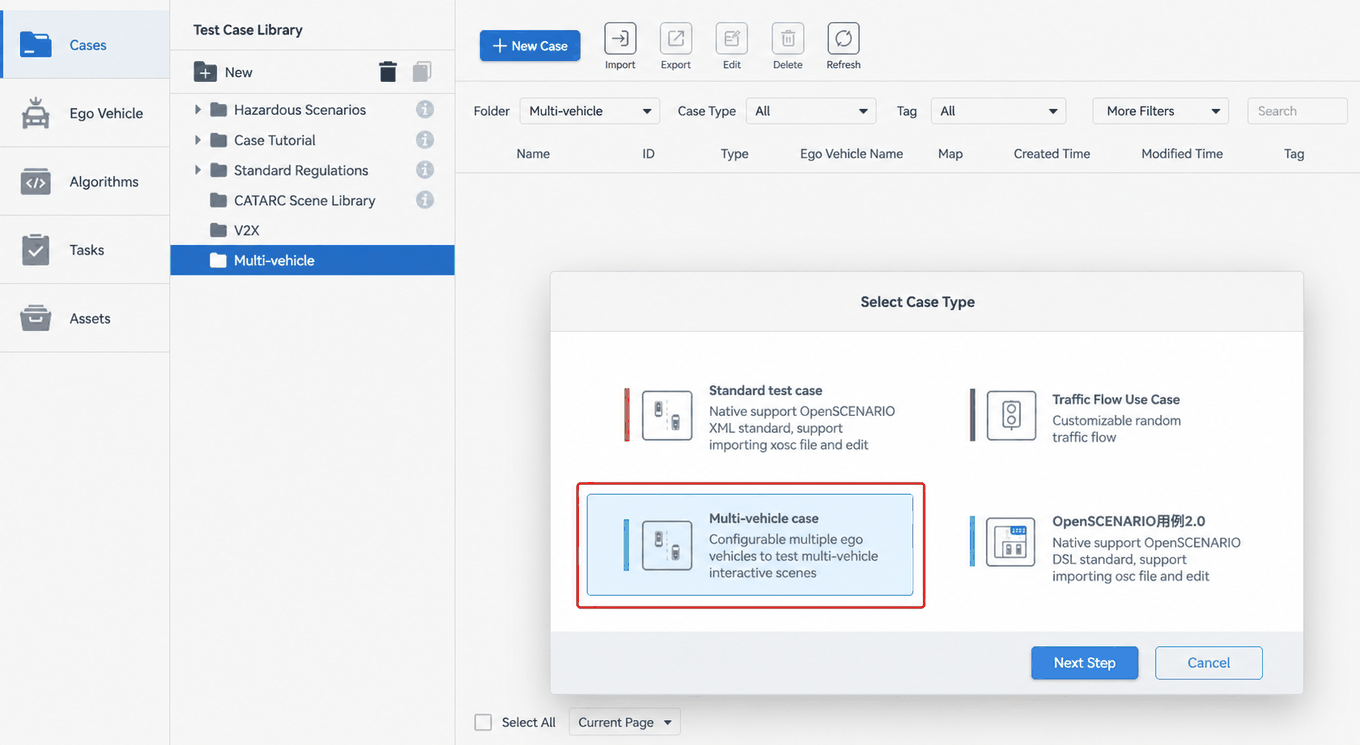
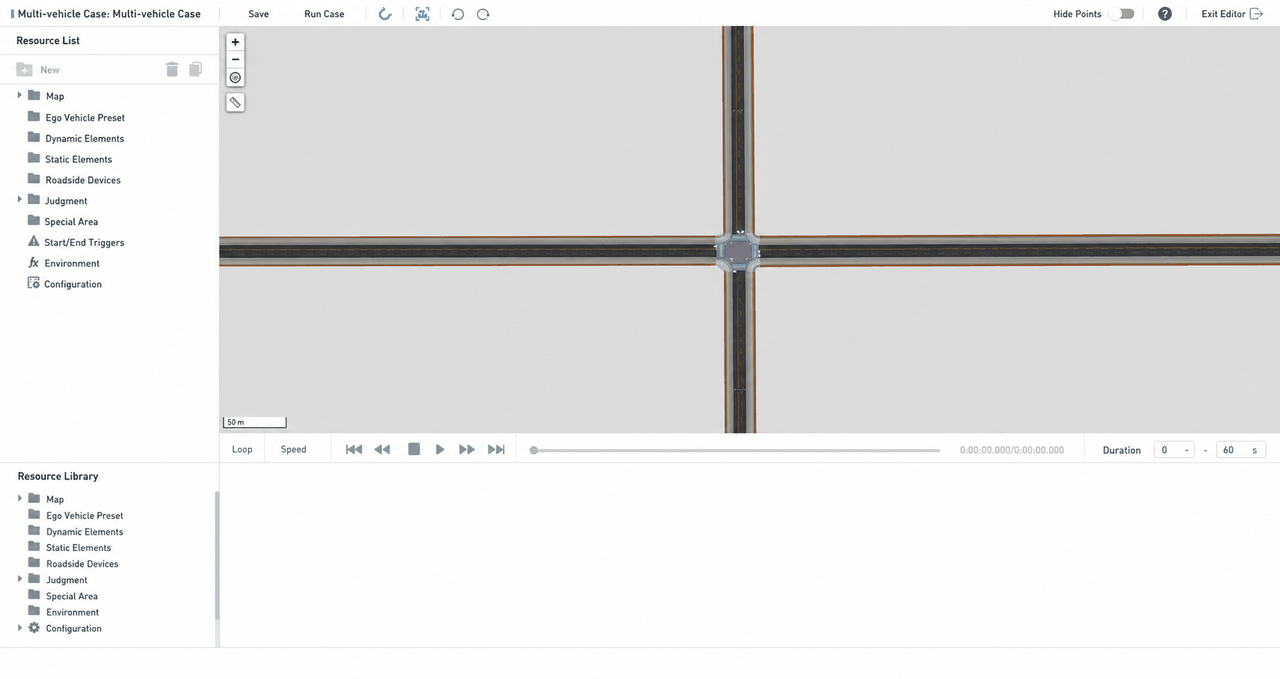
(2)The test case is created successfully. The Test Case Editor opens automatically.
5. Edit the Multi-Vehicle Interaction Test Case
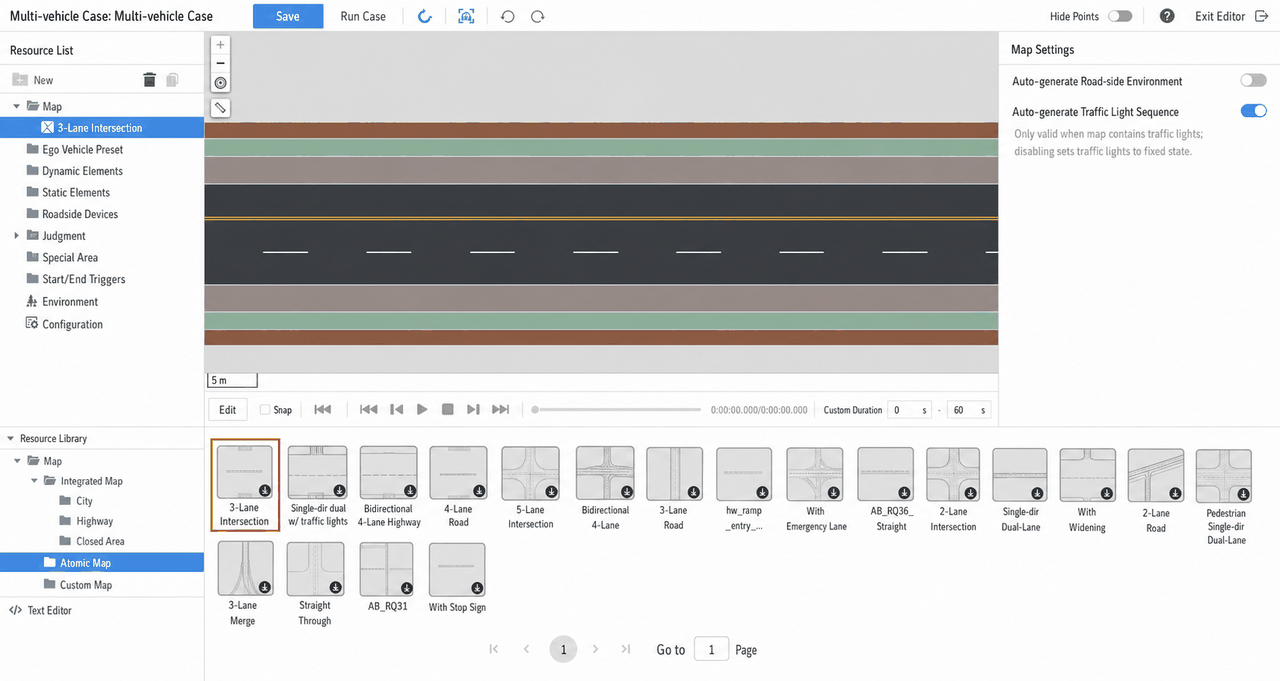
(1)First, configure a Map for the test case.
(2)Next, configure multiple Ego Vehicles for the test case. Drag multiple Ego Vehicles into the test case editor and edit their paths. For this test case, simply drag the Ego Vehicles onto the map.
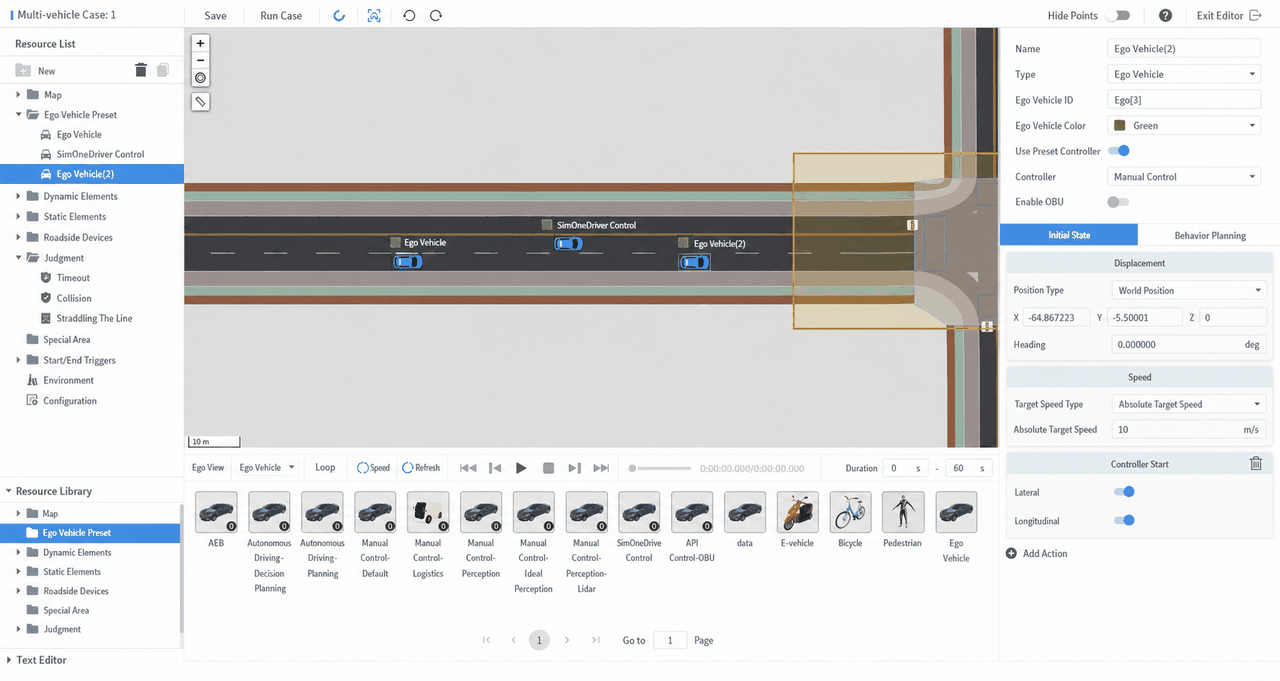
(3)Configure the multi-Ego Vehicle settings, including Ego Vehicle color and other options.
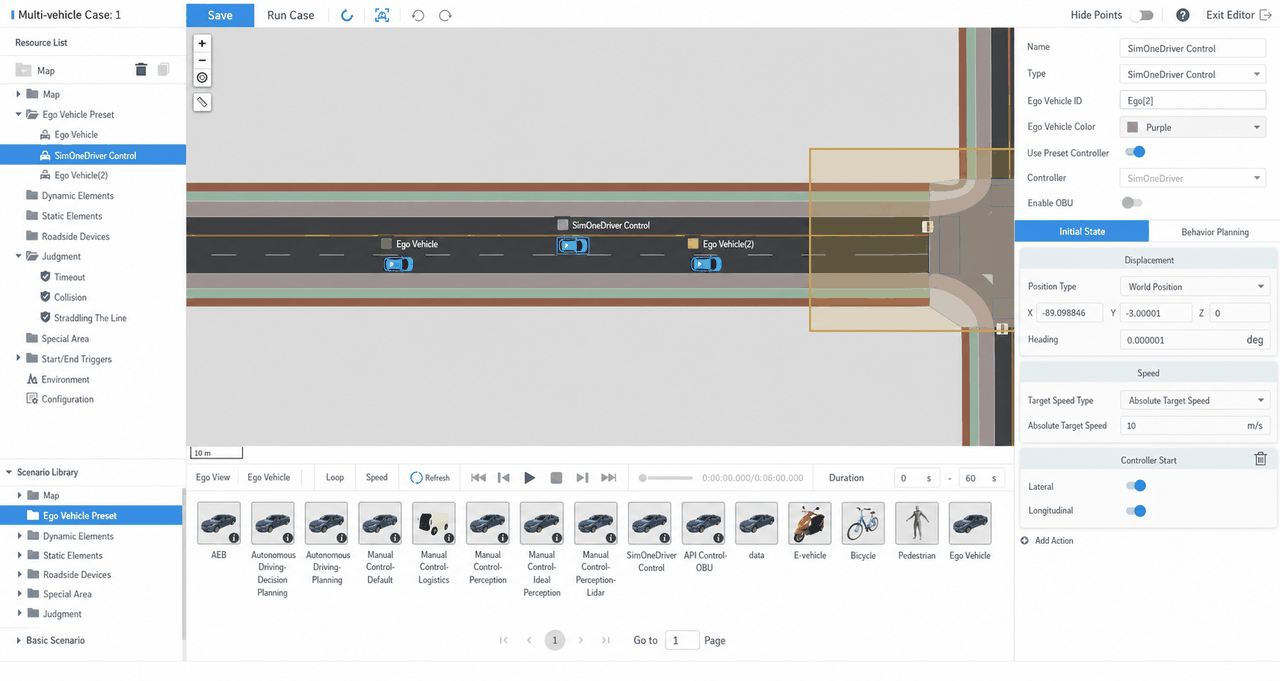
(4)Set judgment conditions. In addition to the default Timeout and Collision conditions, add a Lane Departure judgment and configure its effective targets and scope.
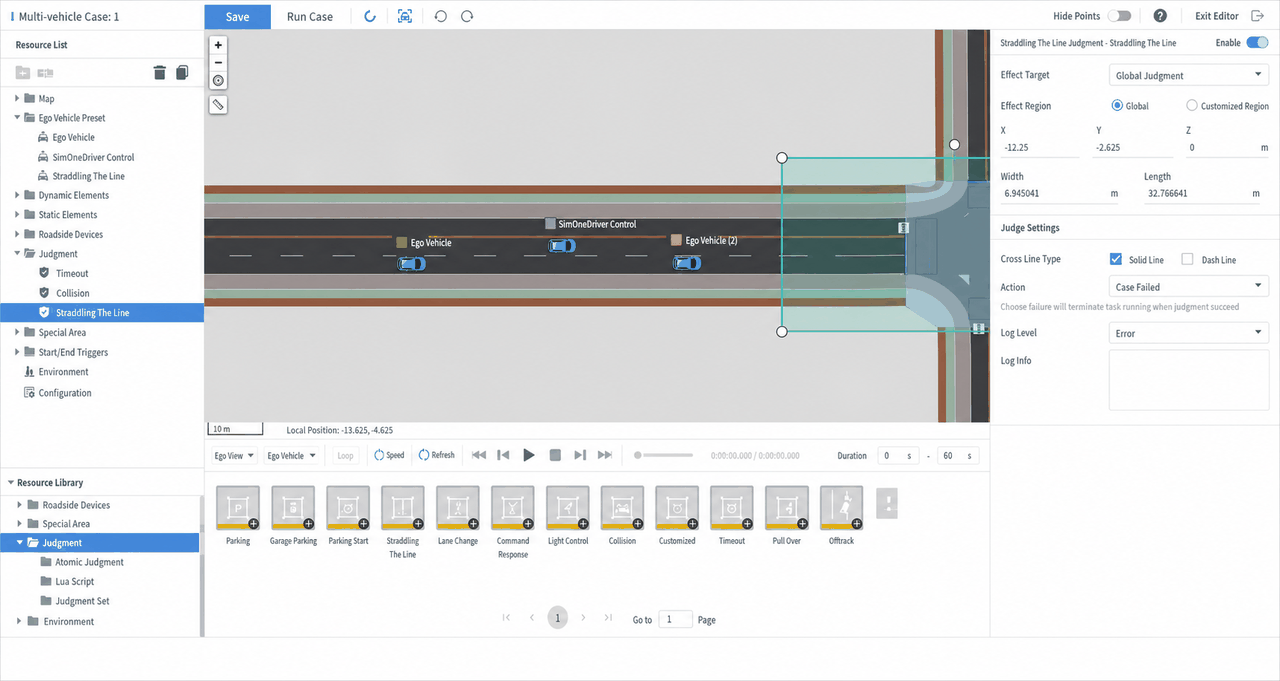
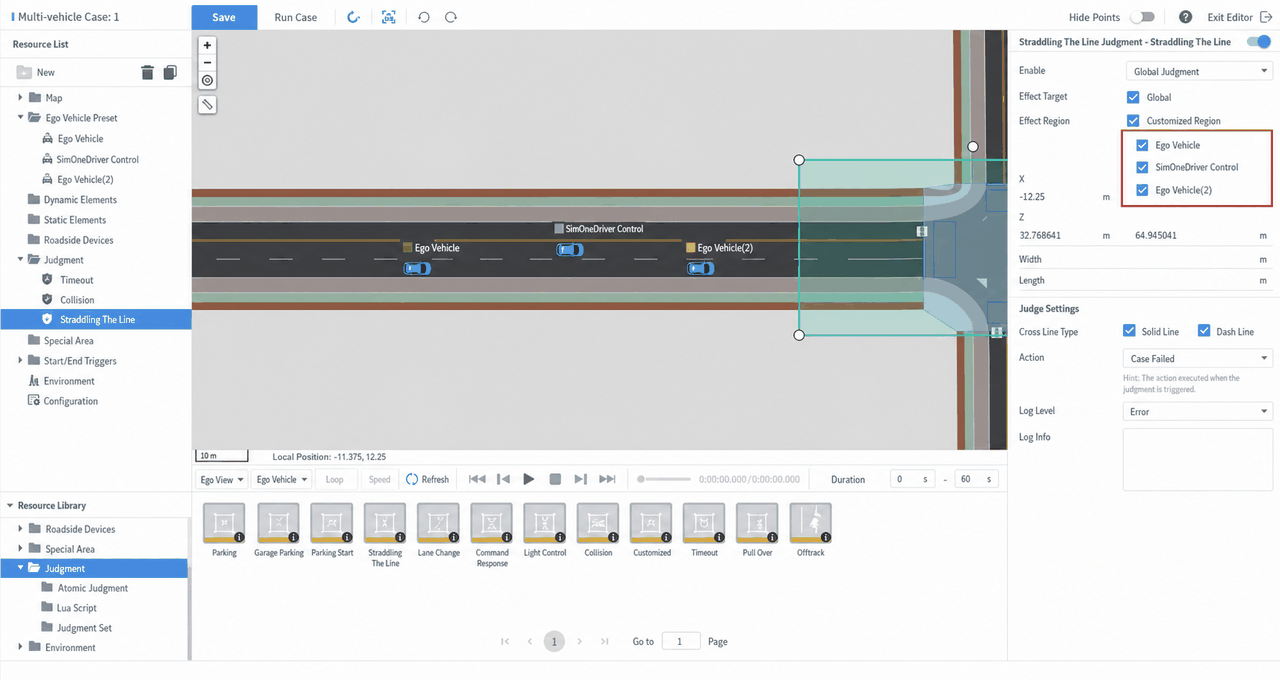
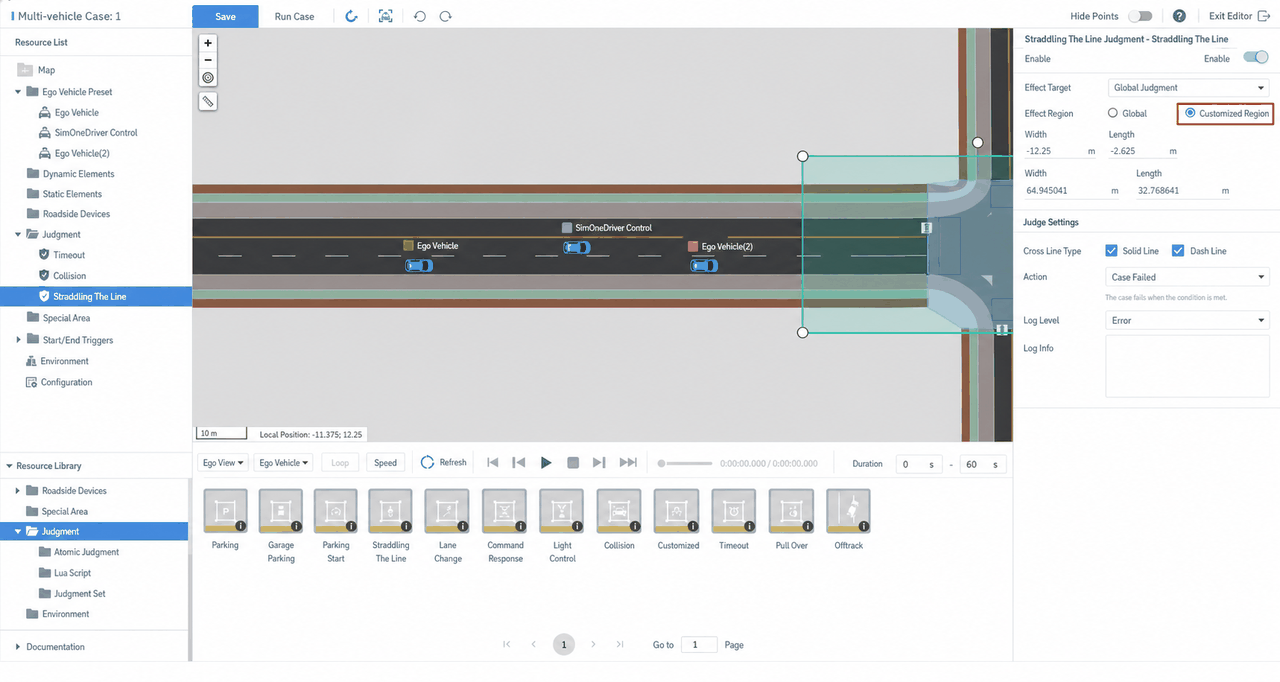
(5)Save the test case and preview the multi-vehicle interaction test case.
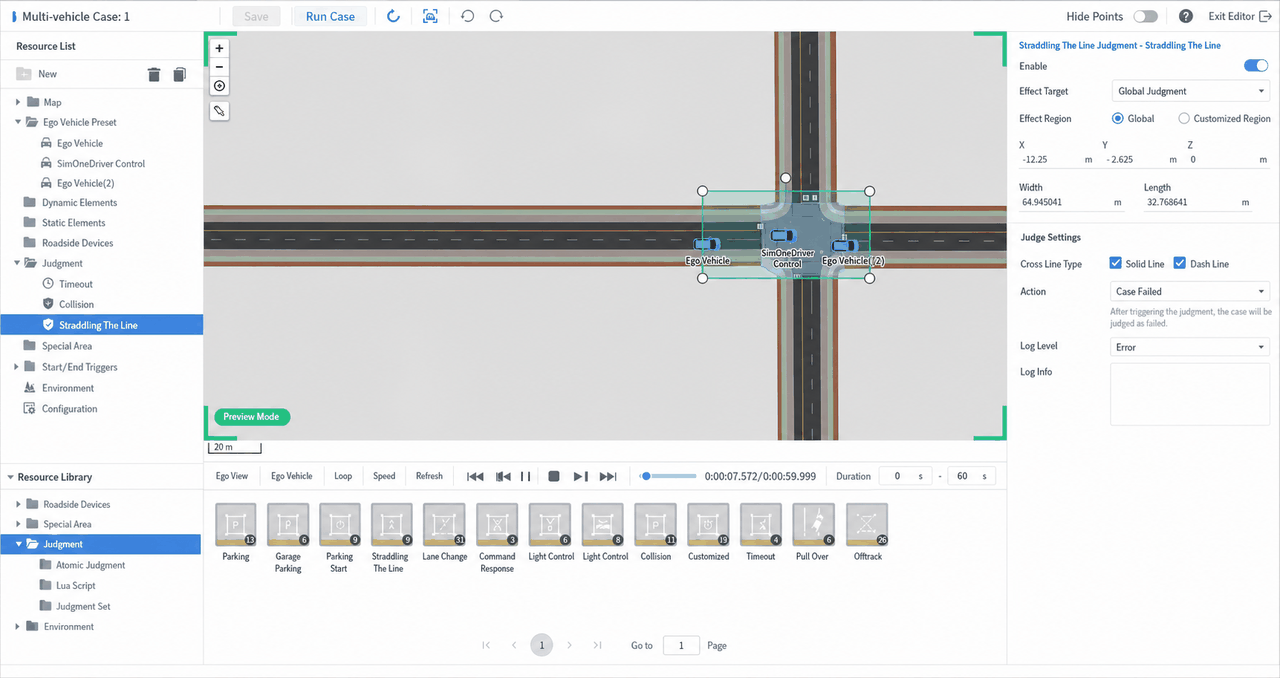
6. Run the Test Case with Multiple Ego Vehicles
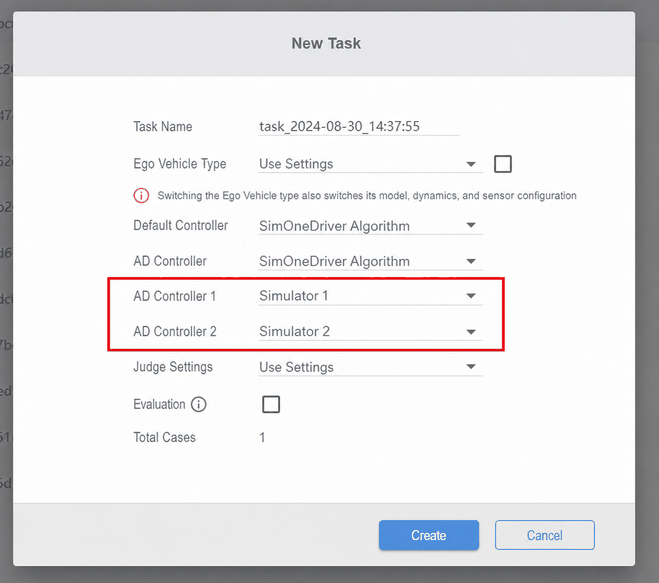
(1)Click the Run Test Case button at the top of the test case editor. In the run dialog, configure an autonomous controller for each Ego Vehicle and click Create.
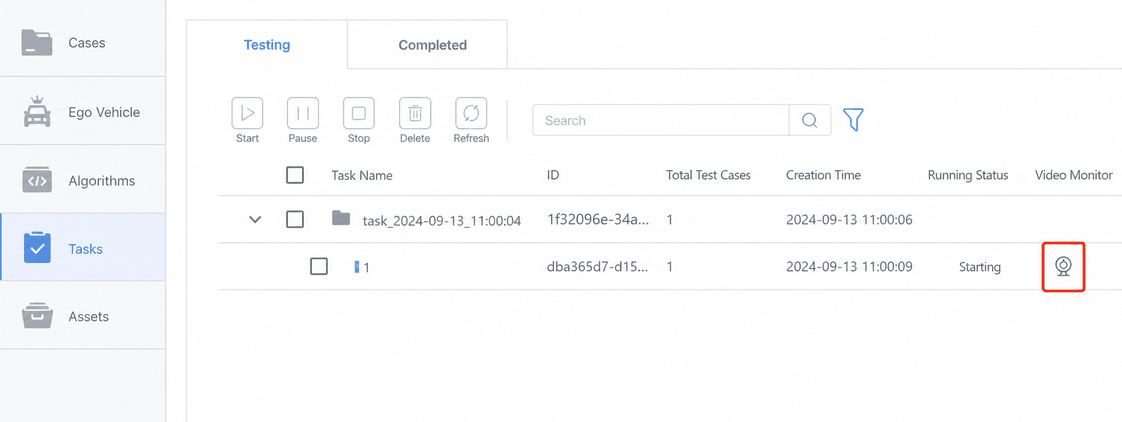
(2)In Task Management, locate the running task under the Running tab and click the Monitor button.
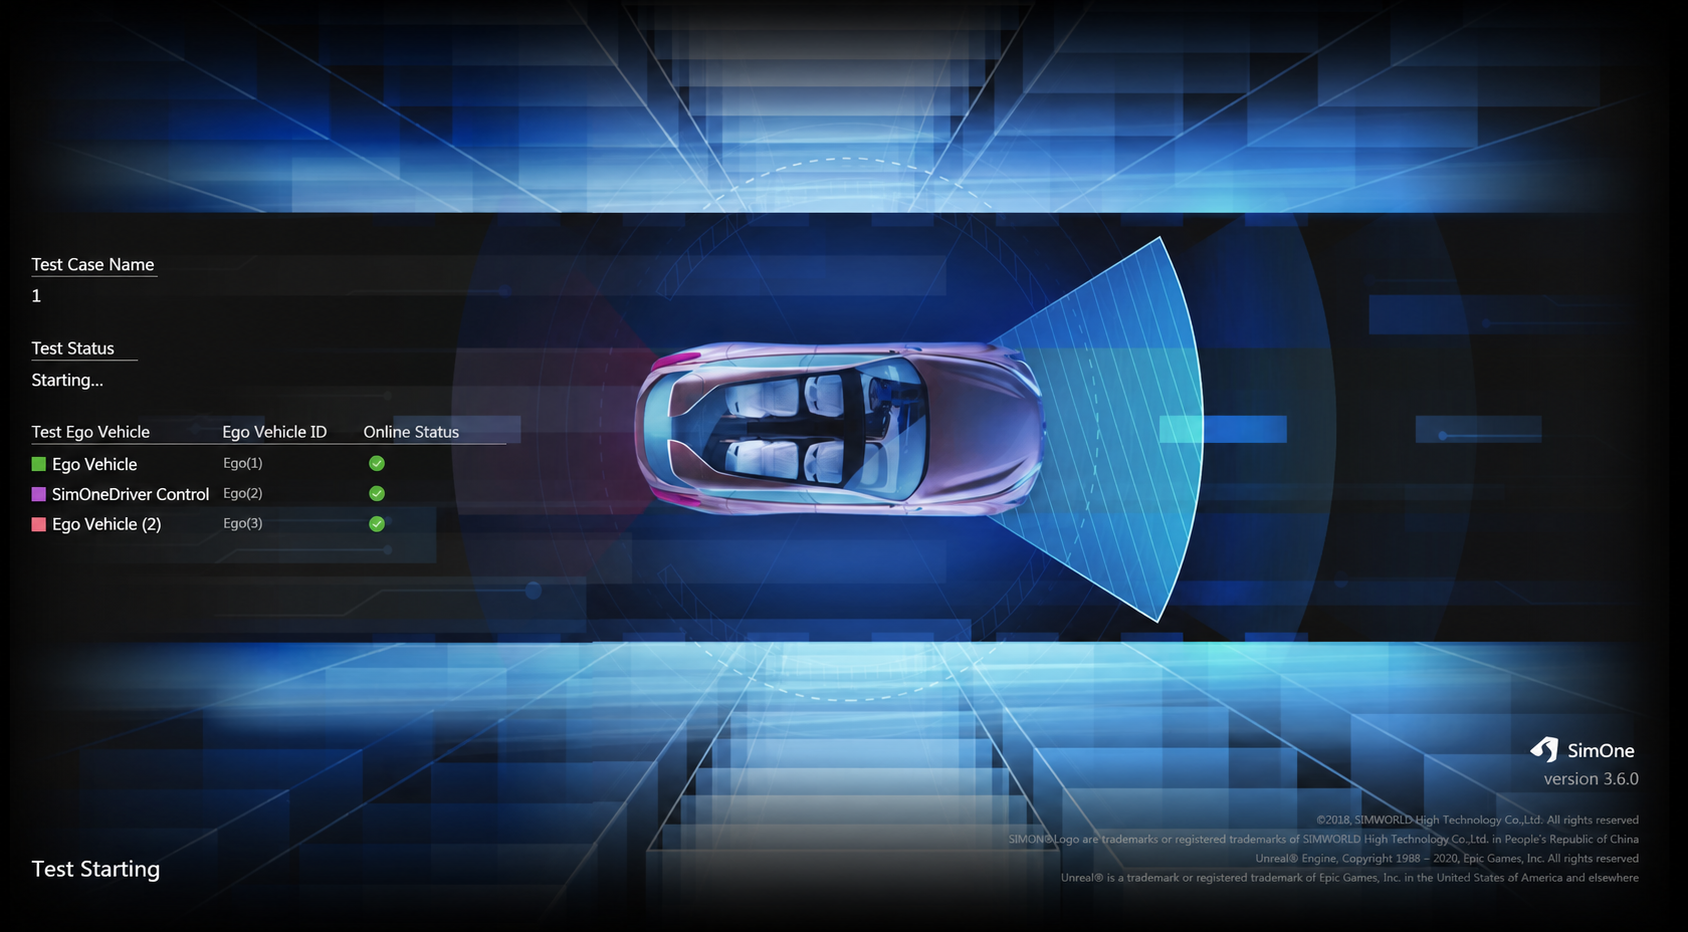
(3)In the visualization window, first check the connection status of the multiple Ego Vehicles, then observe the test case execution.
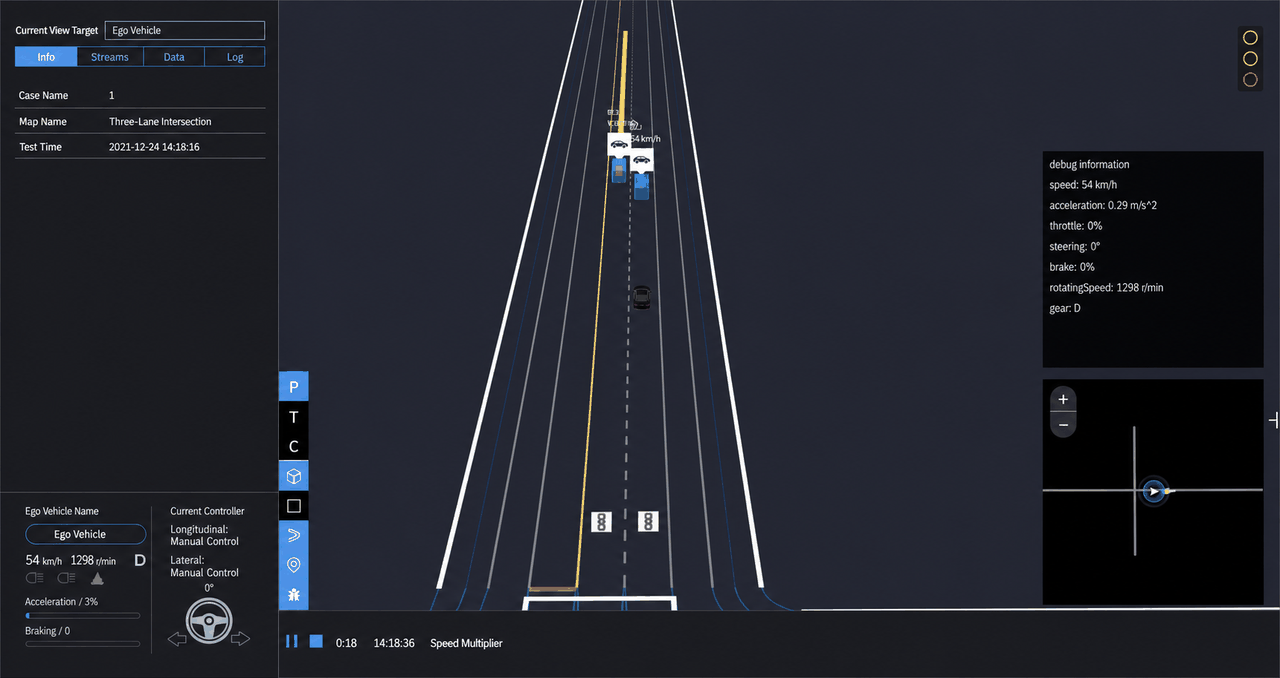
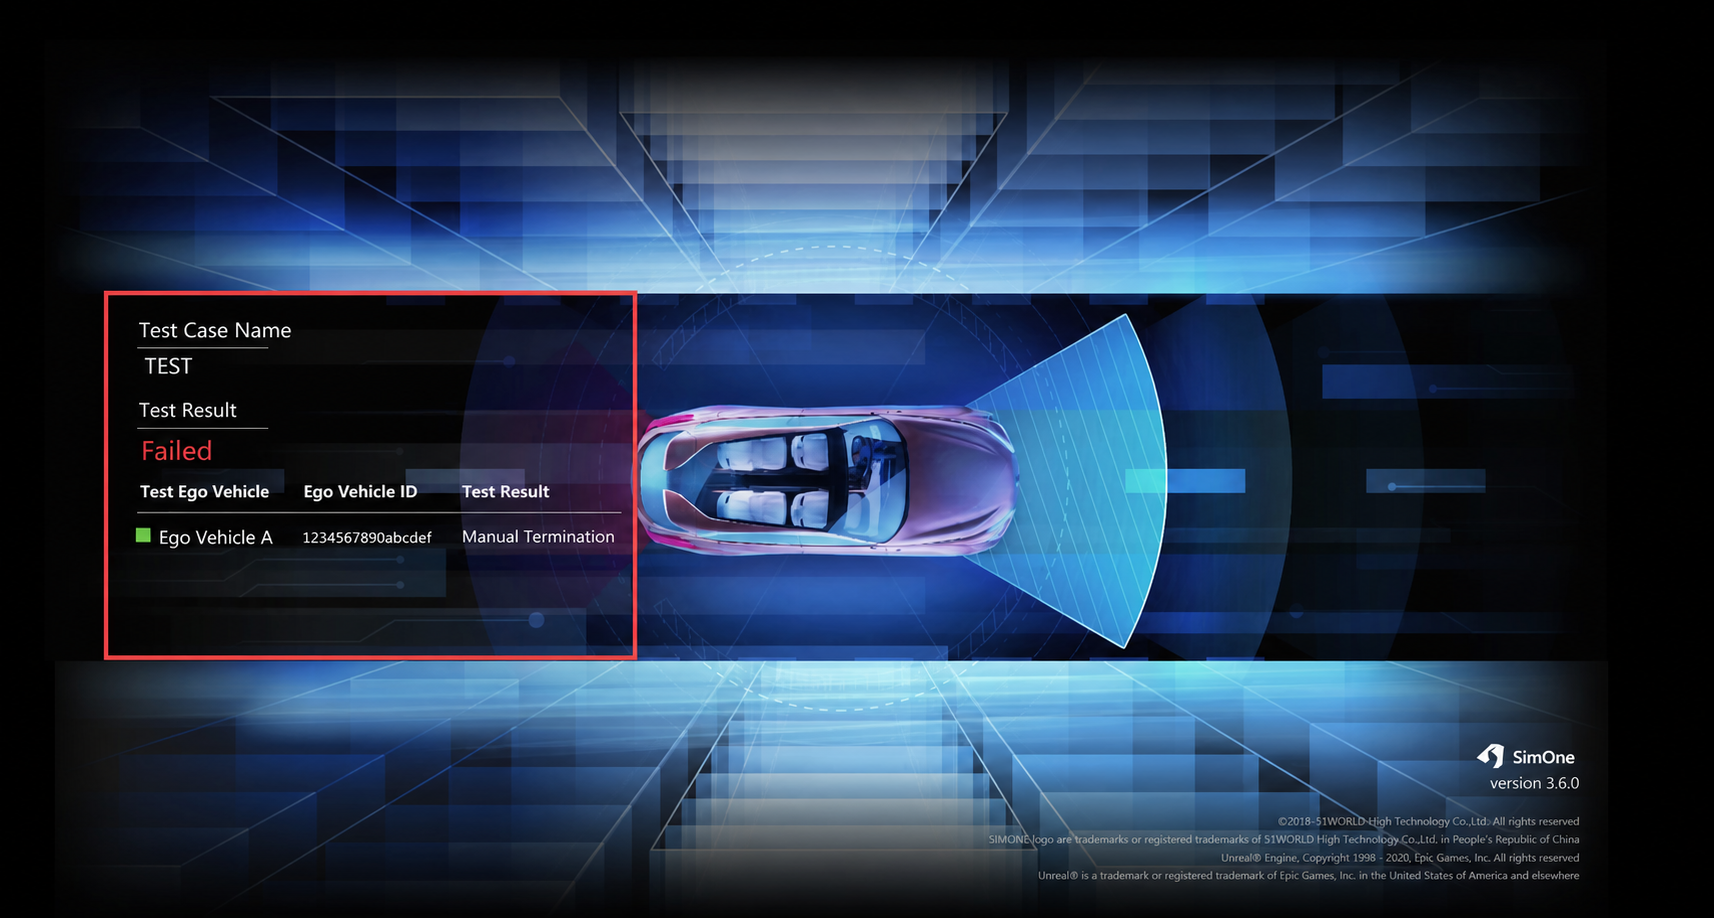
(4)After the test case finishes, view the results in the visualization window. If a failure occurs, you can see which judgment condition failed.
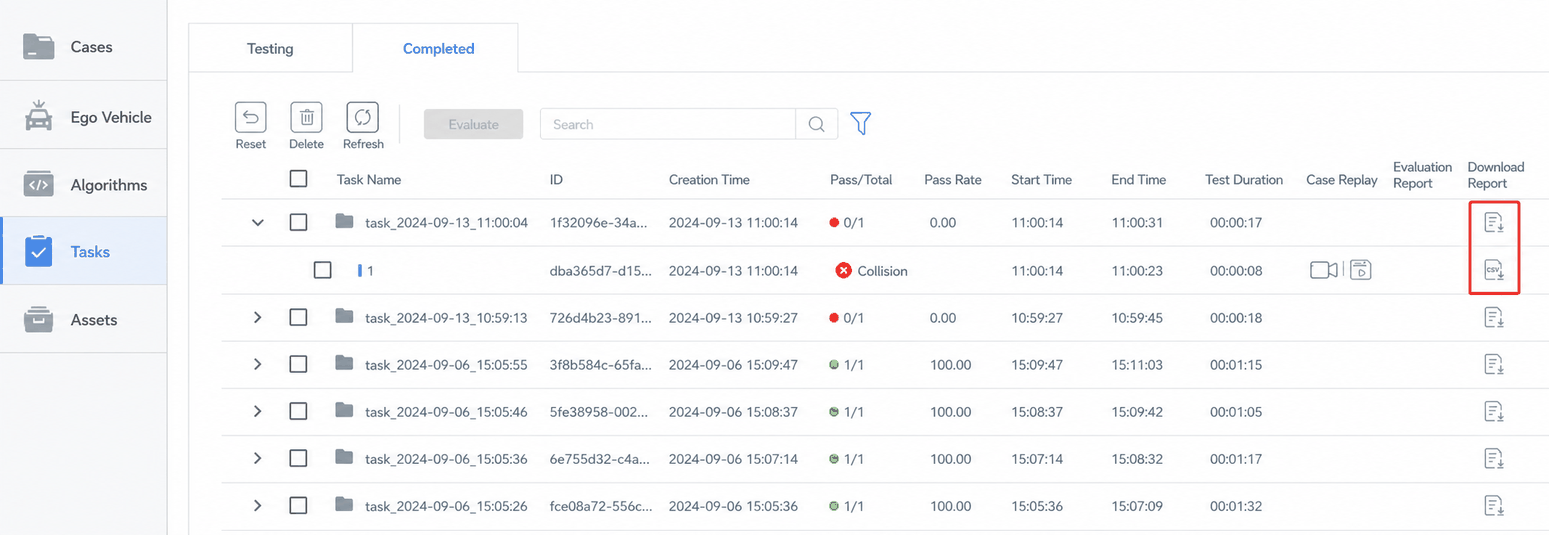
(5)In the completed task list, you can view the test case results and download the test report and data.
7. Agent List Management in the Distributed Architecture Global Settings
(1)Click Global Settings in the upper-right corner of the page and switch to the Agent List management module.
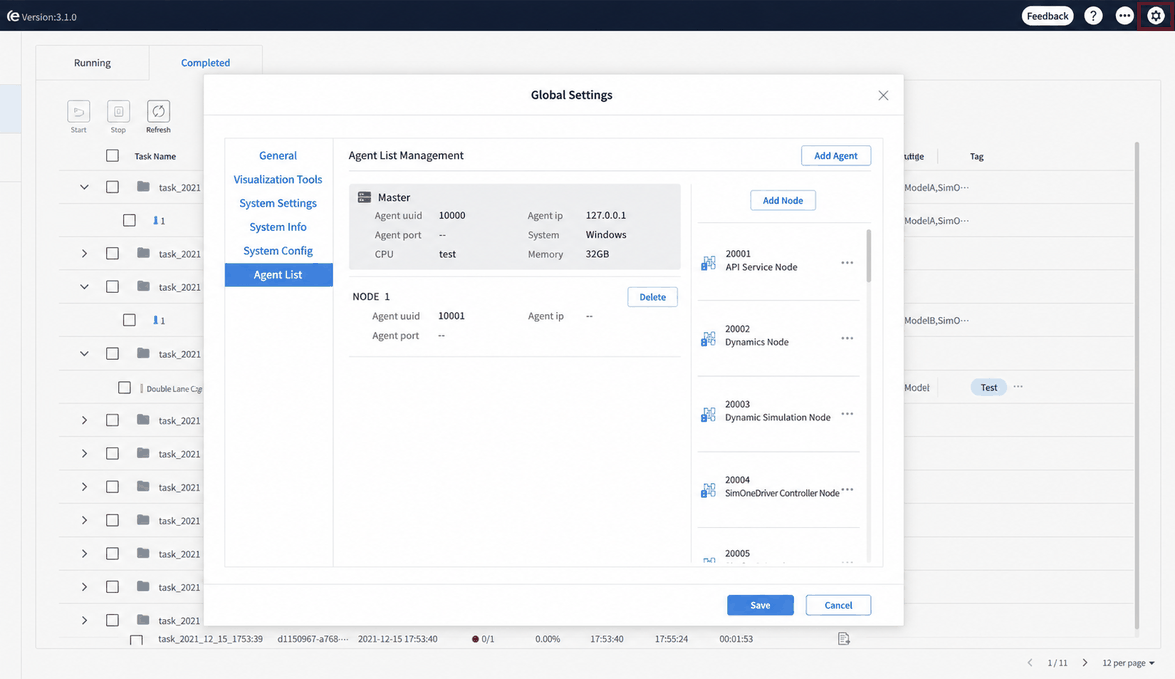
(2)Add the required nodes in advance based on the multi-vehicle interaction test case requirements. As shown in the figure, click the Add Node button and enter the node name and node type in the dialog.
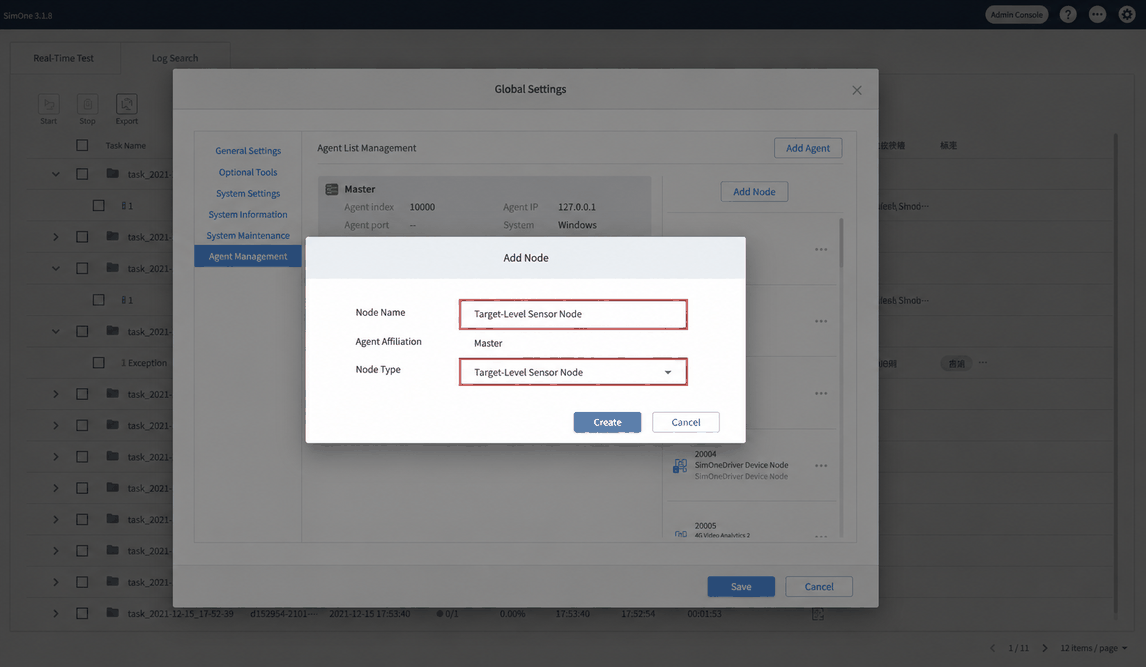
- Each Ego Vehicle requires one Dynamics node (a dynamics node is available by default).
- If the Ego Vehicle is configured with sensors, configure the corresponding sensor node (a target-level sensor node for target-level sensors, a physical-level sensor node for physical-level sensors).
- If the Ego Vehicle controller is set to Driving Simulator, add a simulator controller node.
- If the Ego Vehicle controller is set to SimOneDriver, add a SimOneDriver controller node (a SimOneDriver controller node is available by default).
- If the Ego Vehicle is configured with render windows — including dashboard, center console, or rear-view mirrors — add a visualization node (GPU).
- If the test case is configured with judgment conditions, add a judgment node.
- If the renderer starts in simplified rendering mode, add a Web visualization node. If it starts in high-fidelity mode, add a visualization node (GPU).
(3)Click the Add Node button on the page to add the required nodes one by one. Enter the node name, select the Agent this node belongs to, select the node type, and click Create.
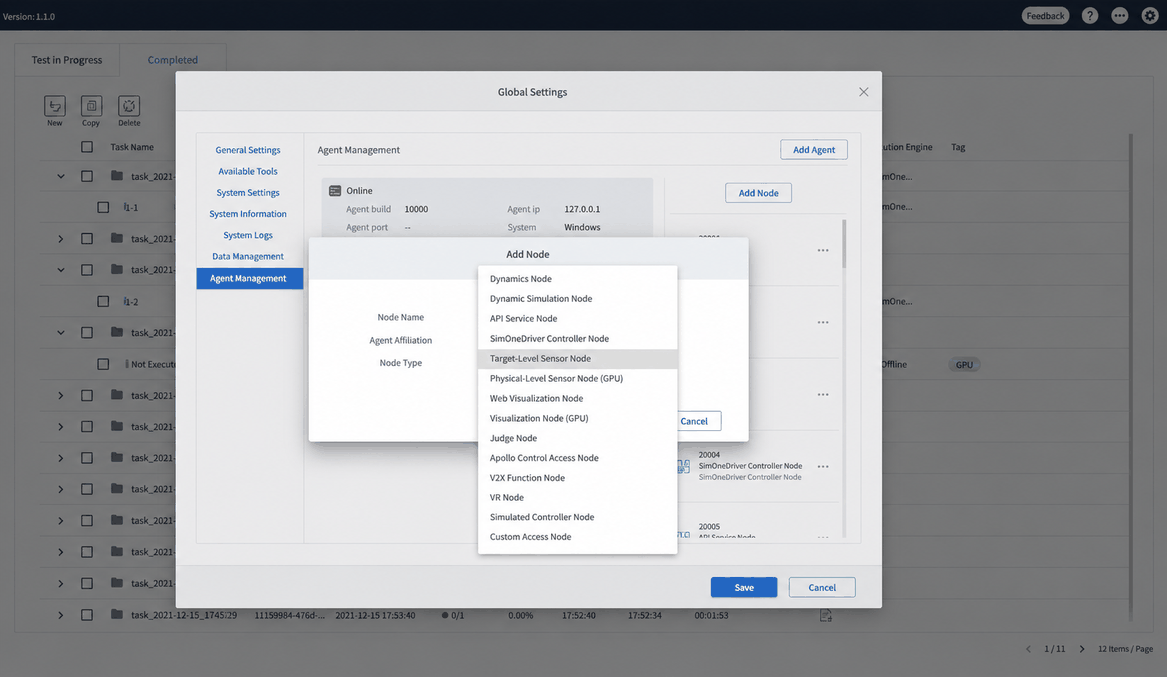
(4)After successful creation, you can complete the node binding for the Ego Vehicle or test case.