External Ego Vehicle and Prop Model Import
This tutorial currently applies only to [SimOne — Enterprise Edition].
1. Ego Vehicle / Prop Plug-in Model Import Workflow
1.1 High-Fidelity Ego Vehicle Model Creation and Packaging
High-fidelity ego vehicle models are primarily used for UE Observer test visualization rendering.
1.1.1 Ego Vehicle Model Specification
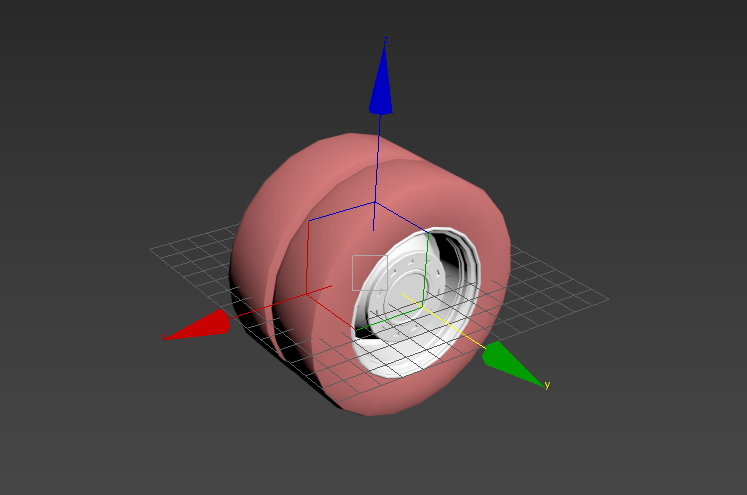
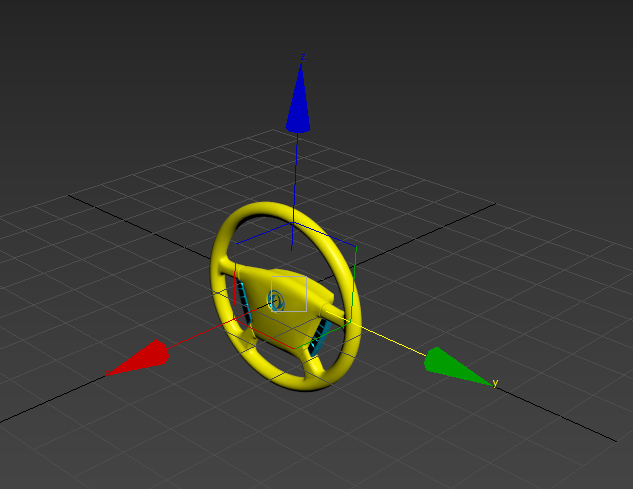
(1) Component Breakdown: The vehicle must be split into three components — Body, Wheels, and Steering Wheel (optional depending on project requirements).
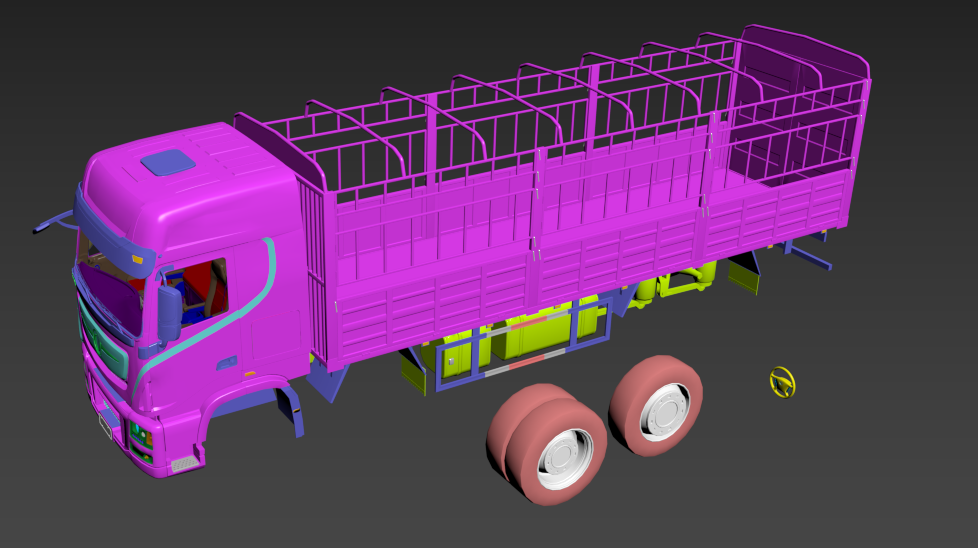
(2) Scale: Vehicle model dimensions in the DCC application must match real-world dimensions.
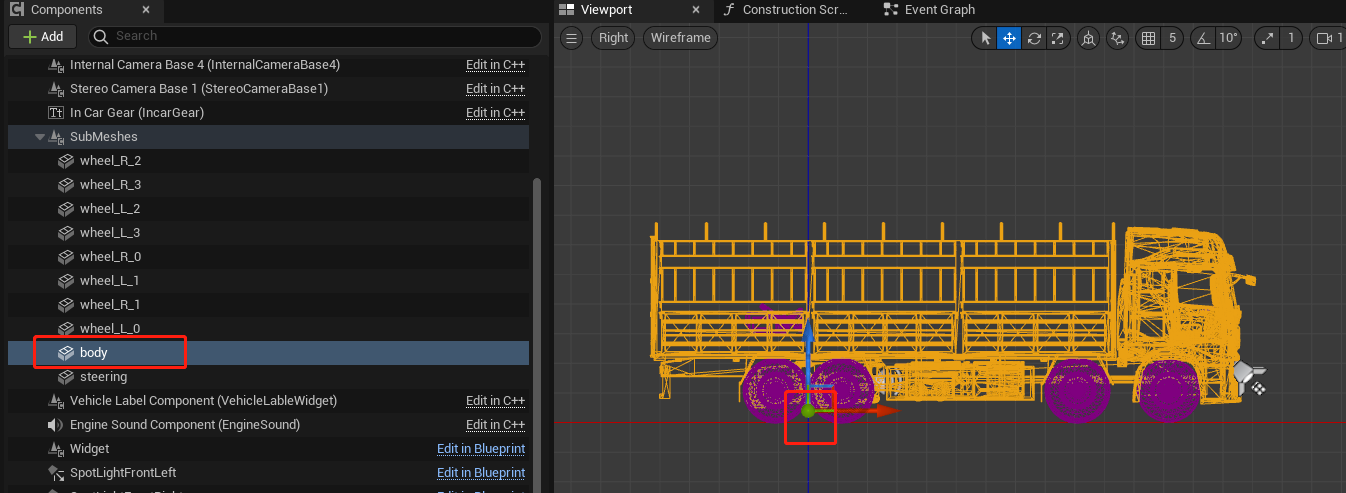
(3) Model Origin: The vehicle body model's origin in the DCC application should be at the rear axle center, with the X axis pointing forward and the Z axis pointing up. Wheel and steering wheel origins should be placed at the rotation center of each component.
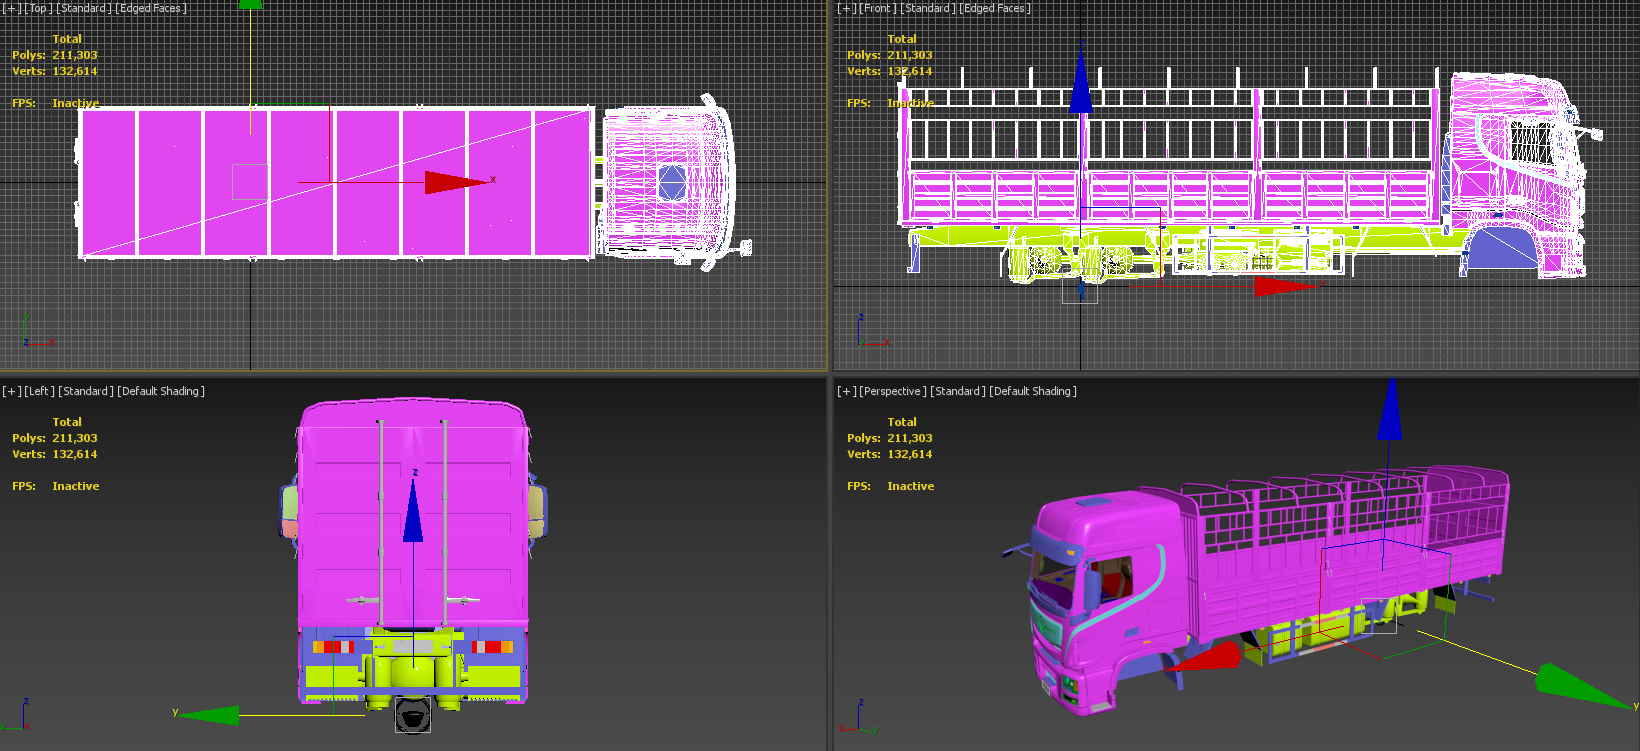
(4) Polygon Count: Total polygon count (including interior) must not exceed 500,000 triangles.
(5) UV: Only one UV set is required; UVs must be fully unwrapped and laid out efficiently.
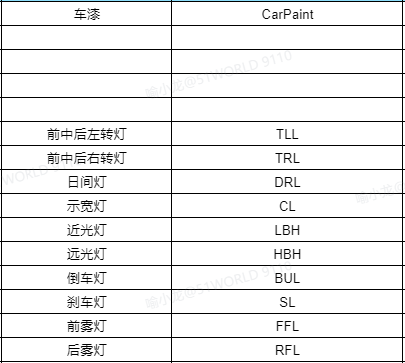
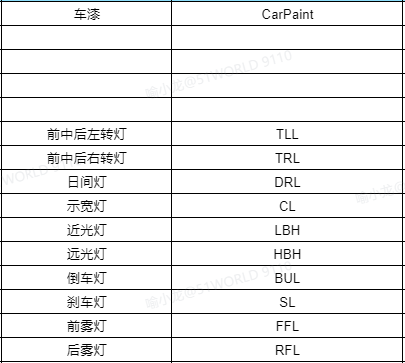
(6) Material IDs: Assign different named material slots to different vehicle components in the DCC application. All vehicle lights must have their own dedicated material. Light material slot names follow the naming convention in the table below.
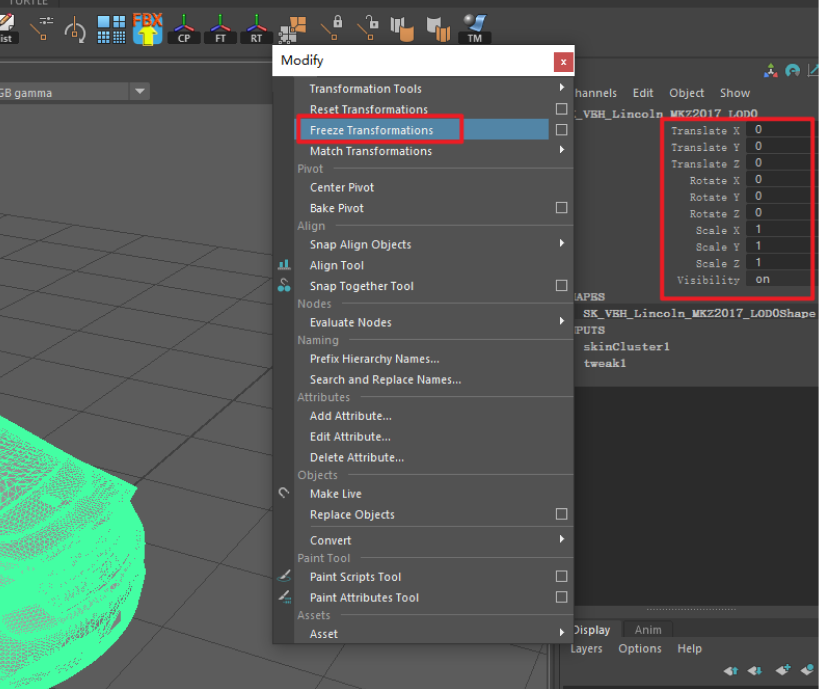
(7) After the vehicle model is finalized, freeze the vehicle position, scale, and other basic transforms. XForm the model position parameters.
1.1.2 Import to Engine, Configure Materials, and Create Plug-in Ego Vehicle Blueprint
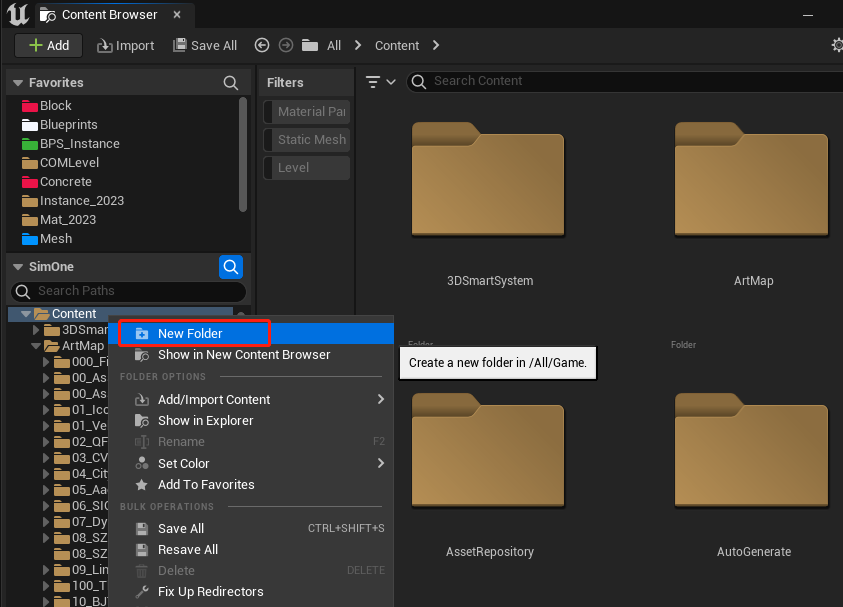
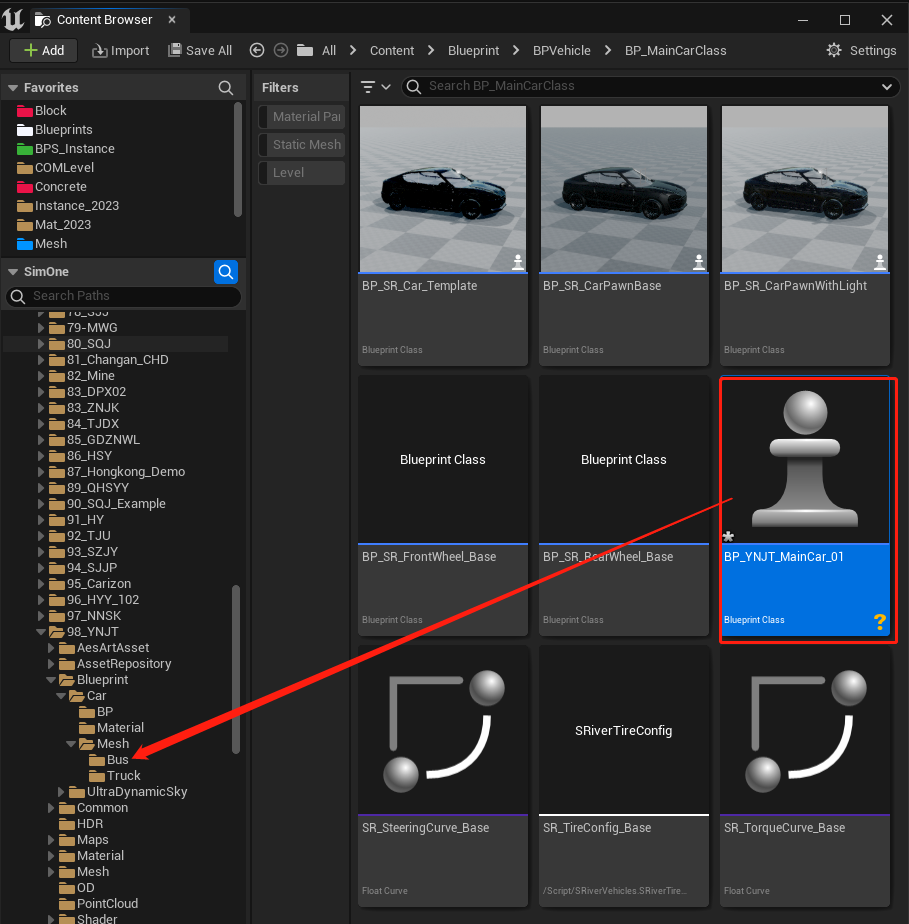
(1) In the content directory, right-click and create a custom folder to store the plug-in ego vehicle model assets, then import the FBX file into SimoneEditor.
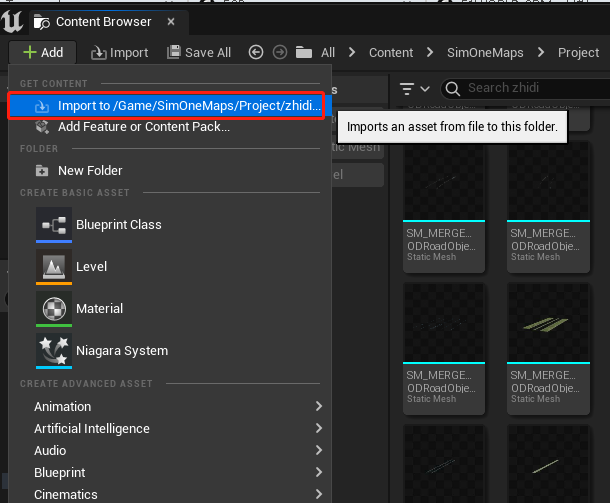
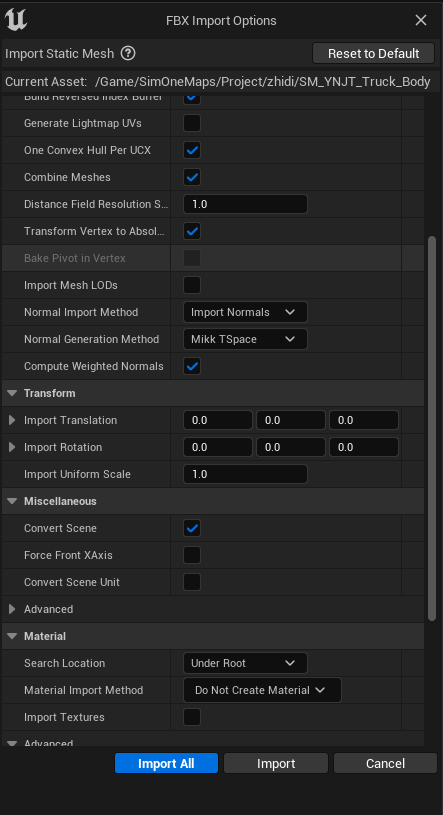
(2) Based on the imported vehicle's actual colors and materials, find the corresponding material assets in the SimoneEditor asset library or create new ones to configure material information for the plug-in ego vehicle. The Material Slot Names for lights and paint must strictly follow the naming convention table.
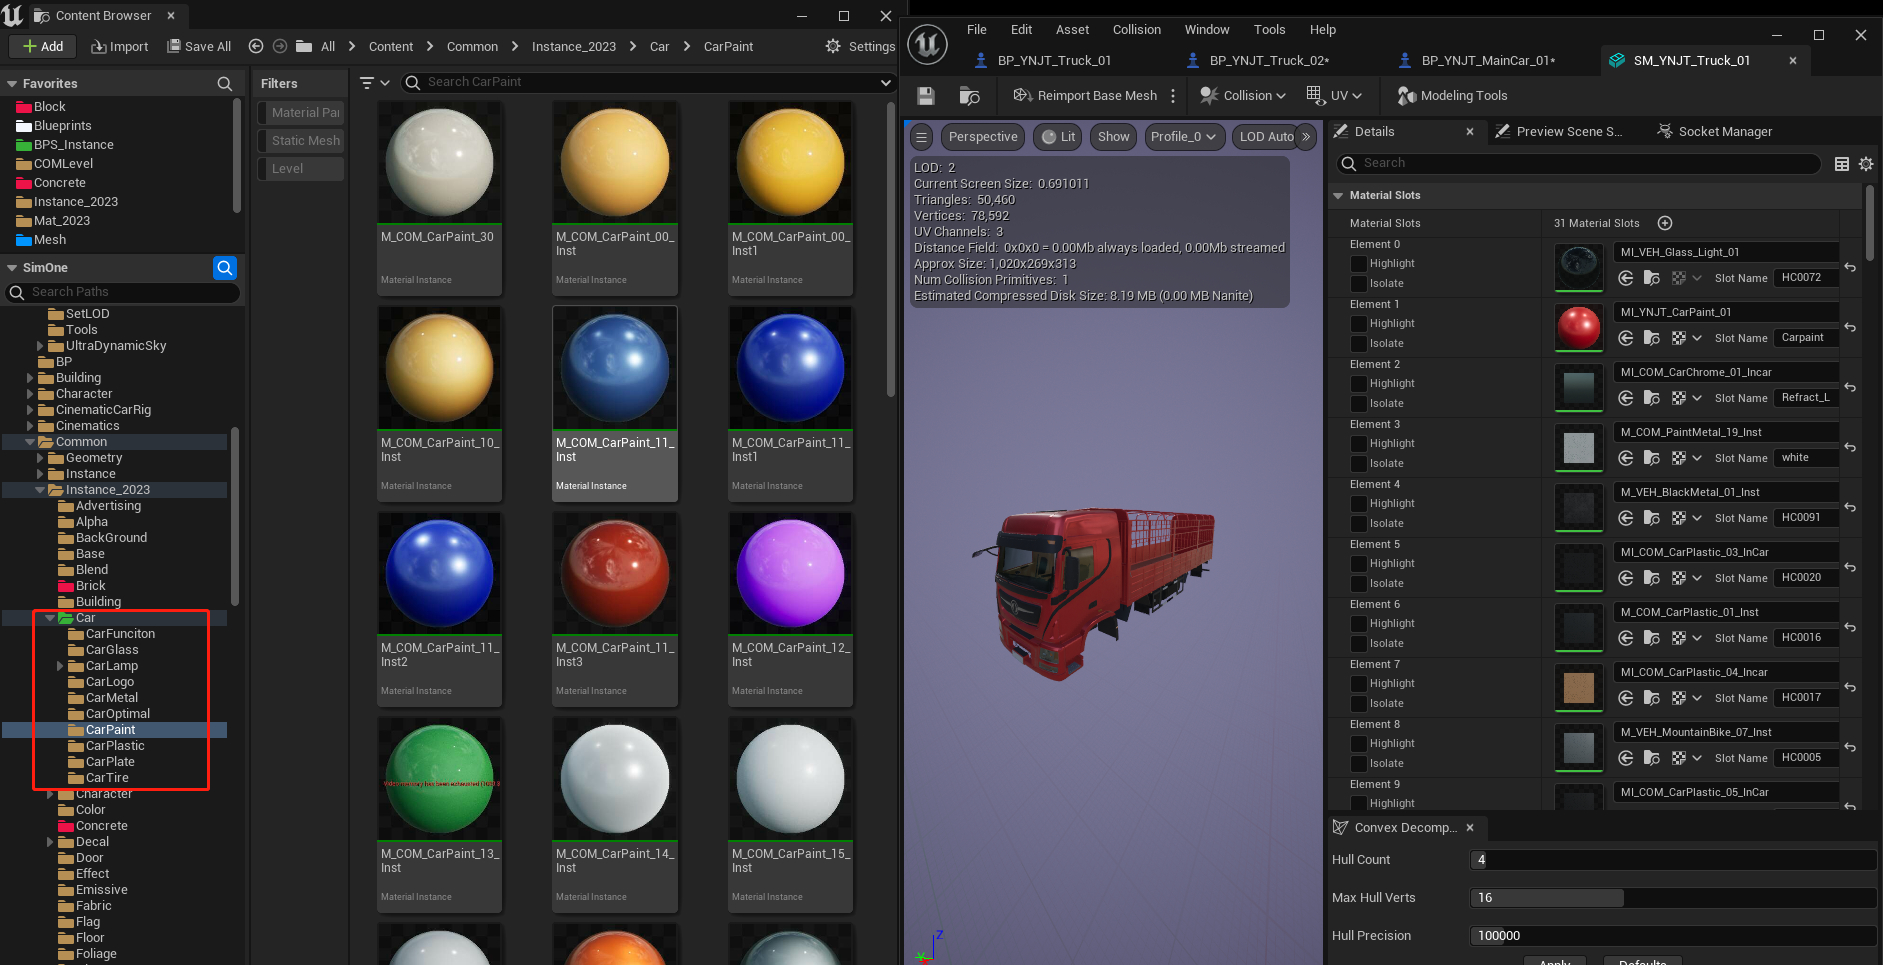
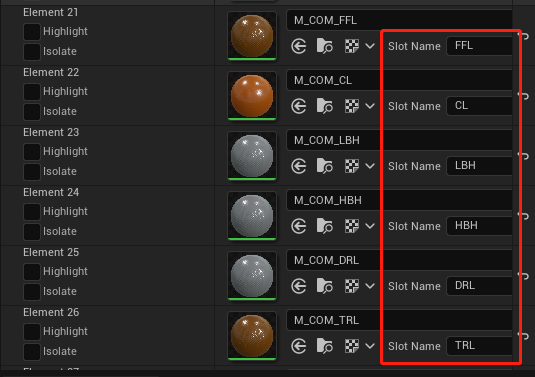
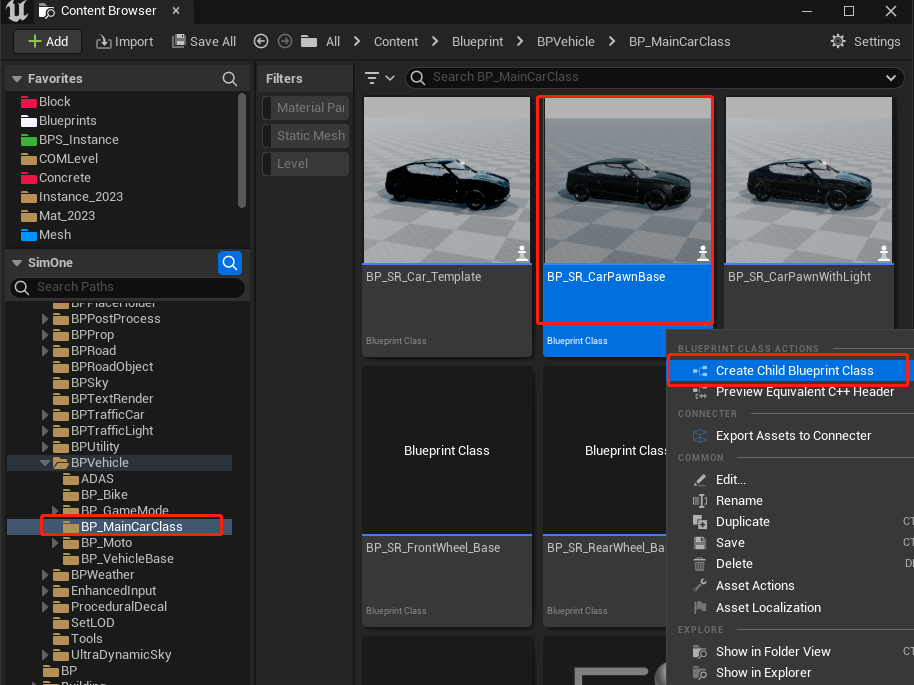
(3) Navigate to /Blueprint/BPVehicle/BP_MainCarClass/BP_SR_CarPawnBase. Right-click BP_SR_CarPawnBase and create a child blueprint for the plug-in ego vehicle; name it according to your project. It is recommended to place your vehicle blueprints in your own project folder for easier management.
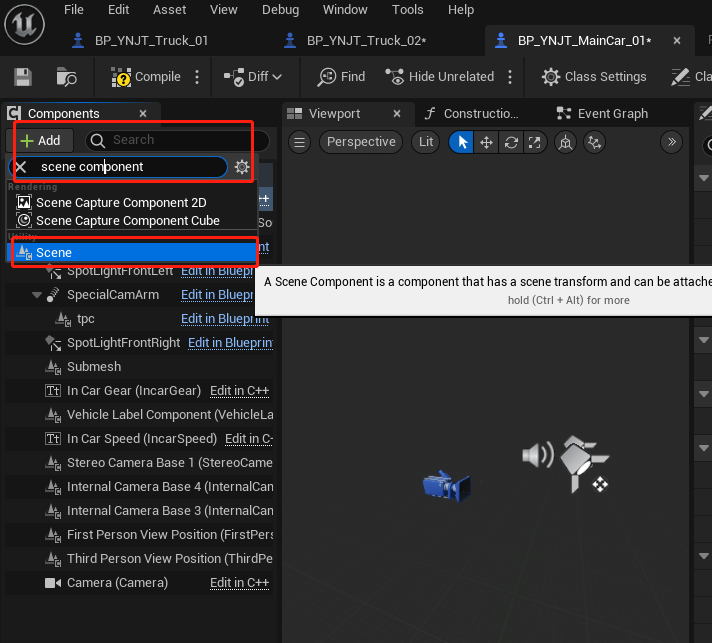
(4) Open the blueprint, click Add in the top-left menu, add a Scene Component, rename it SubMeshes, drag the body, wheel, and steering wheel meshes into the blueprint under SubMeshes in the appropriate parent-child hierarchy, and rename each component.
Body:
bodySteering Wheel:steeringFront-Left Wheel:
wheel_L_0Front-Right Wheel:wheel_R_0Rear-Left Wheel:wheel_L_1Rear-Right Wheel:wheel_R_1
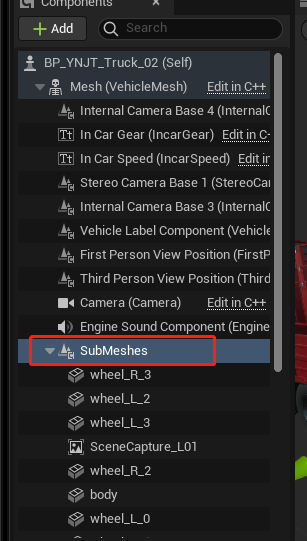
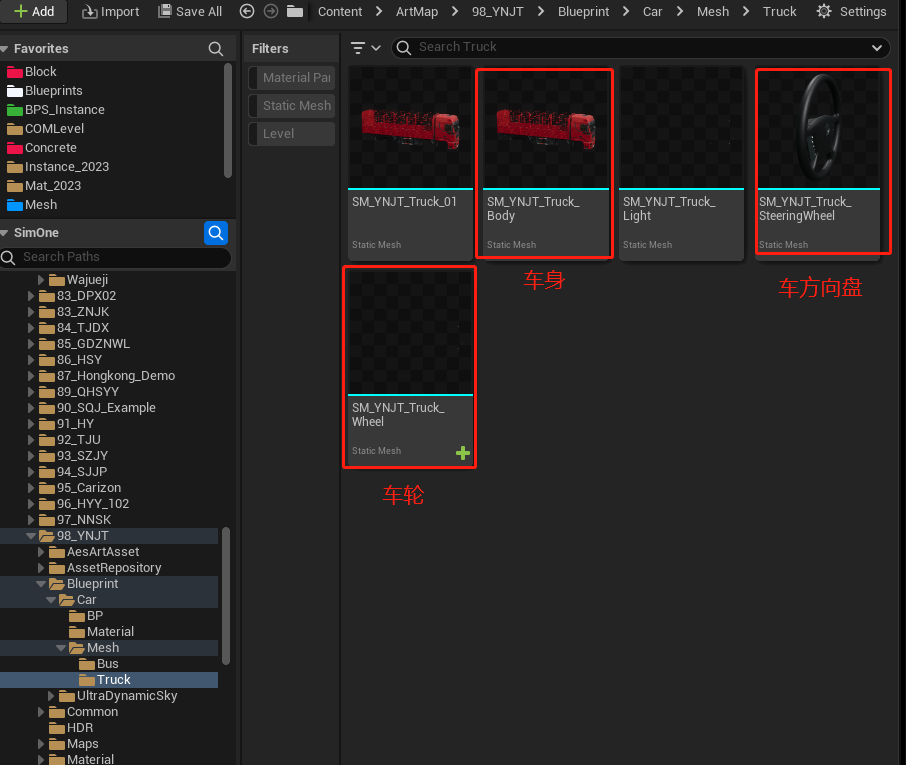
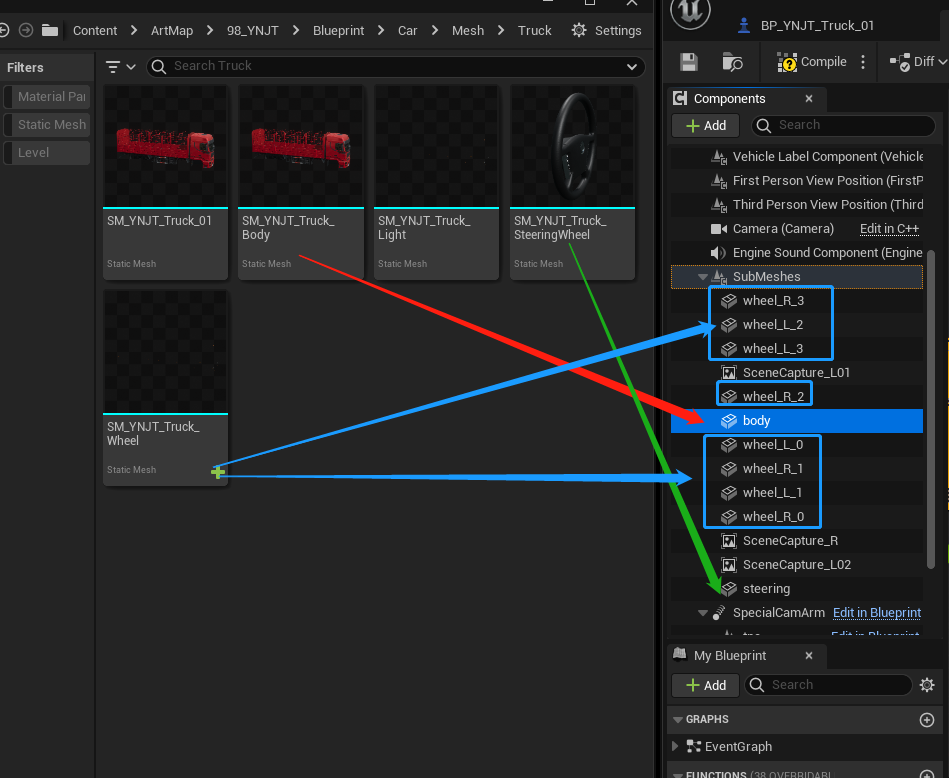
(5) The vehicle model's (0, 0) origin corresponds to the rear axle center of the body. Position the wheels and steering wheel to align with the body. The plug-in vehicle blueprint is now complete.
1.2 Export Asset Package with the Plug-in Tool
1.2.1 Export the ZIP Asset Package for the Frontend
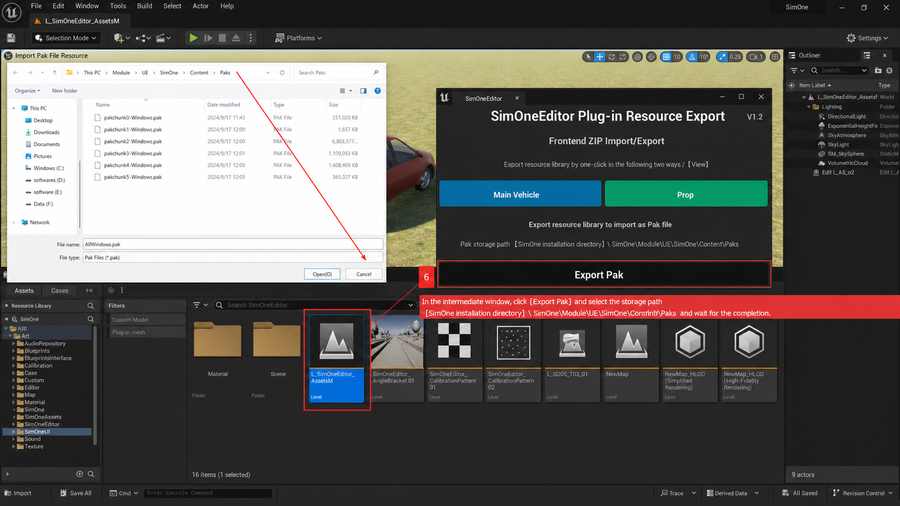
(1) After preparing assets in SimOneEditor, click SimOne Toolbox in the menu bar to open the [SimOneEditor External Resource Export] plugin.
Tip
Currently, the ego vehicle supports single-item selection and export only; props support multi-selection and batch export.
Props: refers to dynamic and static element resources.
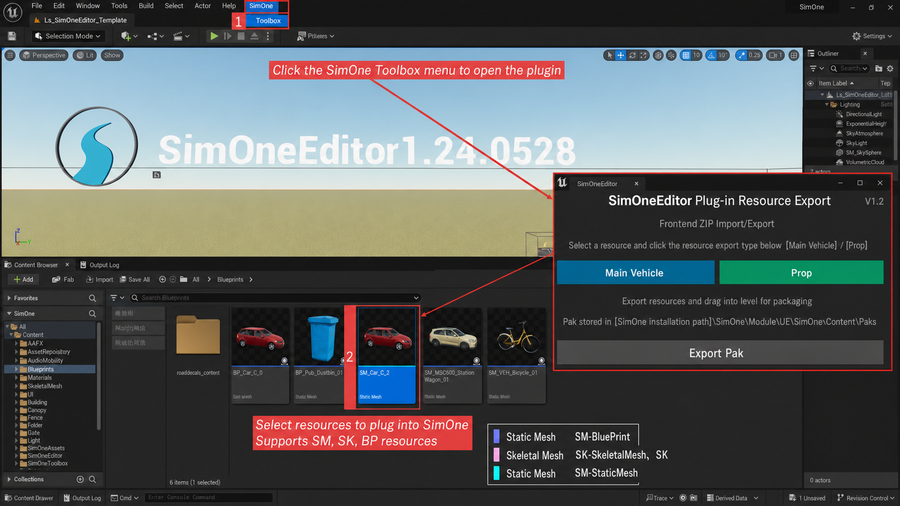
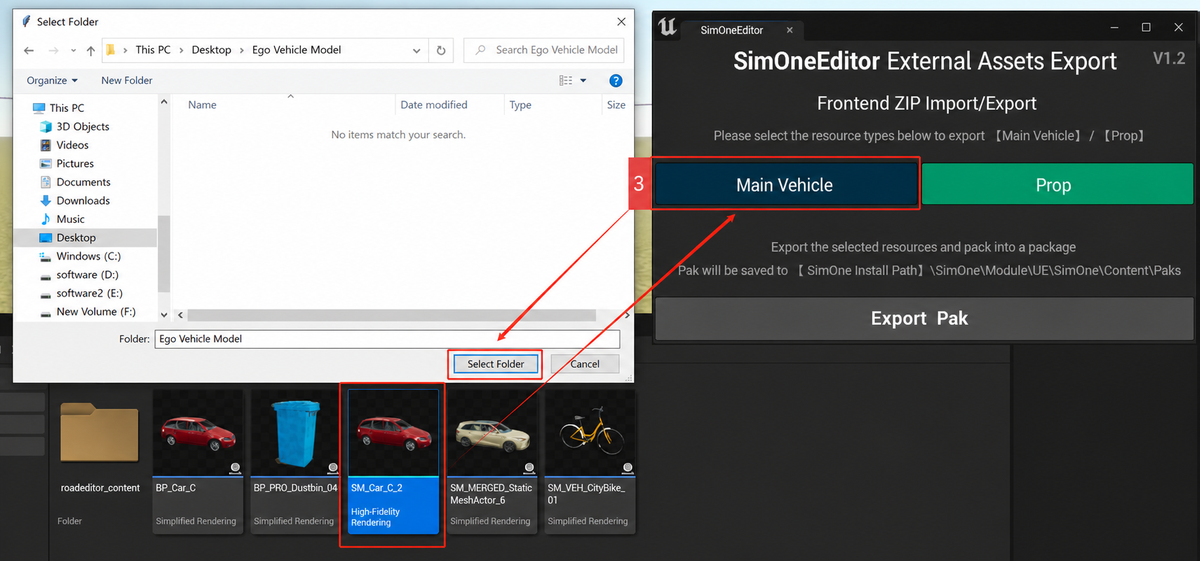
(2) Select the asset(s) to export, click [Ego Vehicle] / [Prop], choose the destination folder in the dialog, and wait for export to complete — the ZIP package for the frontend is generated.
1.2.2 Select Level and Export PAK Package
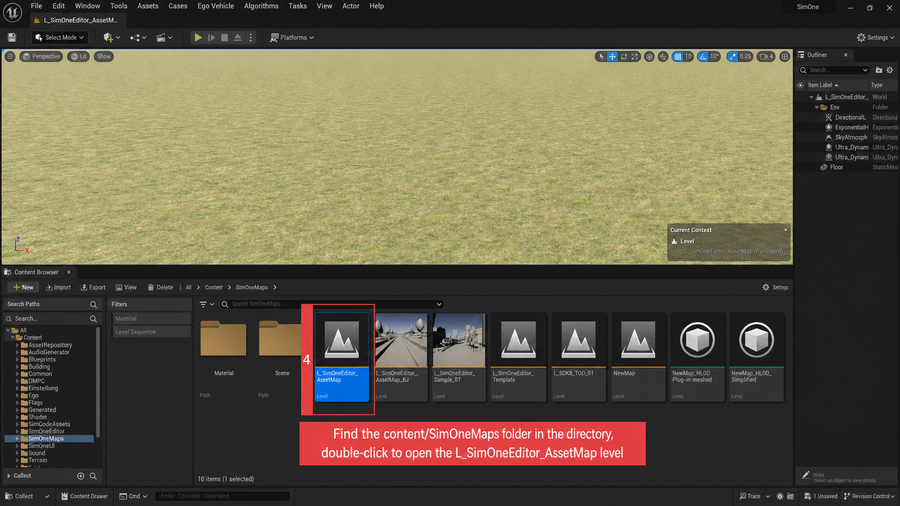
(1) In the content directory, locate the content/SimOneMaps folder, double-click to open the L_SimOneEditor_AssetMap level, drag the asset into the level, and save.
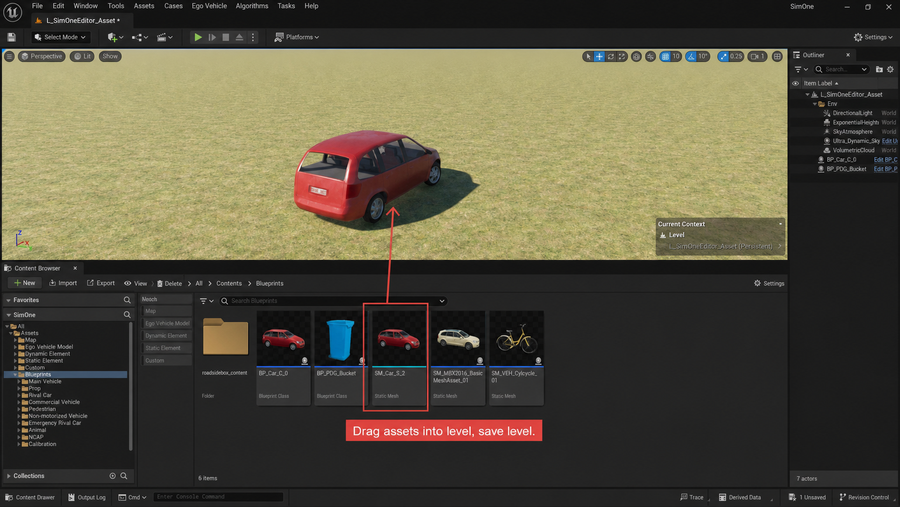
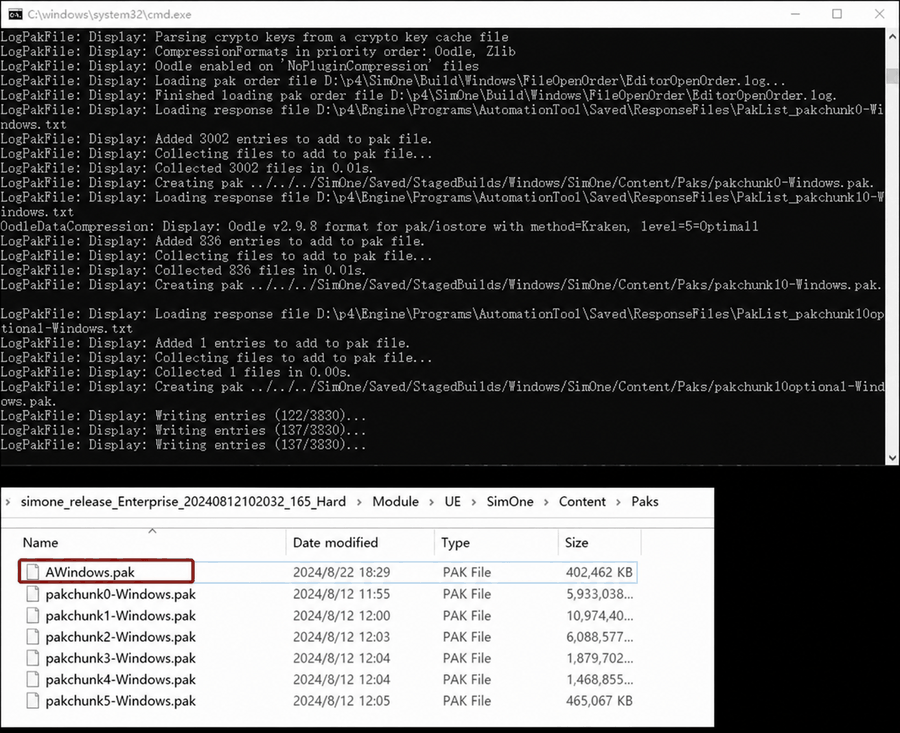
(2) Select the level, click Export Pak, choose the destination path: [SimOne Installation Path]\SimOne\Module\UE\SimOne\Content\Paks, and wait for packaging to complete.
1.3 Import Asset Package into SimOne
1.3.1 Ego Vehicle Import
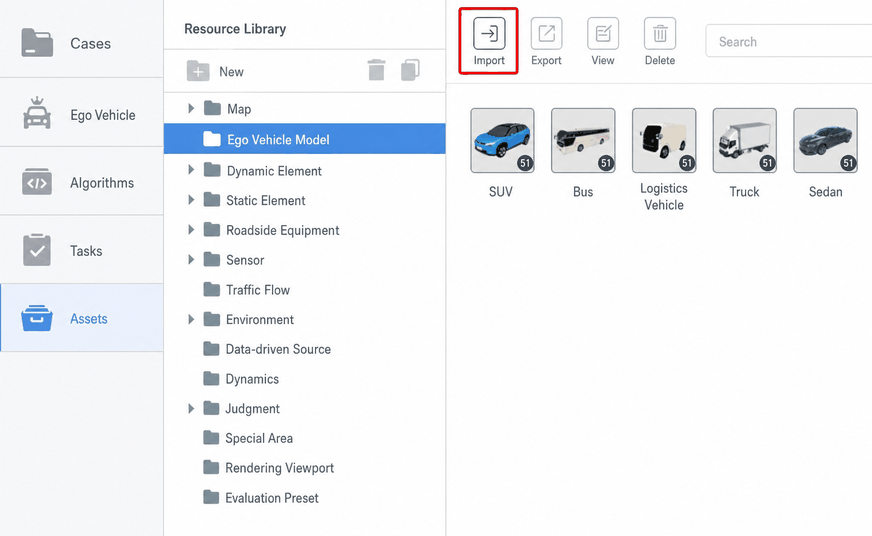
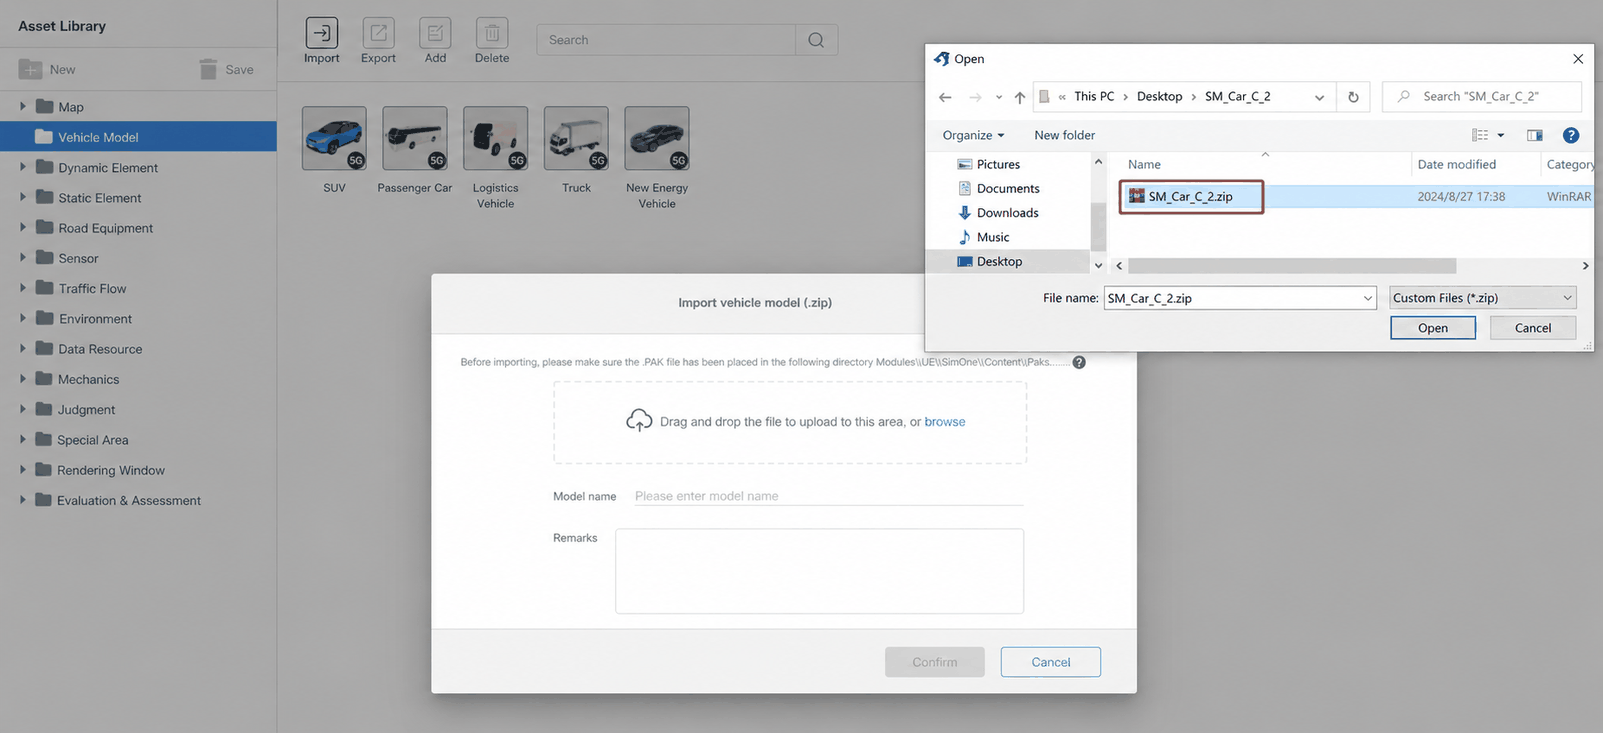
(1) Switch to Assets → Ego Vehicle Models, click Import, select the ZIP asset package, and click Create.
Tip
Verify that the corresponding PAK file has been placed in the correct directory.
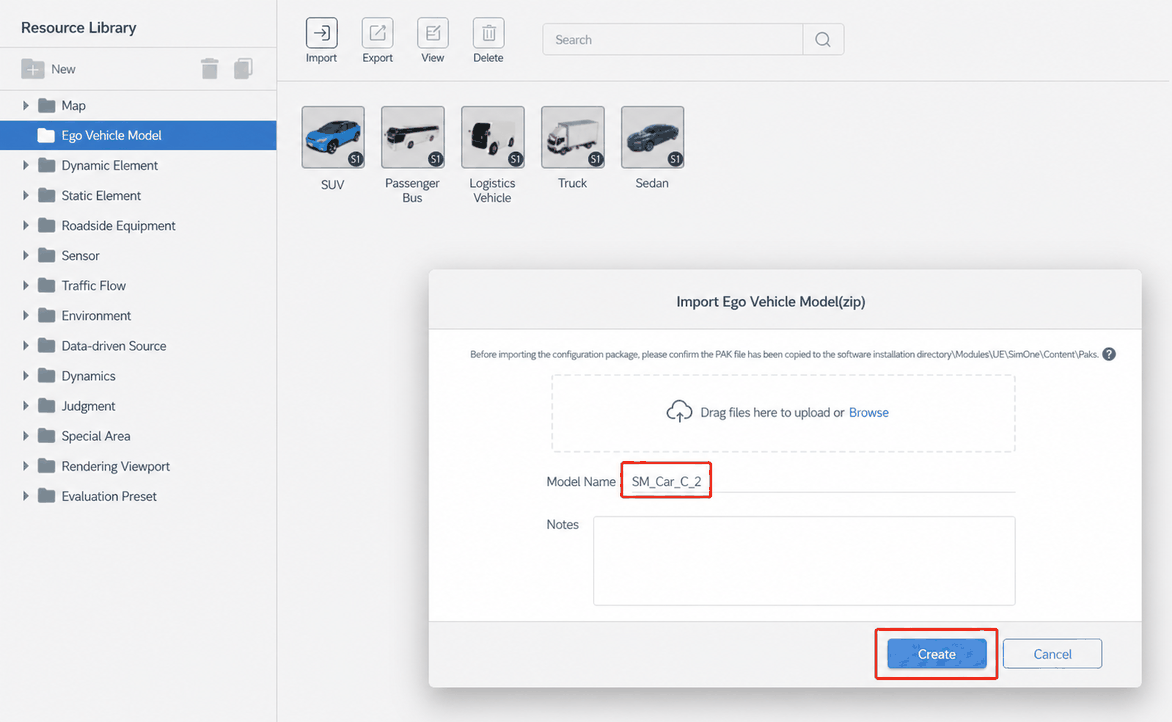
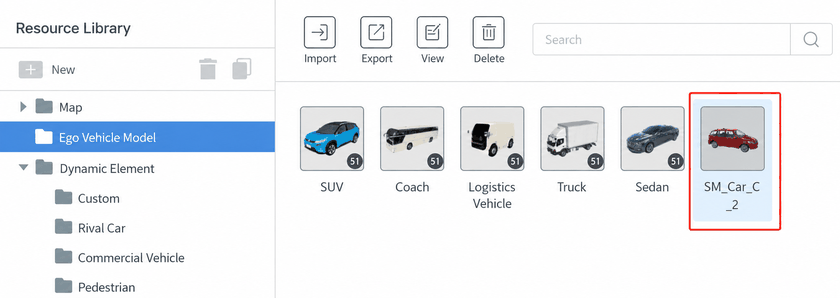
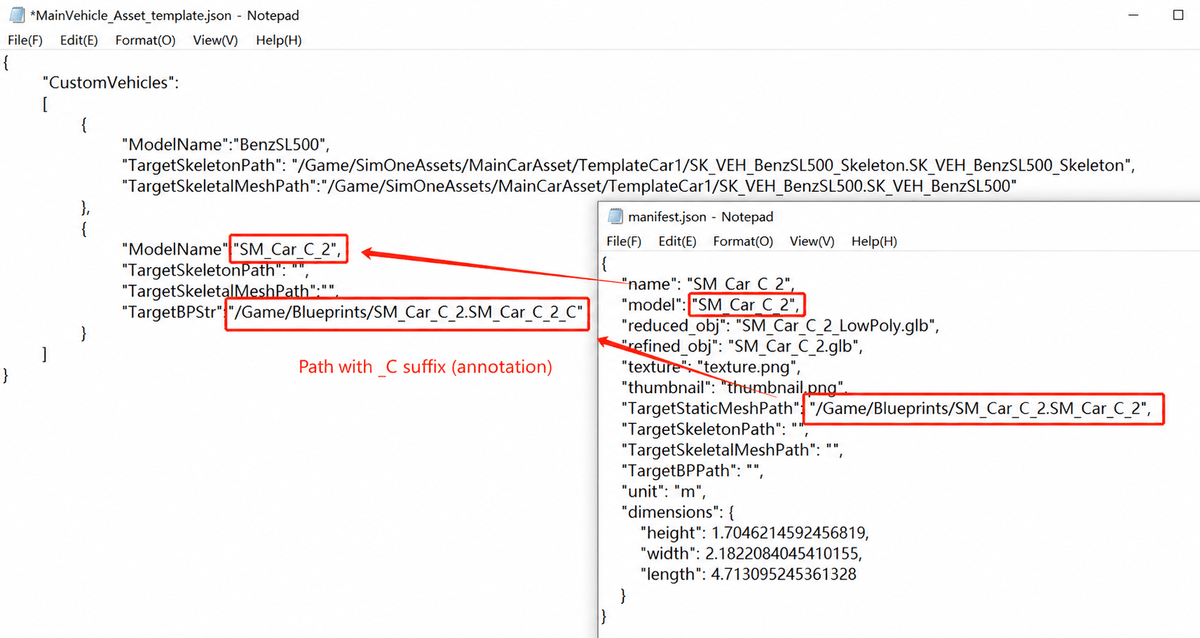
(2) Open the file at installation path \SimOne\Module\UE\Engine\Settings\MainVehicle_Asset_template.json. From the ZIP, find manifest.json and copy the relevant information into MainVehicle_Asset_template.json. (A future version will not require manual JSON editing.)
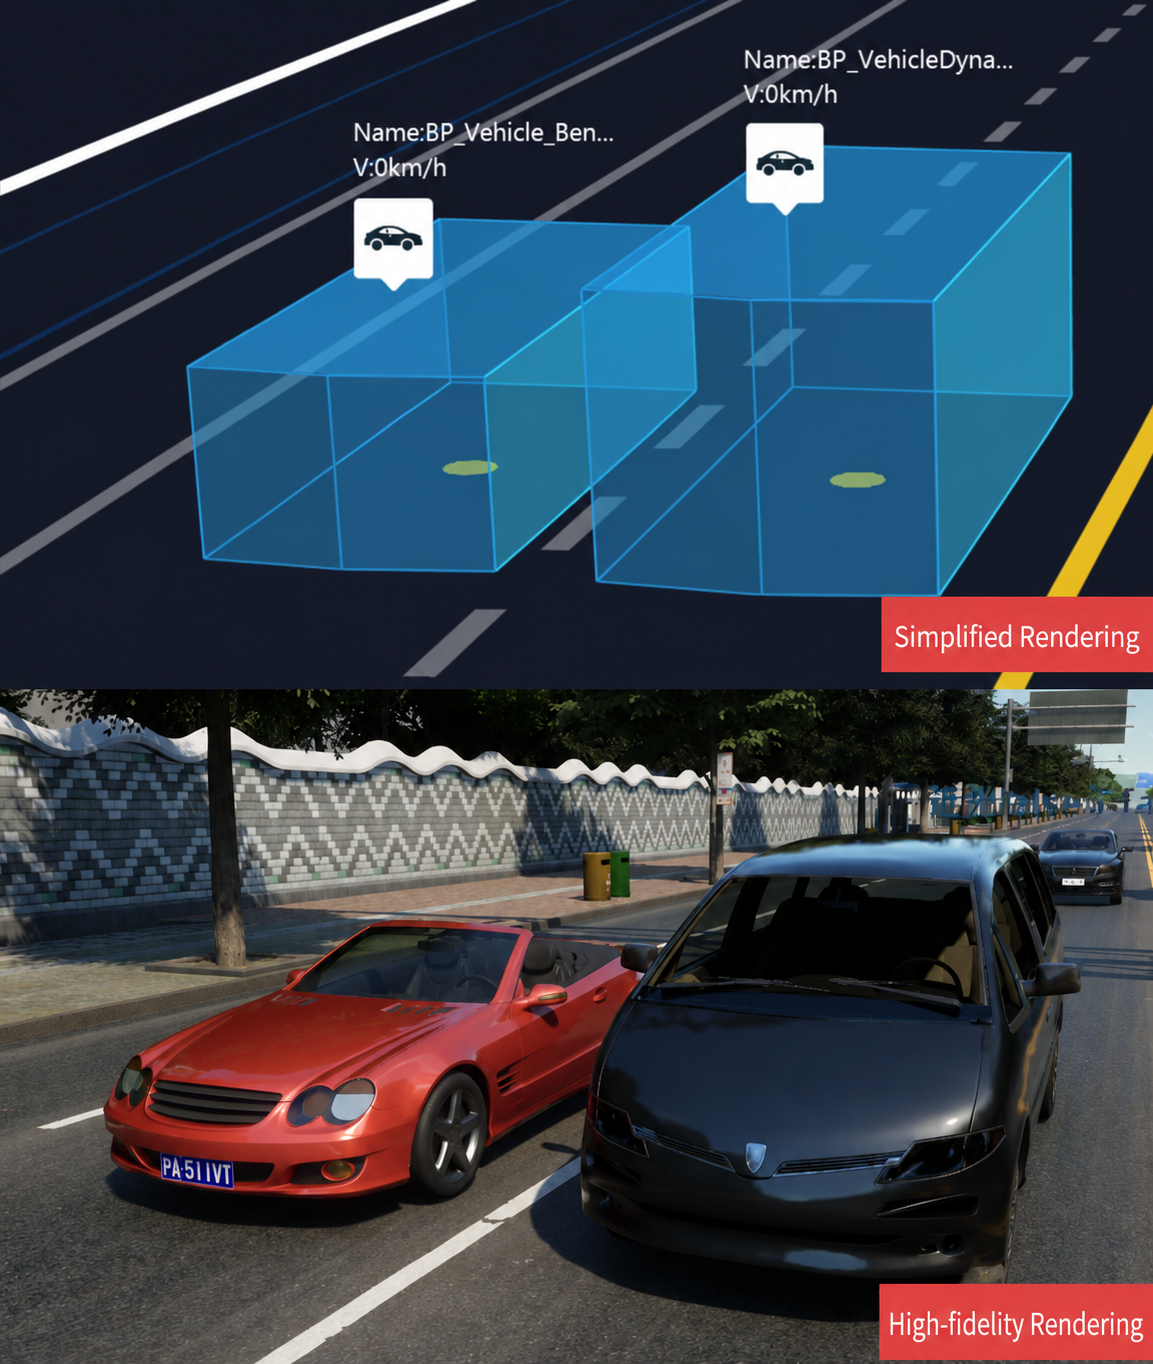
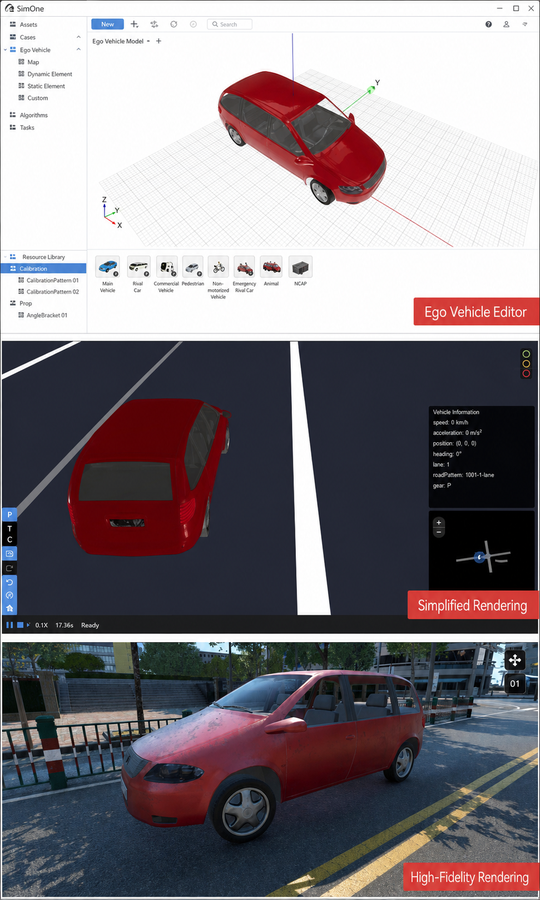
(3) Verify the import result (Ego Vehicle Editor, simplified rendering, high-fidelity rendering).
1.3.2 Prop (Dynamic / Static Elements) Import
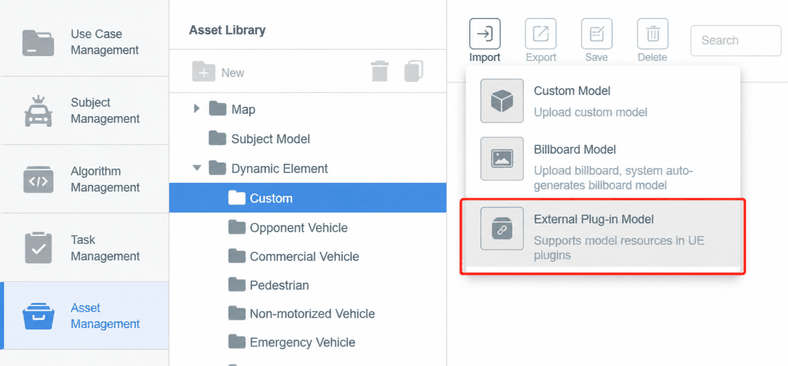
(1) Navigate to Assets → Dynamic Elements / Static Elements, select the target folder, click Import in the upper right, and select External Model.
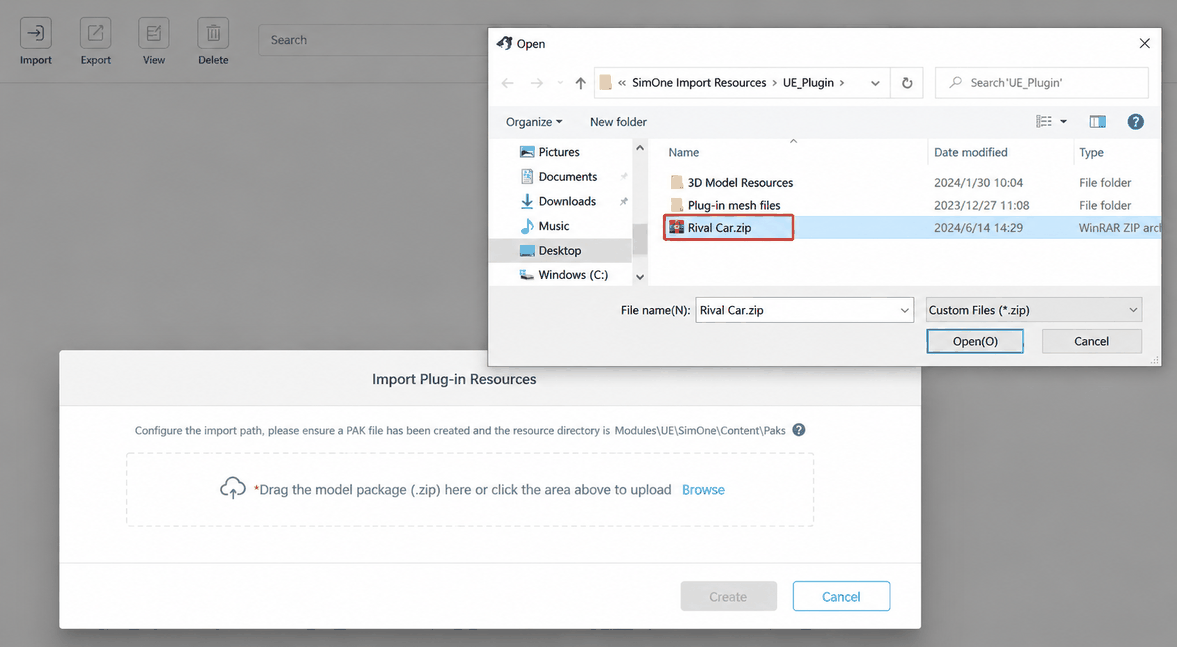
(2) Click Browse or drag the prop ZIP package into the dialog.
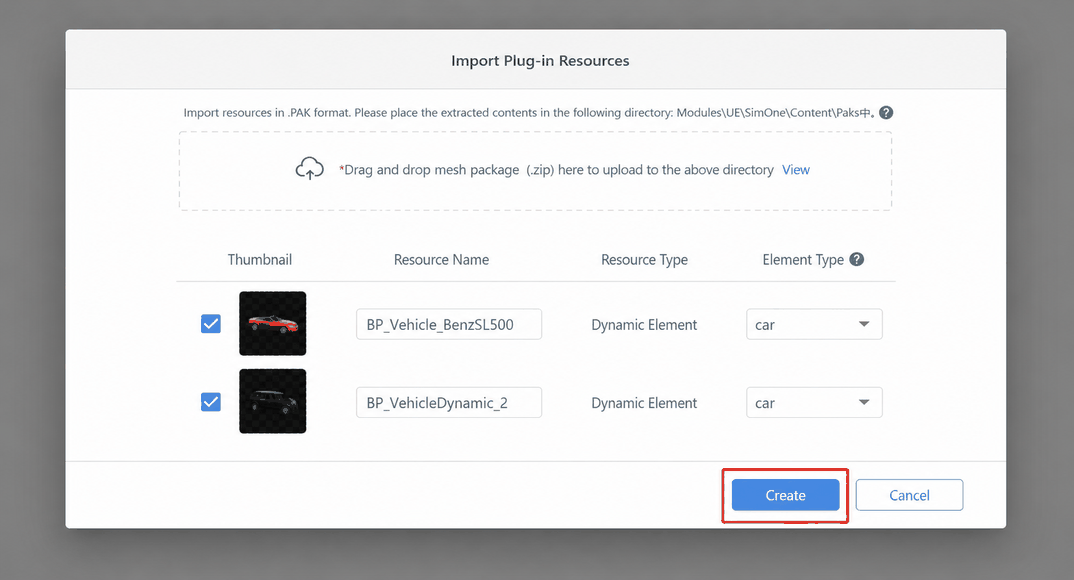
(3) Confirm the resource information, optionally modify the resource name and element type, then click Create.
Tip
Verify that the corresponding PAK file has been placed in the correct directory.
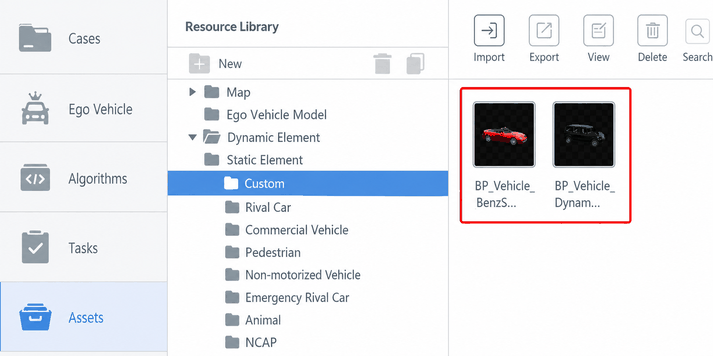
(4) Verify the import result (simplified rendering shows only a 3D bounding box matching the prop's length, width, and height; high-fidelity rendering).