Third-Party Traffic Flow Integration (Vissim)
Supports direct integration with the Vissim traffic flow tool, or connecting third-party traffic flow via the DST API.
1. Traffic Flow Case — Using Vissim
Step 1 Install Vissim Software
Install Vissim version 10. (Note: do not install other versions — only this version is supported for SimOne simulation.)
Step 2 Install CodeMeter 7.10a and Configure
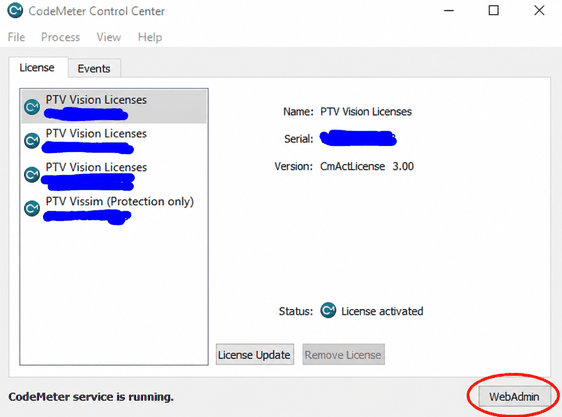
(1) Open CodeMeter and click WebAdmin in the lower-right corner.
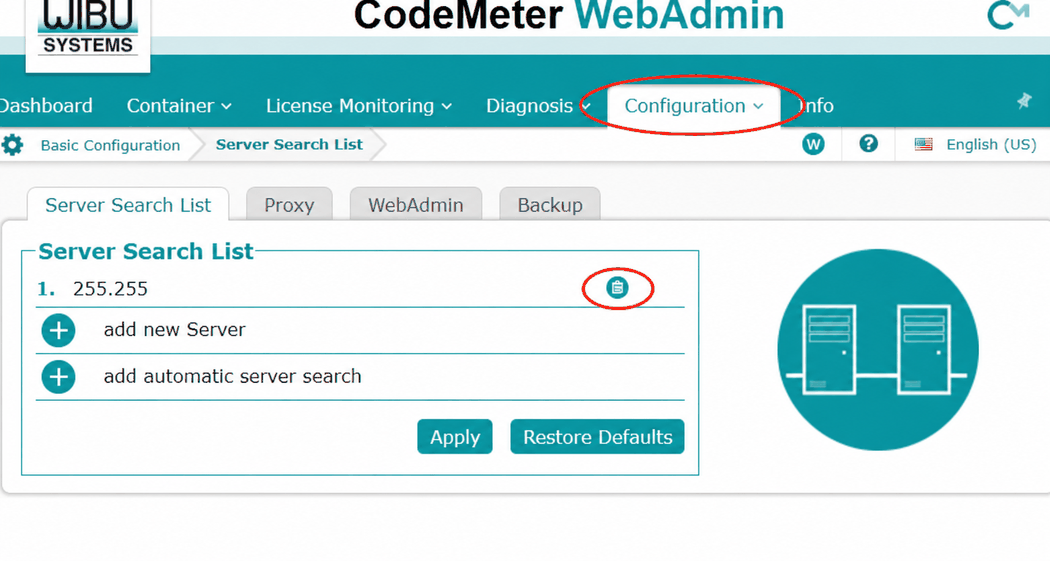
(2) In the webpage that opens, click the Configuration menu at the top. Clear the Server Search List (click the trash can icon), then click Apply to confirm.
Step 3 Configure Vissim in SimOne
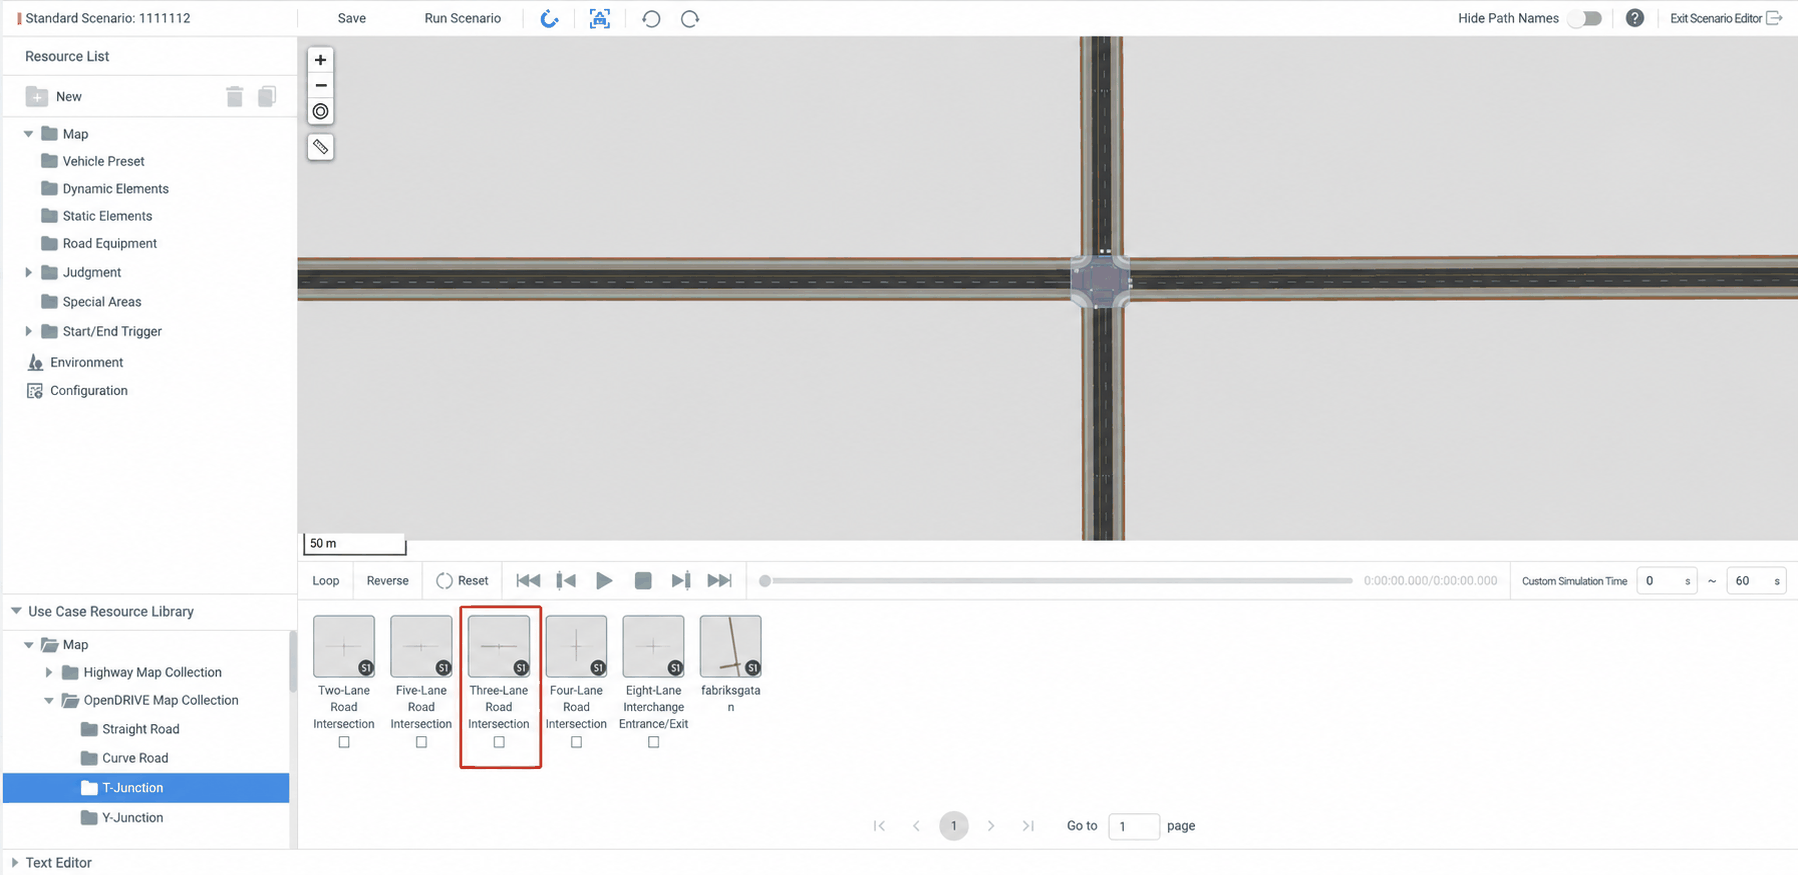
(1) In the current public release, only the Three-Lane Intersection map supports Vissim. Select this map when building the case.
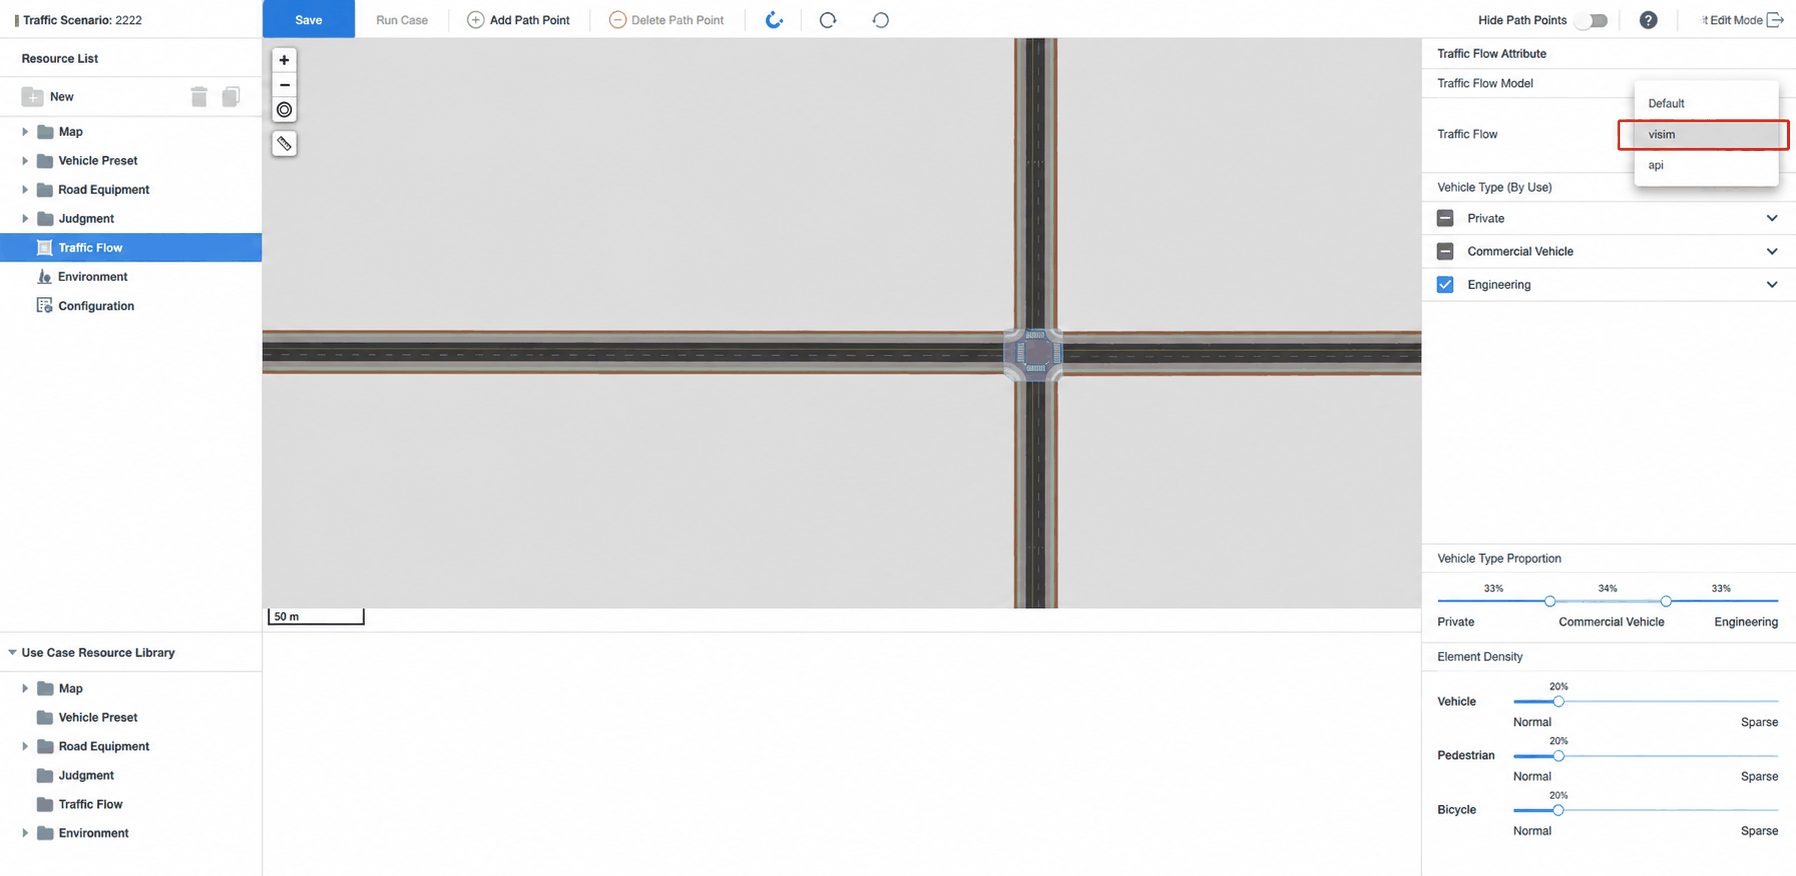
(2) Set the case type to Traffic Flow Case, select Vissim in the Traffic Flow Properties panel, and configure the required adversary vehicle types and their ratios as needed.
(3) Run the simulation case.
2. Traffic Flow Case — Using DST API Control
DST (Dynamic Simulation Translator) API is used to connect third-party generated traffic flow. Communication between the DST API and third-party traffic flow data is done via socket. Each frame of third-party traffic flow data is sent to DST in JSON format (refer to Appendix: DST Single-Frame JSON Format Example).
For typical usage, to ensure data transfer efficiency, it is recommended to run the sending process on the same machine as SimOne. In this case, the socket communication IP is 127.0.0.1 and the port is 21568.
DST
Dynamic Simulation Translator
DST stands for "Dynamic Simulation Translator" — a software tool used to convert and integrate models and data between different simulation environments. It enables sharing and transferring of models, data, and results across simulation platforms for cross-platform simulation and analysis. The primary purpose of DST is to improve simulation flexibility and reusability, reduce redundant development effort, and promote interoperability between different simulation tools.
Basic Workflow
Step 1 Create a Third-Party Traffic Flow Case
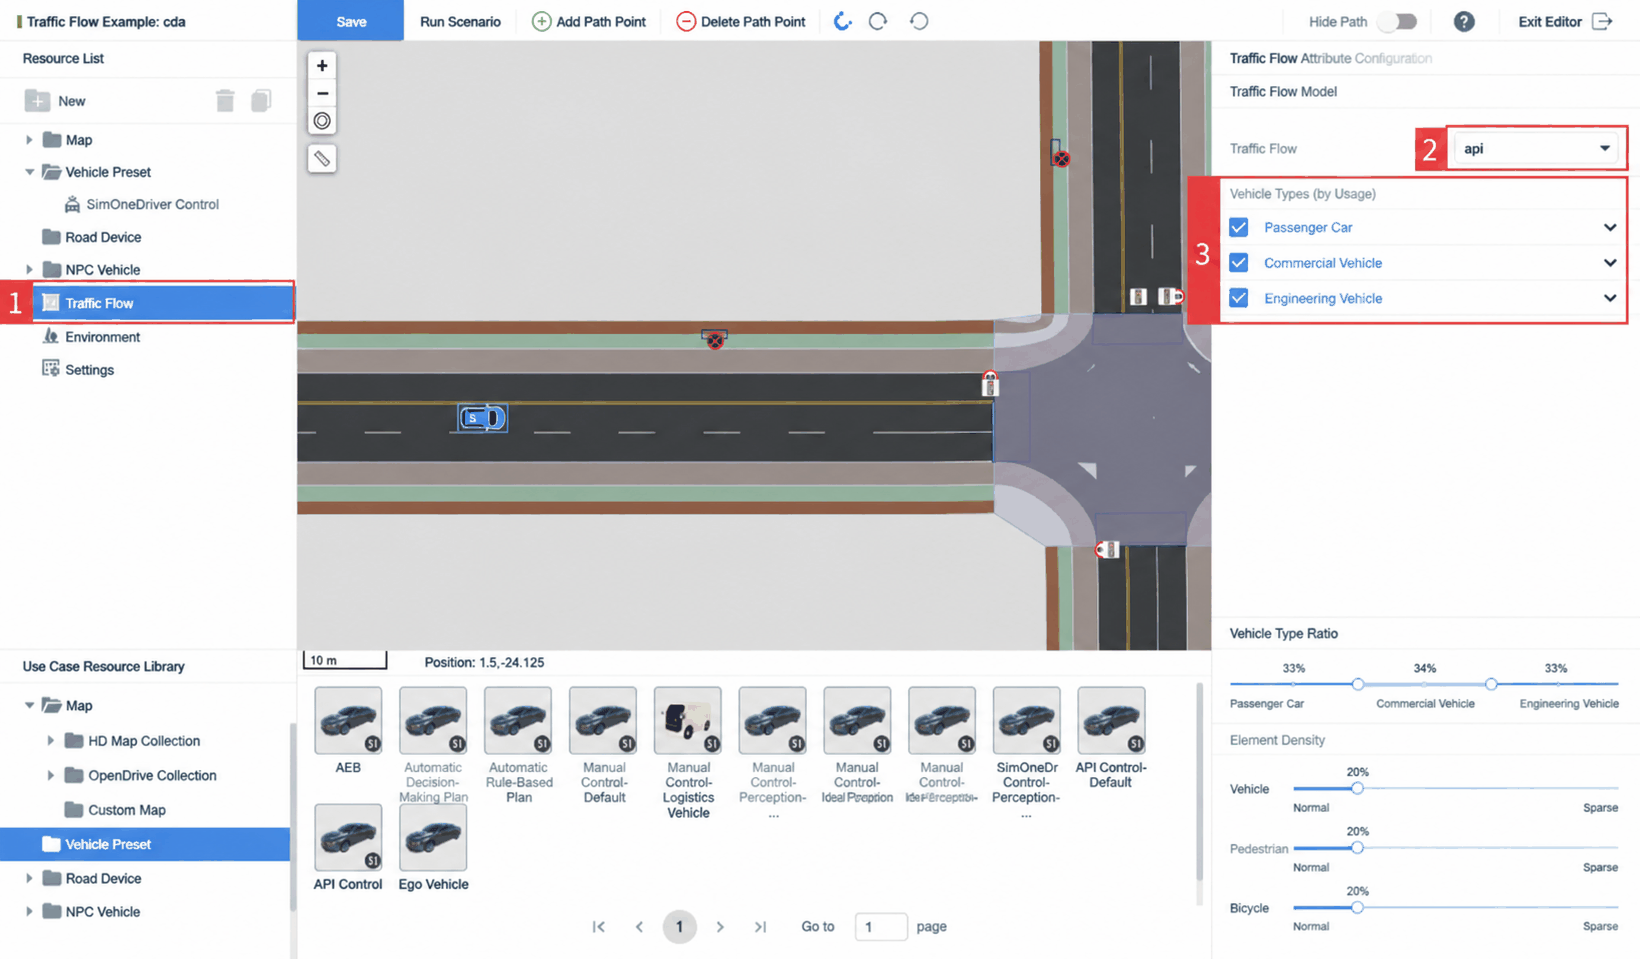
Create a traffic flow case. Click Traffic Flow in the left Resource List, select API traffic flow in the Traffic Flow Properties panel on the right, check the required vehicle types (Passenger, Commercial, Engineering) as needed, and save.
Step 2 Obtain Map and Ego Vehicle Information for Traffic Flow Modeling
Call the API to obtain the map and Ego Vehicle information for the case (refer to the Developer Manual for relevant API calls), then perform traffic flow modeling in the third-party traffic flow tool to generate traffic flow data.
Step 3 Write a Sending Script Using the DST API
Based on the requirements for sending data from the third-party traffic flow tool to DST, write a sending script and copy it to the same environment as SimOne (see Appendix: DST API Sample Code for a Python example). The script mainly includes:
(1) Create a socket and bind the IP address and port to establish a connection.
(2) Retrieve traffic participant data and send it to DST via socket. Refer to the example below. Traffic participant data fields include:
| Data Type | Field Description |
|---|---|
| Common Fields | (1) TimeStamp: timestamp of the current frame for the traffic participant, in seconds — required; (2) ObjectId: user-defined unique ID for the traffic participant — required; (3) ObjectType: specific category of the traffic participant; valid values: Vehicle, Pedestrian, Bike, or TrafficLight — required; (4) Position: coordinates of the traffic participant; X, Y, Z in meters — X and Y are required, Z is optional |
| Vehicle / Pedestrian / Bicycle Fields | (1) Speed: speed of the traffic participant in m/s — optional; (2) PIS: heading angle of the traffic participant in radians — optional; (3) AssetId: type ID of the specific traffic participant for loading a SimOne internal model; refer to SimOne's internal agents.json combined with ObjectType for valid values — optional, defaults to a random Vehicle ID from agents.json |
| Traffic Light Fields | Attributes field containing three sub-fields: OpenDriveLightId, Signal, and CountDown (1) OpenDriveLightId: the ID of the corresponding traffic light in OpenDRIVE — required; (2) Signal: color of the traffic light; values "R", "Y", or "G" for red, yellow, or green — required; (3) CountDown: duration of the traffic light state in seconds — required |
(3) It is recommended to send data at a constant frequency; 10 Hz is suggested.
Step 4 Run the Test Case
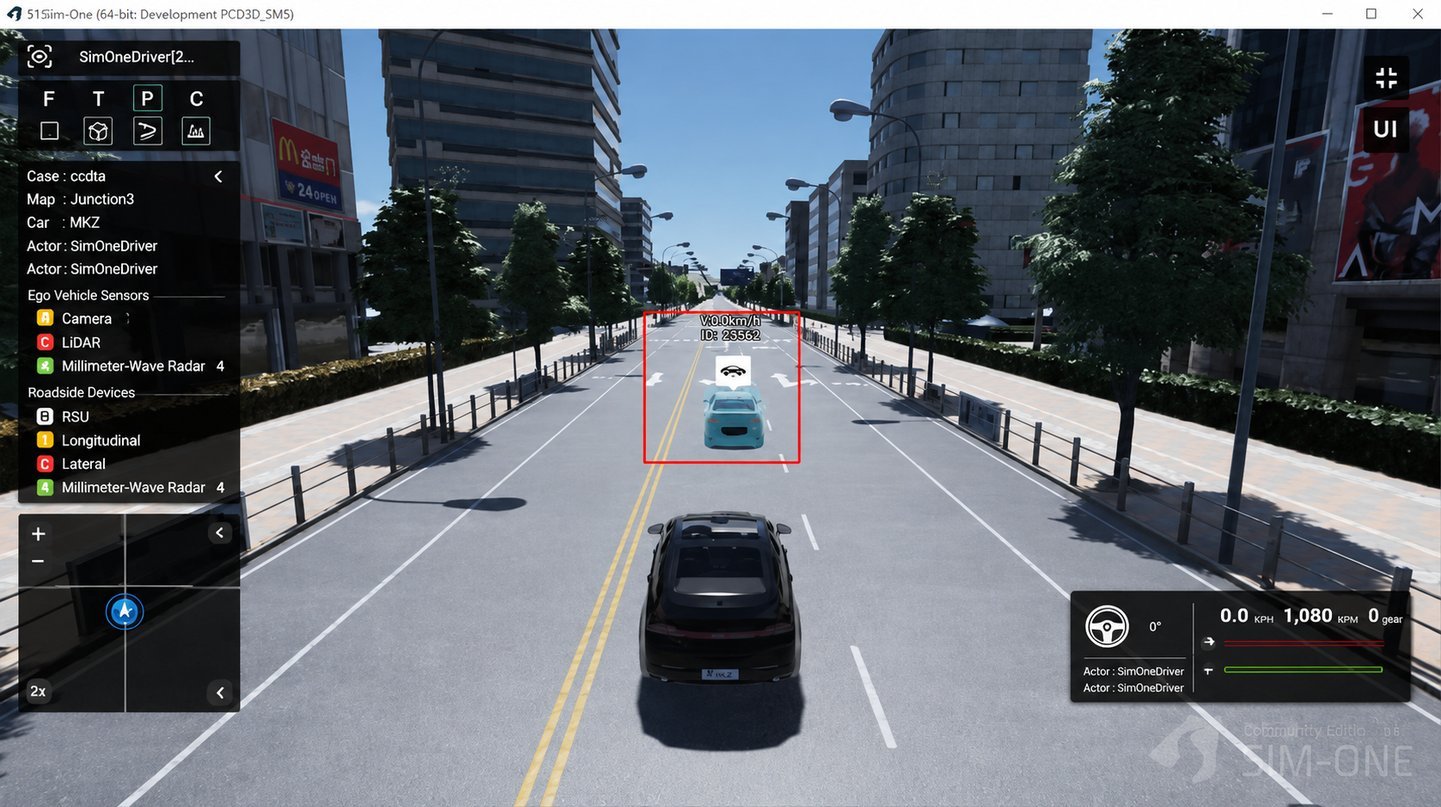
Run the traffic flow case in SimOne. After startup is complete (e.g., the UE interface has finished loading), run the script from Step 3. The result shows the adversary vehicle in front of the Ego Vehicle moving slowly in real time according to the sent data.
Appendix: DST API Sample Code
    #!/usr/bin/env python3
    # -*- coding: utf-8 -*-
    import socket
    import json
    import time

    if __name__ == '__main__':
        dstSocket = socket.socket()
        dstSocket.connect(("127.0.0.1", 21568))
        print("start data process node...\n")
        print("connect dst ip: 127.0.0.1 port:21568")
        index = 0
        tick = 0
        pulse = 0.1

        while True:
            start = time.time()
            dataPackage = {}
            dataPackage['Data'] = []
            asset = {}
            asset['TimeStamp'] = str(tick)
            objects = []
            position = {}
            position['X'] = float(-46 + 0.25 * index)
            position['Y'] = -3.44
            actor = {}
            actor["ObjectId"] = '23562'
            actor['AssetId'] = "1000006"
            actor['ObjectType'] = 'Vehicle'
            actor['Position'] = position
            objects.append(actor)
            asset['Objects'] = objects
            dataPackage['Data'].append(asset)

            try:
                sendData = json.dumps(dataPackage).encode('utf-8')
                dstSocket.send(sendData)
            except:
                print('dst Socket is closed!!')
            index = index + 1
            end = time.time()
            if pulse > (end - start):
                time.sleep(pulse - (end - start))
            tick = tick + pulse
Appendix: DST Single-Frame JSON Format Example
    FrameData = {
        "Data": [
            {
                "TimeStamp": "51.0",
                "Objects": [
                    {
                        # Example with required fields only
                        "ObjectId":"23562",
                        "ObjectType": "Vehicle",
                        "Position": {
                            "X": 575,
                            "Y": 268
                        }
                    },
                    {
                        # Example with all fields
                        "ObjectId": "23562",
                        "ObjectType": "Vehicle",
                        "Position": {
                            "X": 575,
                            "Y": 268,
                            "Z": 0
                        },
                        "Speed": "30",
                        "PIS": 1,
                        "AssetId": "1000049"
                    },
                    {
                        "ObjectId": "73088",
                        "ObjectType": "Vehicle",
                        "Position": {
                            "X": 575,
                            "Y": 280
                        }
                    },
                    {
                        "ObjectId": "73088",
                        "ObjectType": "Vehicle",
                        "Position": {
                            "X": 575,
                            "Y": 280
                        }
                    },
                    {
                        # Traffic light example: set traffic light ID 9 to red for 10 seconds
                        "ObjectId": "74000",
                        "ObjectType": "TrafficLight",
                        "Attributes": {
                            "OpenDriveLightId": 9,
                            "Signal": "R",
                            "CountDown": 10
                        }
                        "Position": {
                            "X": 600,
                            "Y": 300
                        }
                    }
                ]
            }
        ]
    }