Quick Start
Abstract
Welcome to the SimOne autonomous driving simulation platform. This guide helps you get familiar with the platform's core workflow in 10 minutes, from launching the software to running your first simulation task.
1. Step 1: Launch the Software
Choose a startup method based on how you use SimOne:
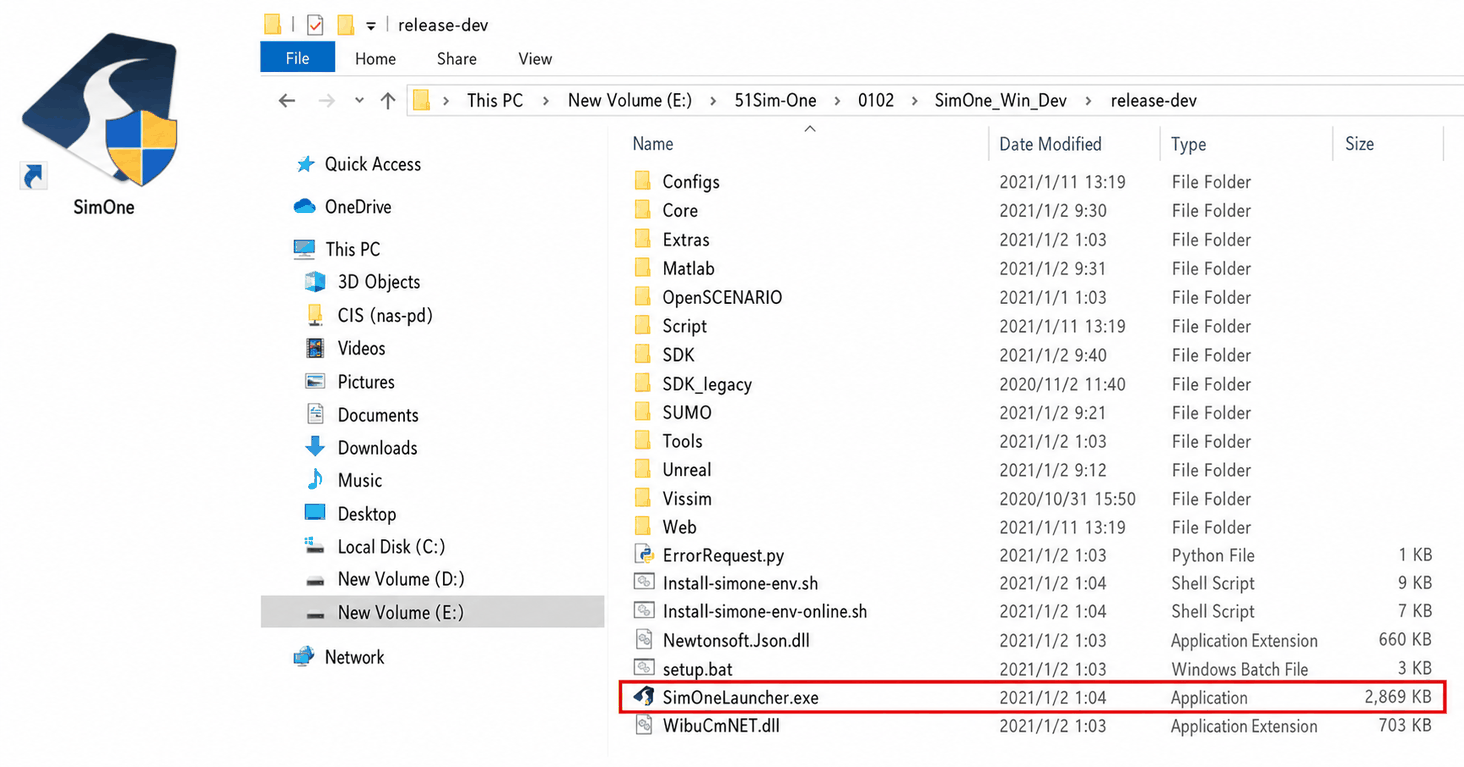
(1) Client (desktop version): Double-click the SimOne desktop shortcut, or double-click SimOneLauncher.exe in the installation directory.
(2) Cloud (web version): Open Chrome and enter the deployed service URL.
(3) Sign in
Version Note
The account sign-in process applies only to the Collaboration Edition. If you are using the Standalone Edition, you can enter the main interface directly after startup without this step.
- After startup, the sign-in page is displayed. Enter your username and password.
- Click Sign In to enter the SimOne home page. (Note: If you do not have an account yet, contact your project administrator. How do I get a login account?)

2. Step 2: Choose Your Starting Path
We recommend starting with Path A to build an intuitive understanding, then moving to Path B to understand the core concepts.
Path A: Experience First (Recommended)
"I want to see what the software can do before touching complex settings."
- Goal: Run a built-in standard scenario directly and experience autonomous driving simulation.
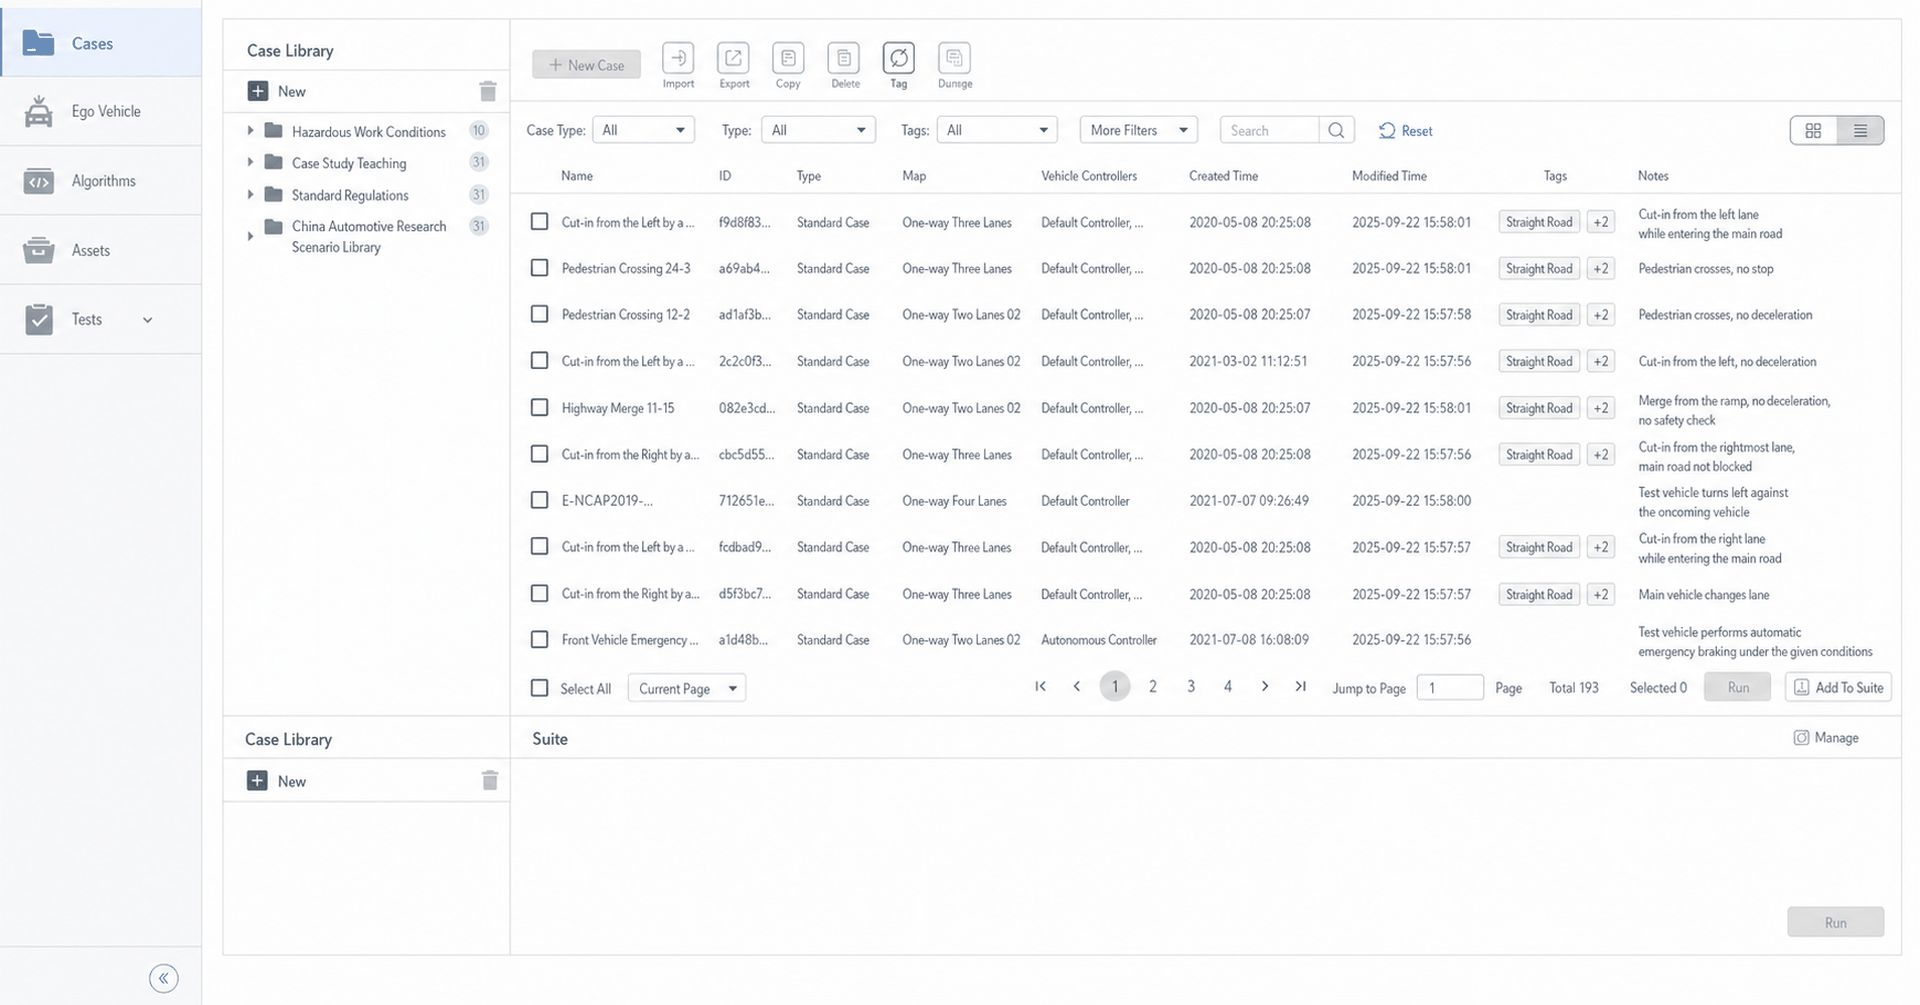
- Action: 3.1. Run a Built-in Use Case
Path B: Hands-On (Essential for Deeper Understanding)
"I want to learn how the editor works and try building a road myself."
- Goal: Create a new Use Case from scratch, add a straight road and an ego vehicle, and run a test.
- Action: 3.2. Build a Simple Use Case and View Results
3. Step 3: Advanced Guide (Learning Map)
Congratulations! After completing the above experience, you have mastered the basic operation logic of SimOne. You can now keep this core workflow in mind and dive into the topic-specific documentation as needed.
📊 Core Workflow Overview
The core SimOne workflow can be summarized in three steps:
- Step 1 — Create/Select a Use Case: In the Cases page, create or select a Use Case and complete the basic scenario configuration.
- Step 2 — Create a Task: Go to the task settings page and configure runtime parameters such as the ego vehicle and algorithm.
- Step 3 — View Results: Observe the run in the visualization window, then review results and playback in the task list.
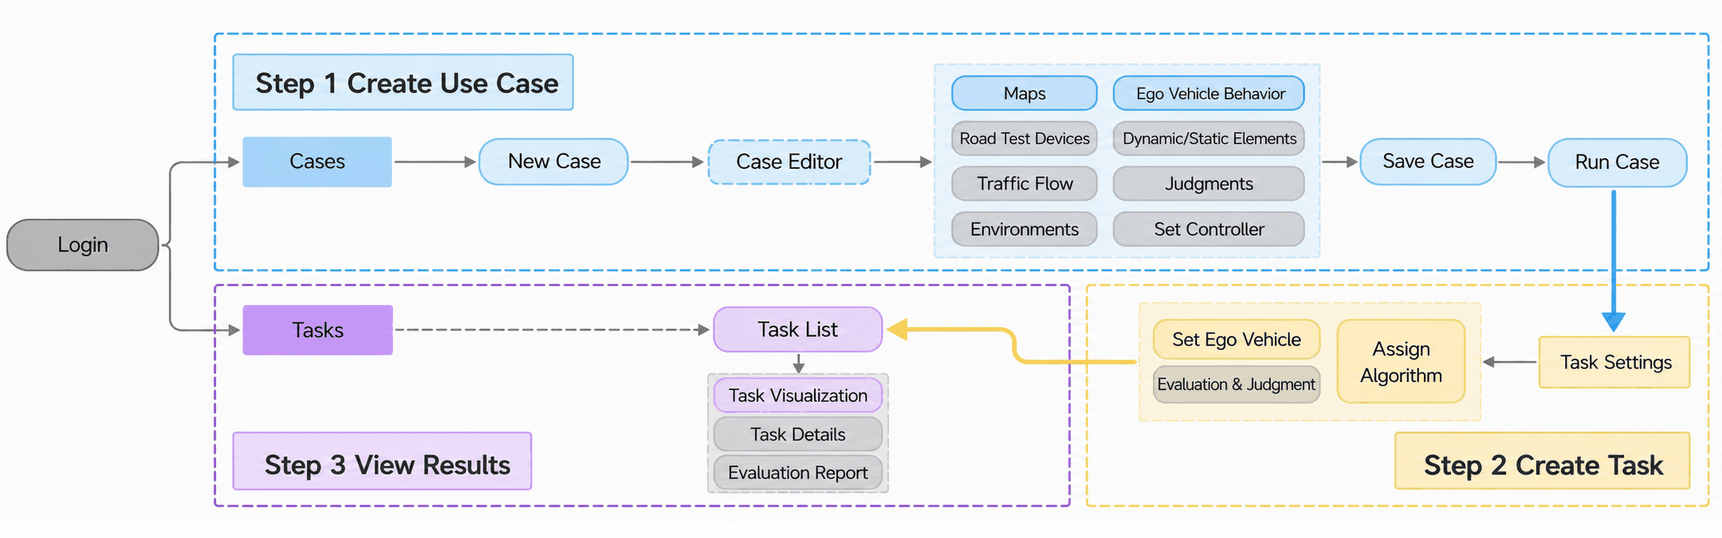
For a complete picture of how Assets, Ego Vehicle, and Algorithms relate to the main workflow, see Overview → 4.2 Full User Workflow Diagram.
🗺️ Topic Learning Map (expand as needed)
Choose the section that matches your needs:
🔍 Configure the Vehicle and Algorithm
- Switch the ego vehicle? Adjust the ego vehicle model, sensor configuration, or dynamics parameters. 👉 See 4.2. Ego Vehicle Management (Ego Vehicle Editor)
- Use your own algorithm? Integrate a custom autonomous driving algorithm (C++ / Python / Simulink). 👉 See 4.3. Algorithm Management (Algorithm Integration)
🛣️ Build Complex Roads and Traffic
- Build a complex road network? Create ramps, intersections, roundabouts, and other HD map elements. 💡 Tip: For complex road networks, use the companion WorldEditor tool to author the map, then import it. Contact a specialist for WorldEditor usage.
- Edit a standard scenario (OpenSCENARIO)? Edit dynamic scenario elements compliant with the OpenSCENARIO standard. 👉 See 5.2. Define Standard Use Cases
- Integrate external traffic flow? Simulate complex mixed traffic, pedestrian crossings, or traffic light logic. 👉 See 5.3. Define Traffic Flow Use Cases
📊 Evaluate Test Results and Automation
- How did the algorithm perform? (Post-evaluation) Comprehensively evaluate the autonomous driving algorithm in terms of performance and functionality. 💡 Tip: Three evaluation modes are supported — built-in evaluation, custom metrics, and fully custom report operators. You can flexibly customize evaluation operators to generate personalized reports. 👉 See 6.2. Algorithm Post-Evaluation
⚙️ End-to-End Industry Solutions
- Explore the complete workflow from Model-in-the-Loop (MIL) to Driver-in-the-Loop (DIL). 👉 See Advanced Guide: Simulation Workflow Examples
Appendix
💡 Key Terms (Built-in Use Case, Standard Use Case, Traffic Flow Use Case, etc.) — see 4.1. Use Case Management → Use Case Type Descriptions
Manual Driving Key Bindings
When you select "Manual" control mode when creating a task, or when connected to a simulator, use the following keys to control the ego vehicle:
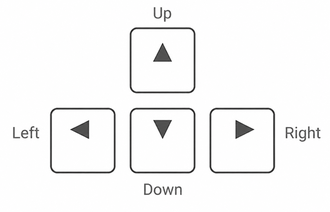
| Key | Function | Description |
|---|---|---|
| W / ↑ | Throttle (Forward) | When reversing: first decelerates to 0, then accelerates forward. |
| S / ↓ | Brake / Reverse | When driving forward: first decelerates to 0, then accelerates in reverse. |
| A / ← | Turn Left | Steers the wheel to the left. |
| D / → | Turn Right | Steers the wheel to the right. |