How to Configure Sensor Nodes? (Physical-Level / Object-Level)
Physical-level sensor simulations (e.g., cameras, LiDAR) — which produce image and point-cloud data — place high demands on hardware rendering capability. When simulating multiple physical-level sensors simultaneously, you must configure a dedicated physical-level sensor node for each sensor. The procedure is as follows:
1. Add a Physical-Level Sensor Node
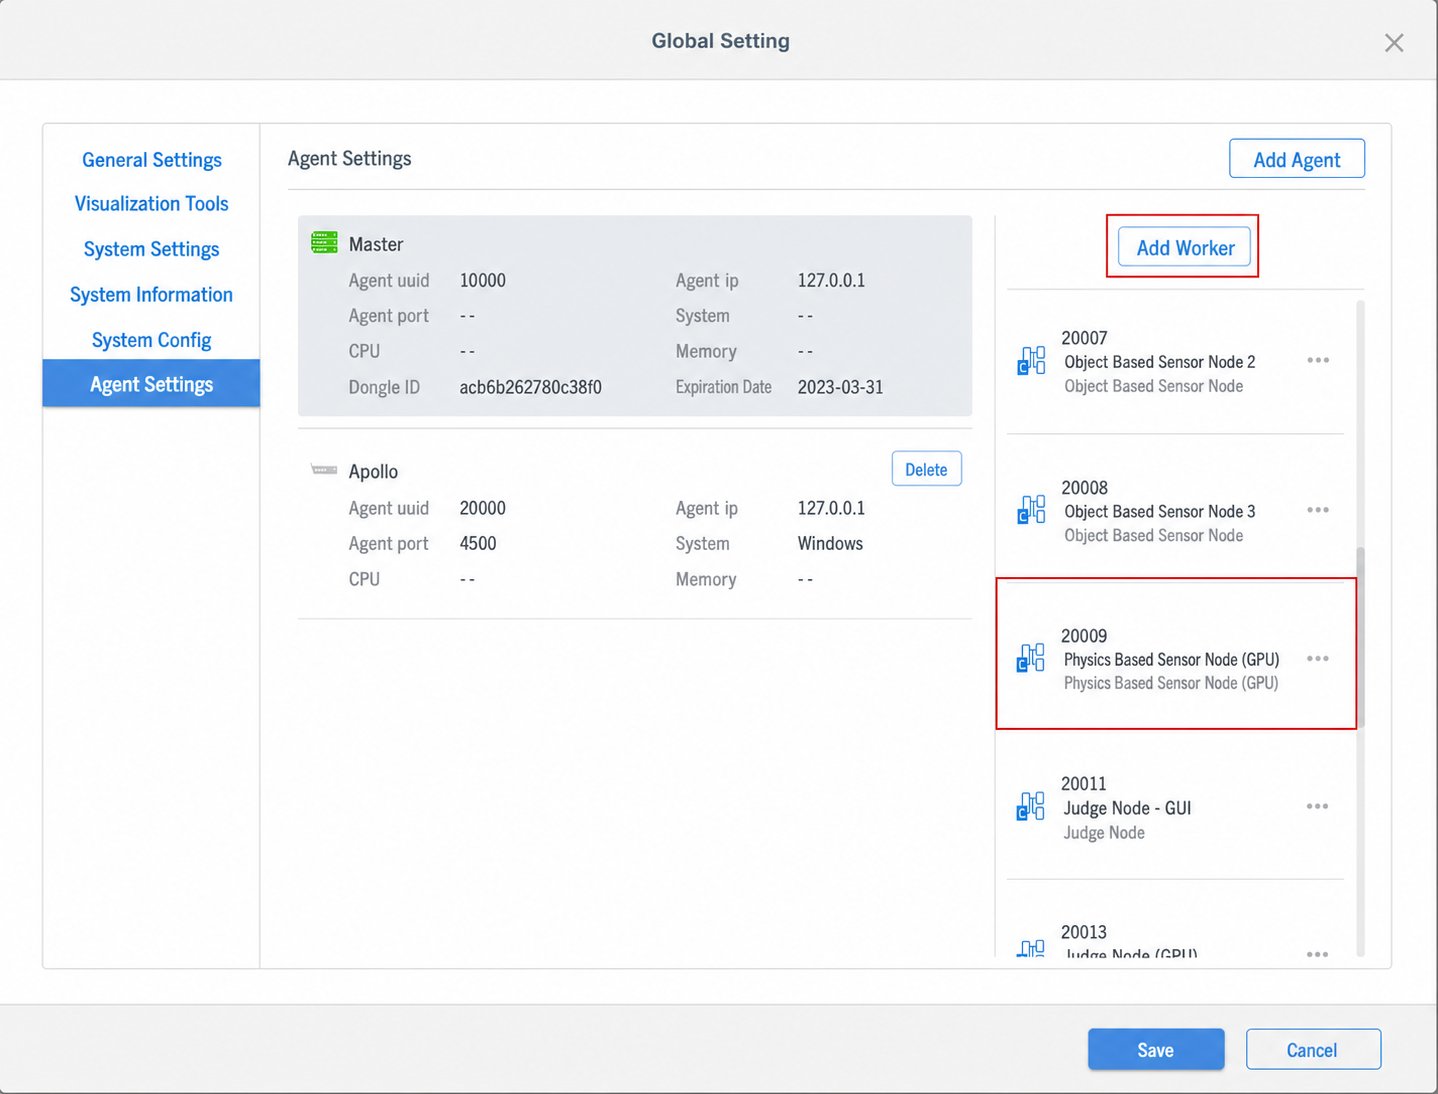
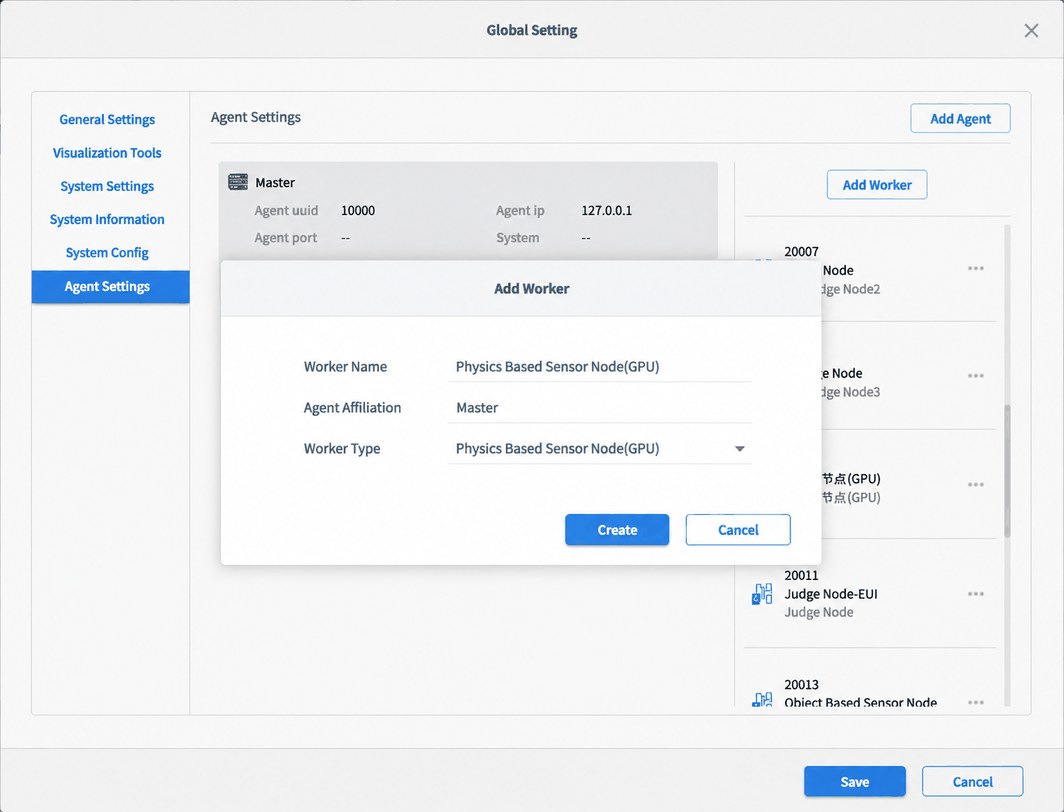
On the main interface, open Global Settings, switch to the Agent List tab, select Main Controller, and click Add Node on the right.
2. Edit the Node Visualization Window Startup Parameters
After adding a node, click the Edit button in the dropdown menu to the right of the Physical-Level Sensor Node to configure the visualization window startup parameters.
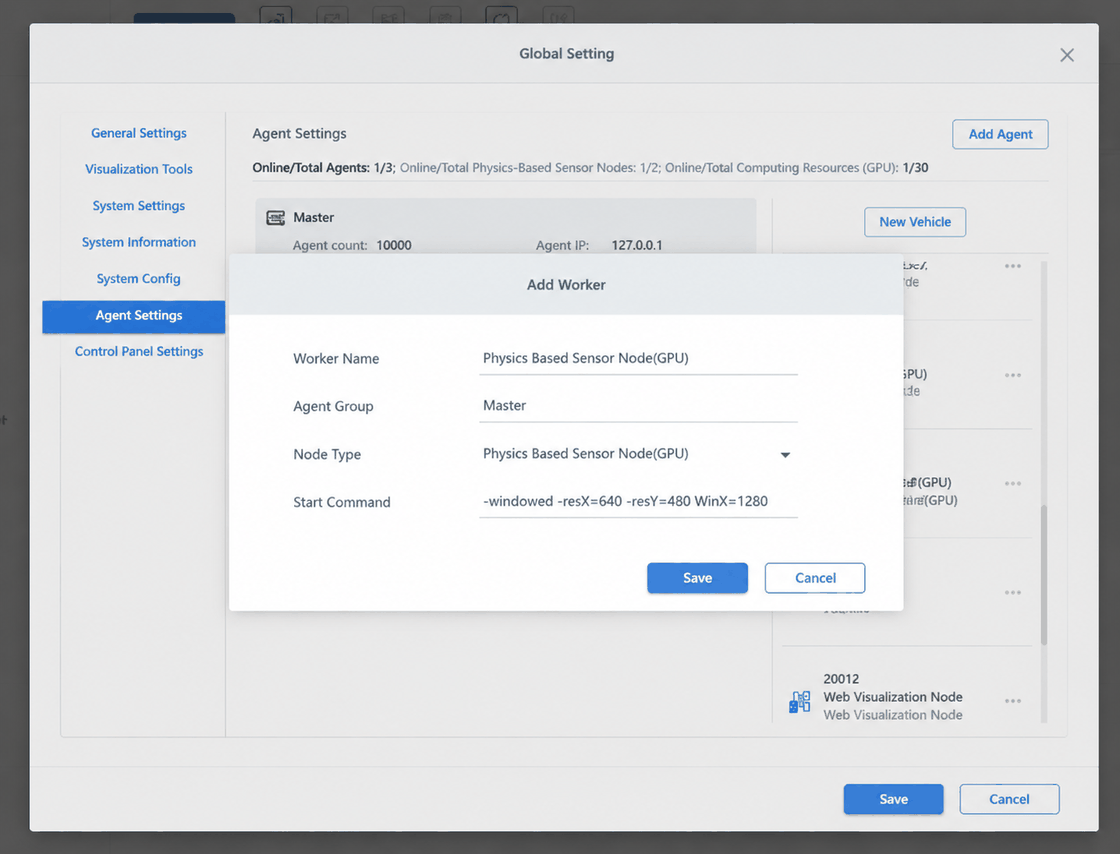
The default parameters and their meanings are as follows:
-Windowed -resX=640 -resY=480 WinX=1280 WinY=540 -GraphicsAdapter=0 -tbbmalloc
| Parameter | Description |
|---|---|
| Windowed / fullscreen | Controls the display mode of the sensor visualization window: windowed or full-screen. |
| resX / resY | Sets the resolution of the visualization window. |
| winX / winY | Sets the starting coordinates of the visualization window on the monitor. In multi-monitor or multi-output configurations, adjust these values to assign the window to a specific screen. |
| GraphicsAdapter | Binds this node to a specific GPU, enabling multiple GPUs to handle multiple physical-level sensor simulation streams. |
| tbbmalloc | Enables the Intel TBB memory allocator, improving memory allocation efficiency and simulation stability in multi-threaded scenarios. |
3. Bind Physical-Level Sensors to Nodes
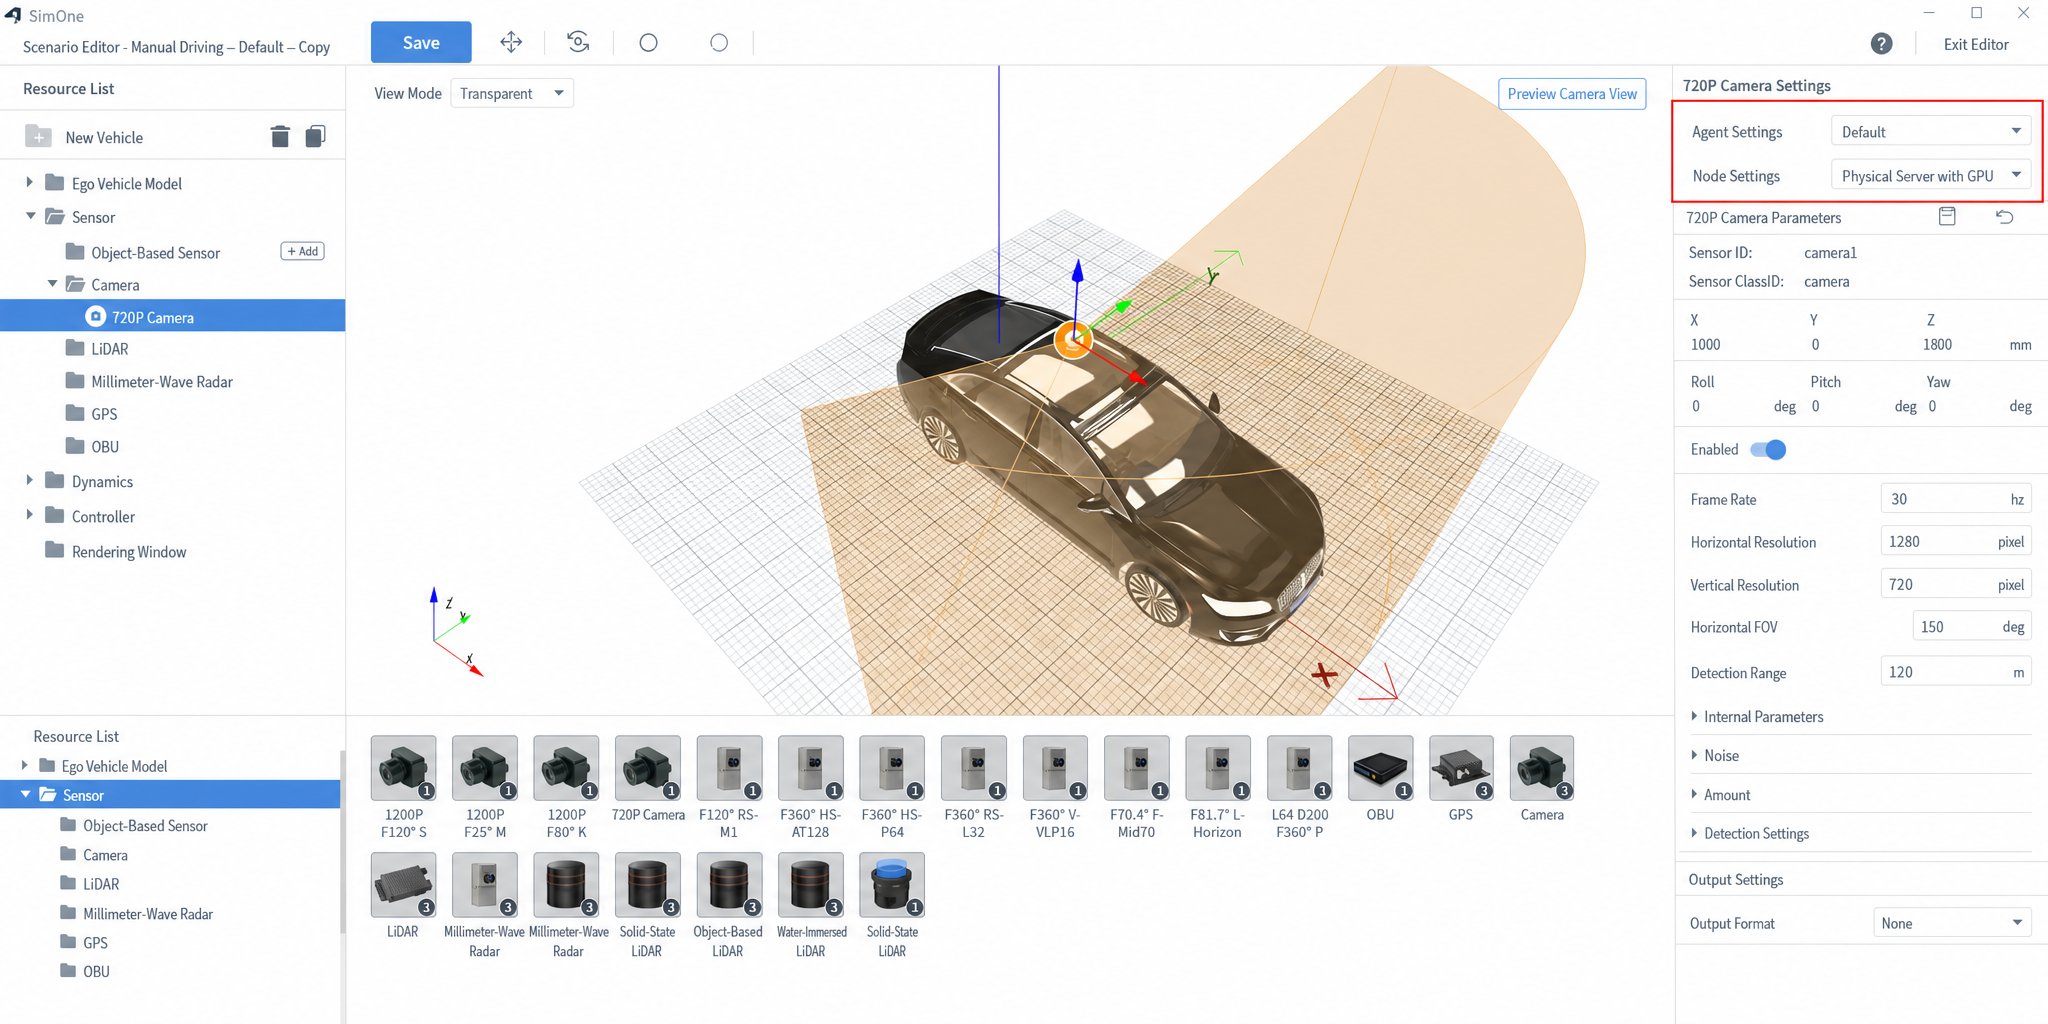
In the ego vehicle sensor configuration interface, associate each physical-level sensor with an individual physical-level sensor node (select the node from the dropdown in the configuration UI).
The number of physical-level sensor nodes must be greater than or equal to the number of physical-level sensors configured on the ego vehicle; otherwise the test case will fail to start.