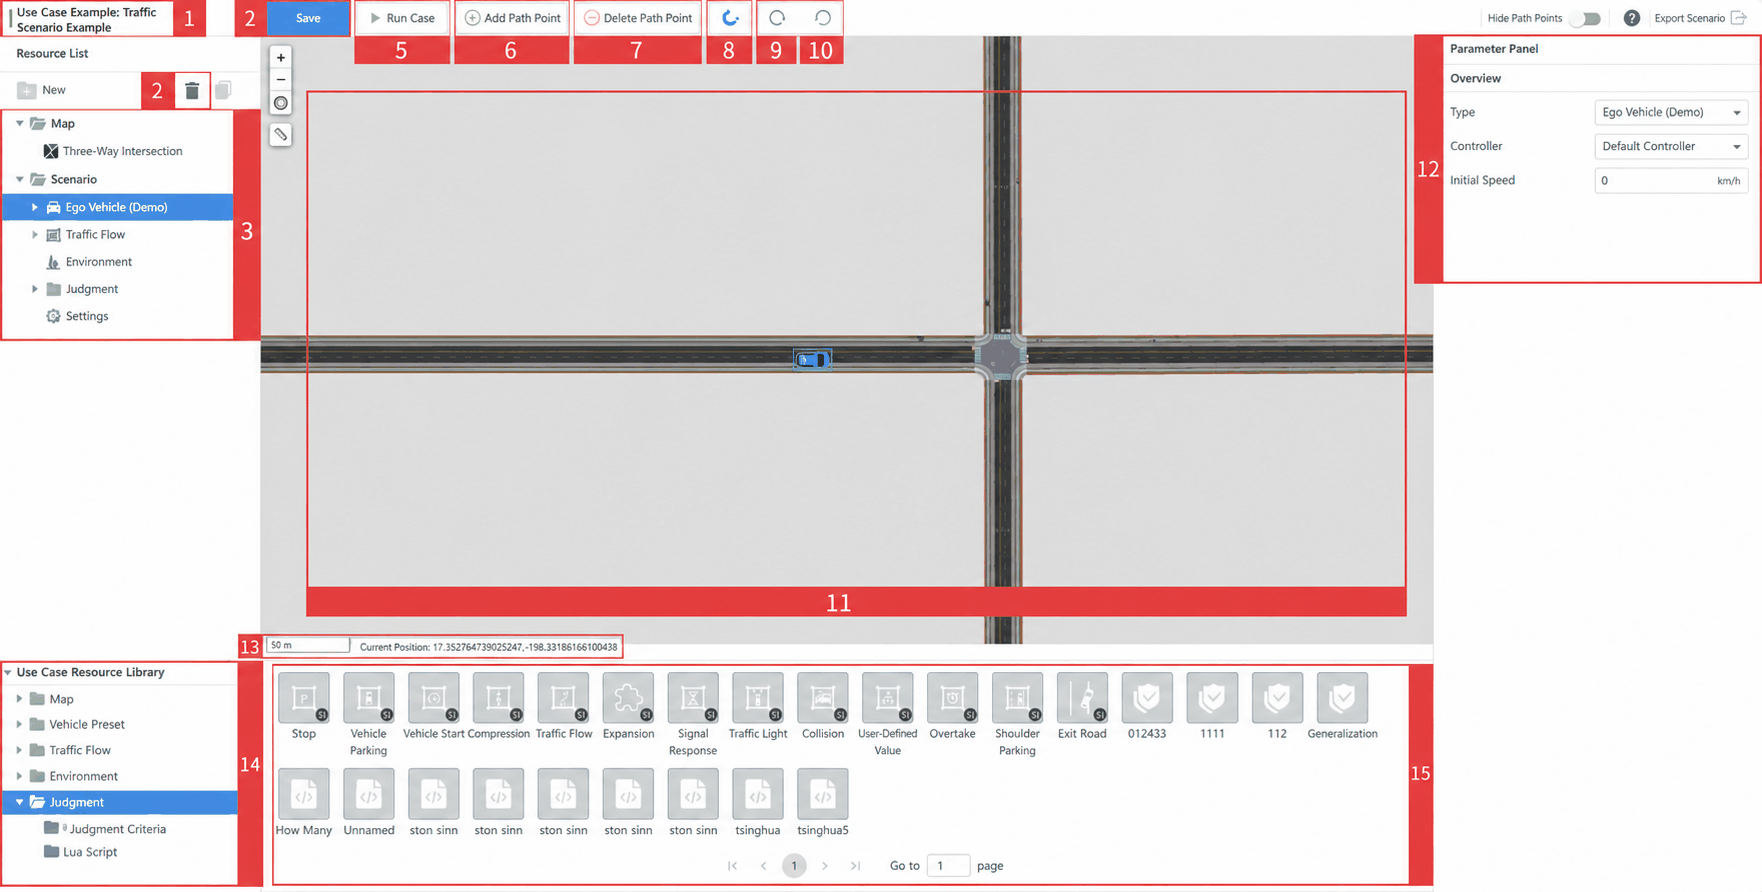
| 1 |
Case Name |
Displays the name of the case |
| 2 |
Delete Button |
Select a resource in the case resource tree and click to delete it |
| 3 |
Case Resource Tree |
Resources added to the case are displayed in the case resource tree on the left side of the editor |
| 4 |
Save Button |
After editing the case, click to save |
| 5 |
Run Case Button |
When edits have been made in the case editor, click to open the new task dialog. Select the Ego Vehicle type and controller type to run the case directly |
| 6 |
Add Waypoint |
Activated when an Ego Vehicle, static element, or dynamic element is selected. Click to add a waypoint along the current path |
| 7 |
Delete Waypoint |
Activated when an Ego Vehicle, static element, or dynamic element is selected. Click to delete a waypoint |
| 8 |
Snap to Lane Center |
When activated, waypoints added for the Ego Vehicle or dynamic elements will default to the center of the lane under the cursor |
| 9 |
Step Forward |
Redo the next operation |
| 10 |
Step Backward |
Undo the previous operation |
| 11 |
Case Edit Viewport |
Edit the case in this viewport — drag in Ego Vehicles, dynamic elements, static elements, and triggers, and set their paths or parameters |
| 12 |
Case Editor Properties Panel |
Configure parameters for objects in the case edit viewport |
| 13 |
Status Bar |
Displays scale, mouse coordinates, and error or notification messages |
| 14 |
Case Resource Library List |
Click an item in the left case resource list to display its resources on the right. Drag resources into the case editor |
| 15 |
Case Resource Display |
Click an item in the case resource library list on the left to display the resources in the selected folder on the right |