Custom Model Import
This tutorial currently applies only to [SimOne — Enterprise Edition].
Importing custom models as dynamic or static elements is supported. Custom models can also be imported as calibration targets for developing and validating calibration algorithms.
Model Import Specification
(1) Object Dimensions: Object dimensions must match real-world dimensions (unit: cm).
(2) Model Axis Orientation and Origin: The model's coordinate axes must be at the world origin (0, 0, 0) with the model's lowest point at the origin.
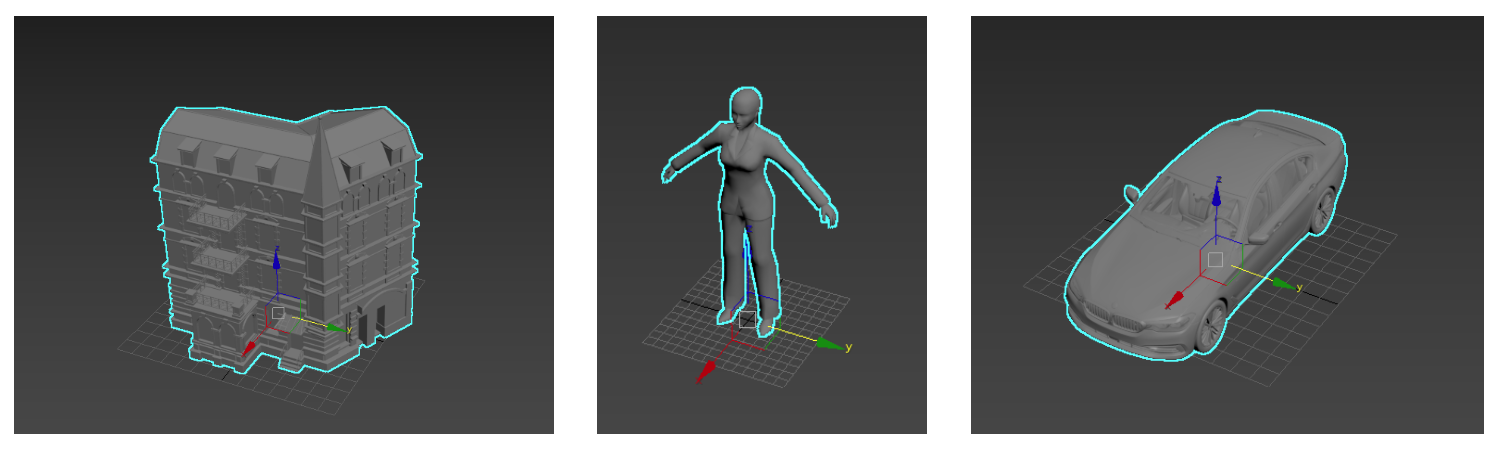
- Architectural Props: Character models — X and Y axes at the model center, Z axis at 0, front face pointing toward the X axis.
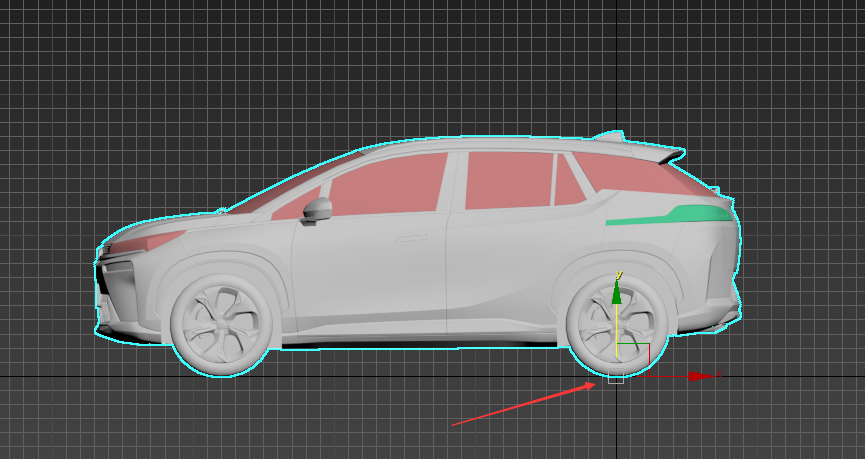
- Vehicle Type: Pay attention to orientation; the axis origin should be at the center of the rear wheel's lowest point.
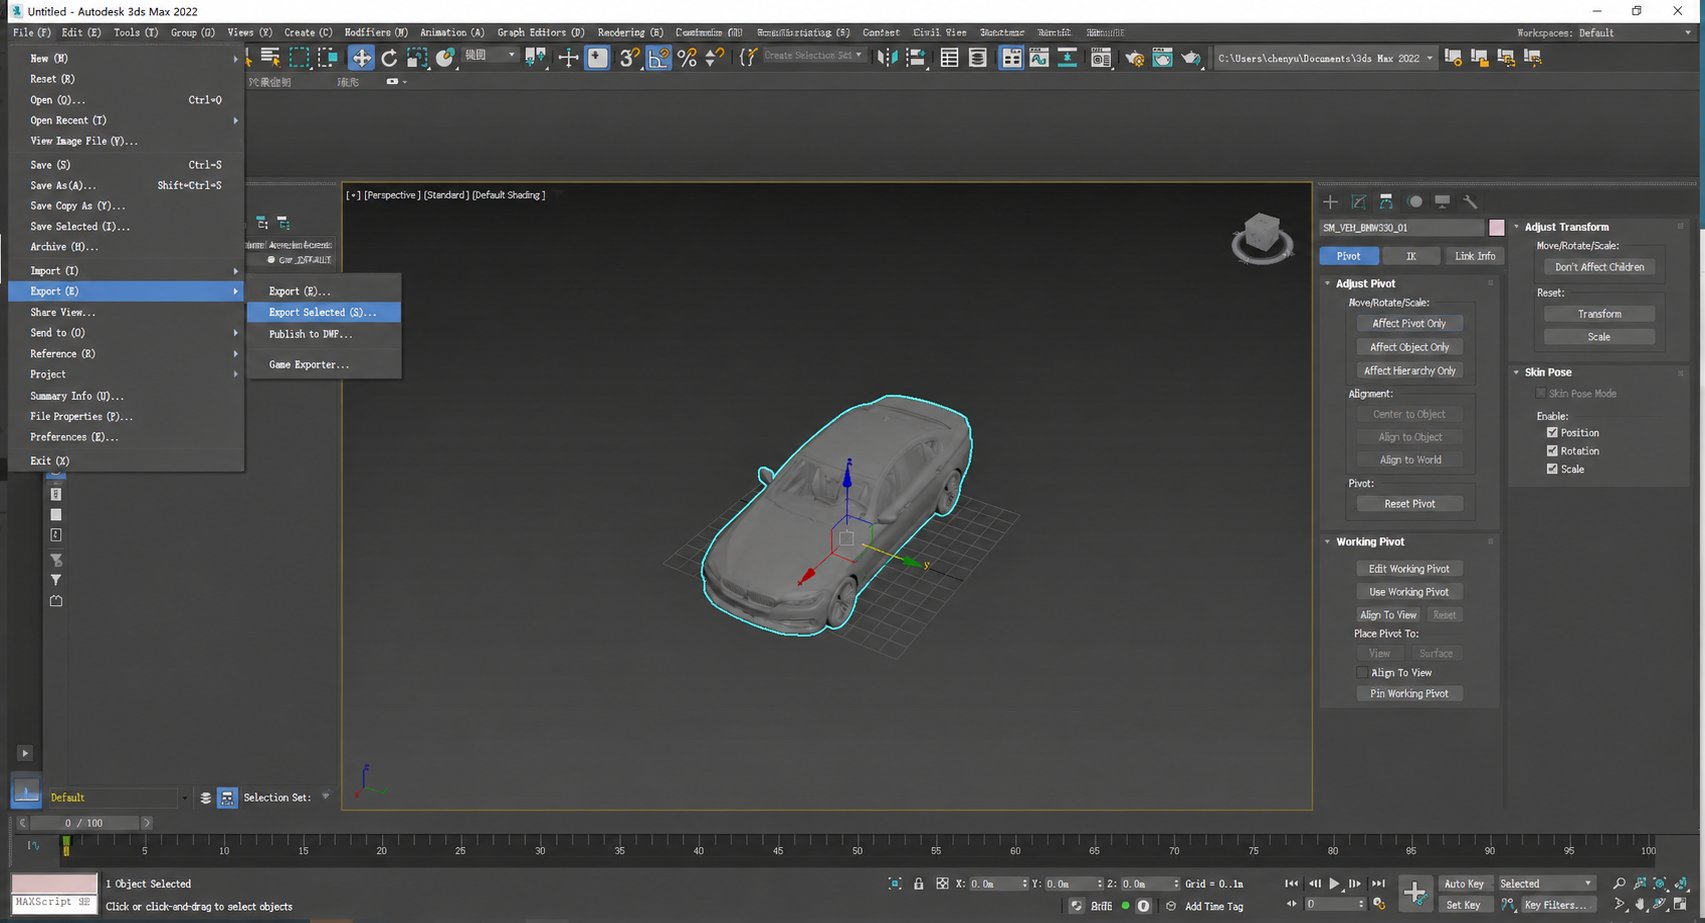
(3) Export Model: Export in FBX format (FBX retains dimension and texture information). During export, disable the "Automatic" unit option and select Centimeters. Animation export is not required.
Using Autodesk 3ds Max as an example.
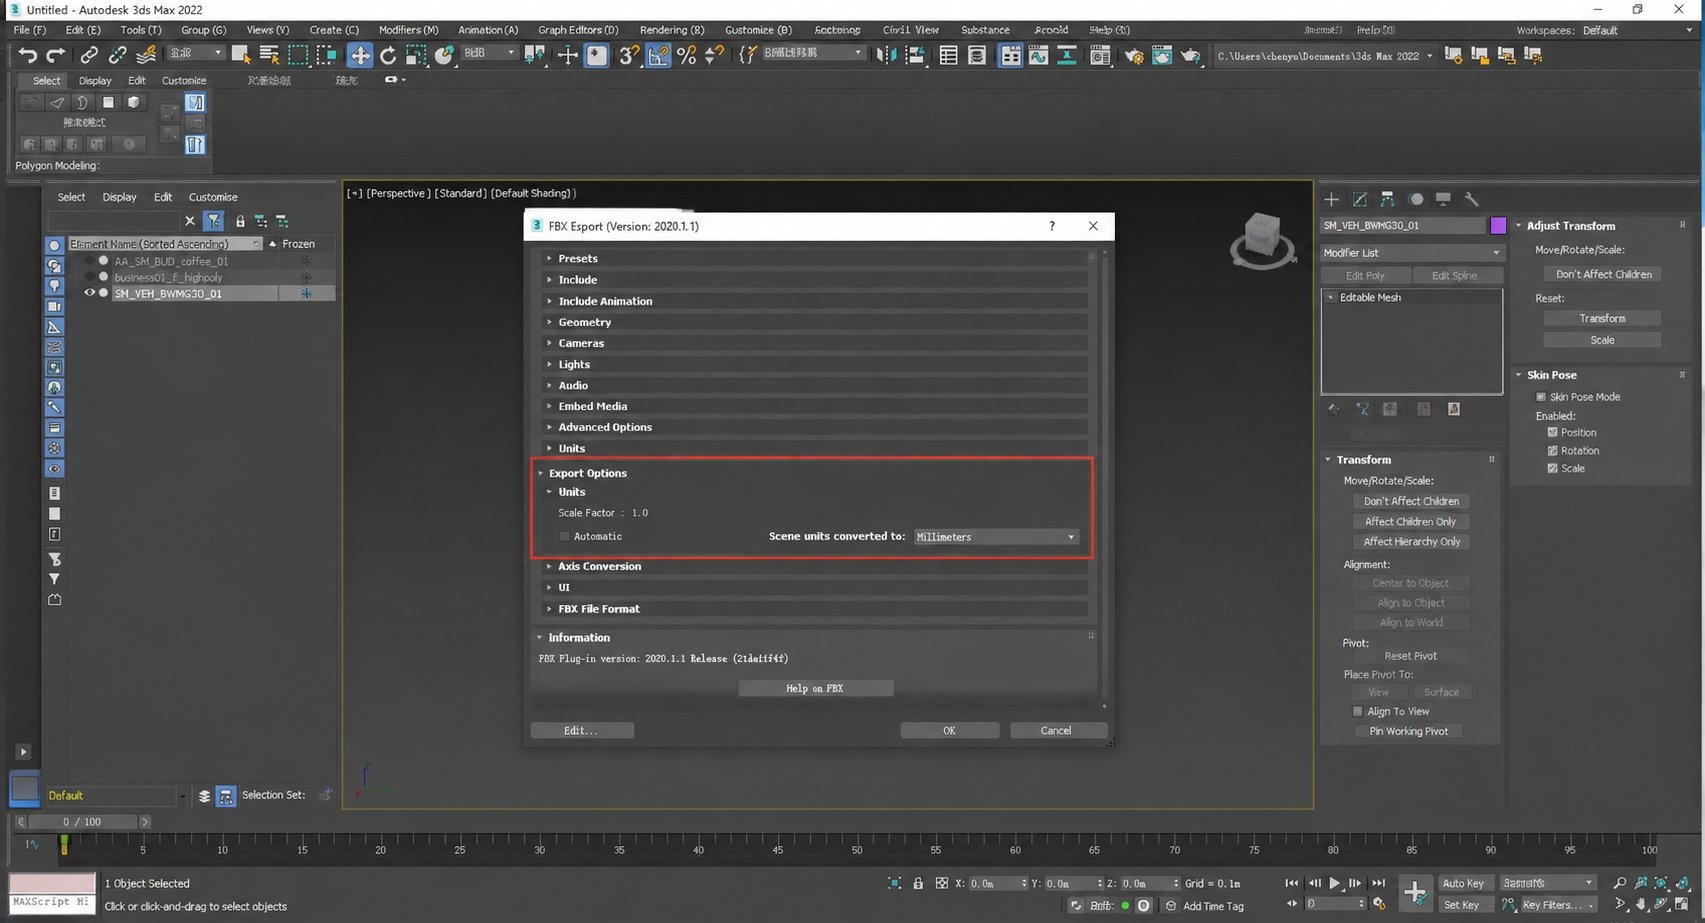
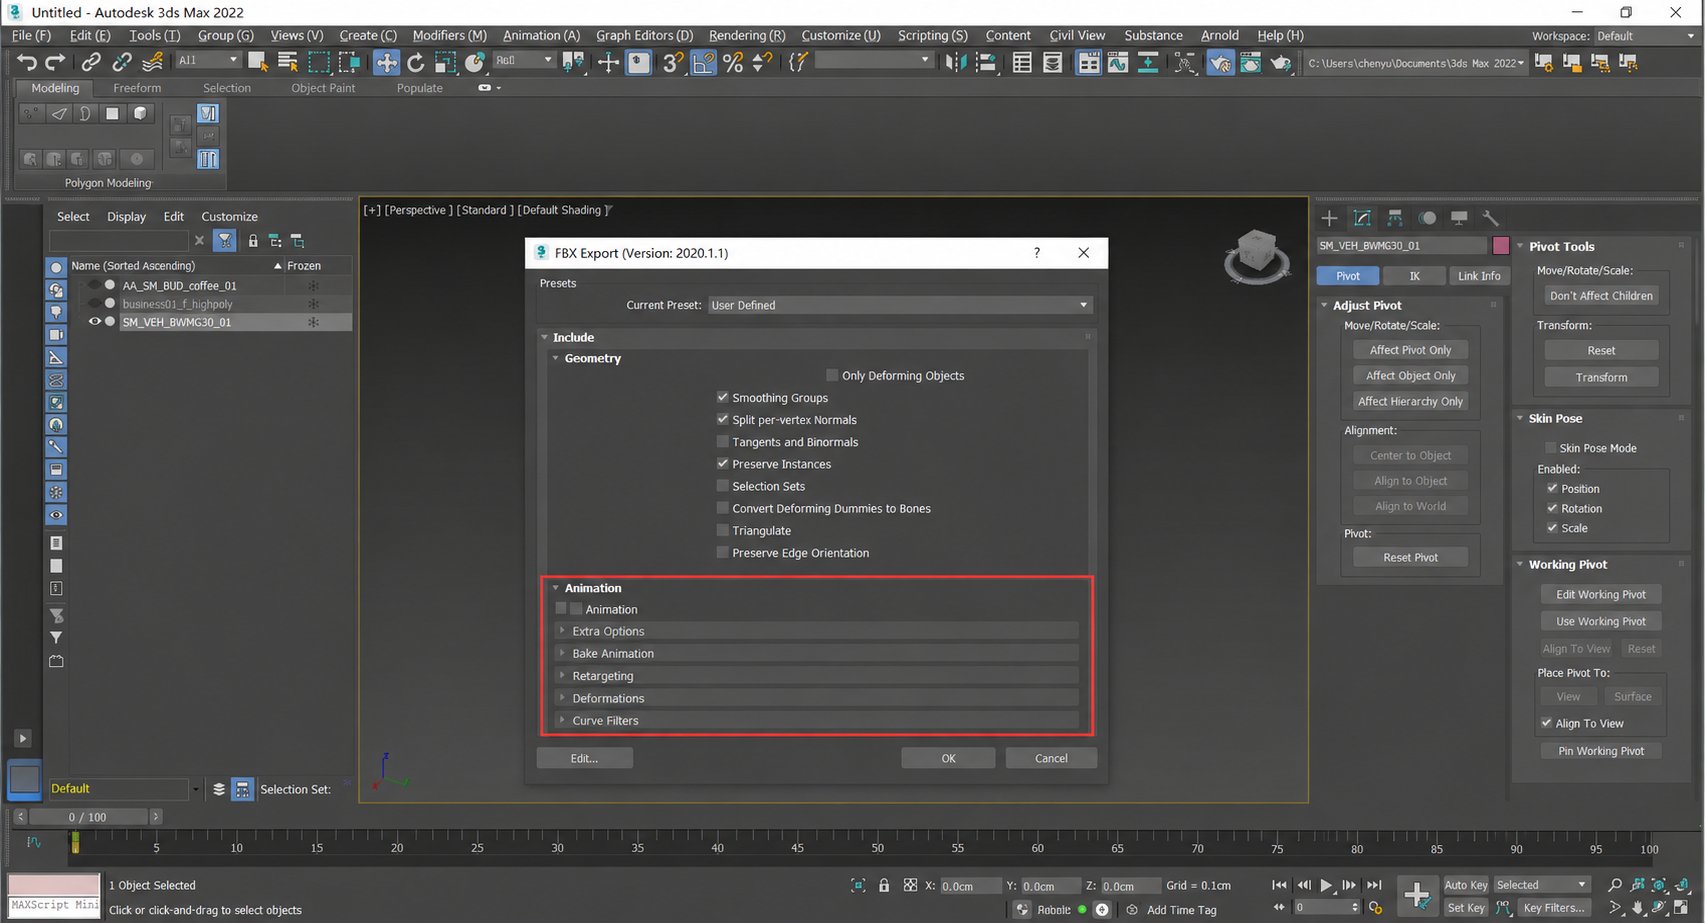
(4) Material Requirements: Ensure materials are non-redundant and clean. If the model has textures, assign them in Max before exporting.
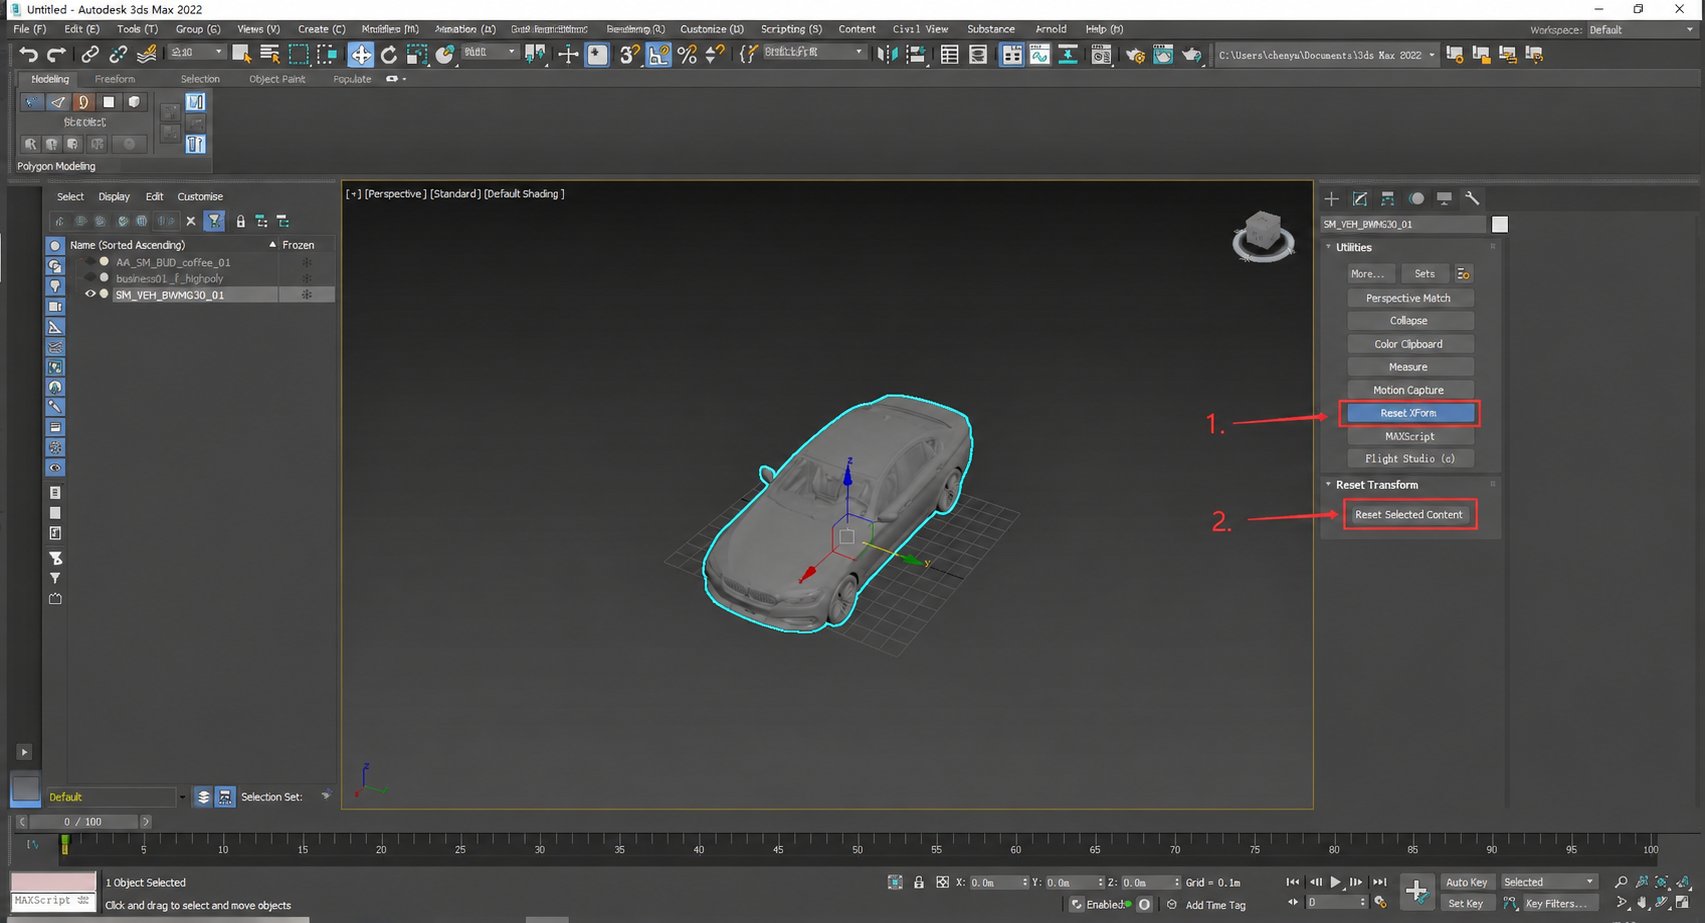
(5) Reset Transforms: If the model has been scaled or translated, reset the transforms before exporting.
Import Model
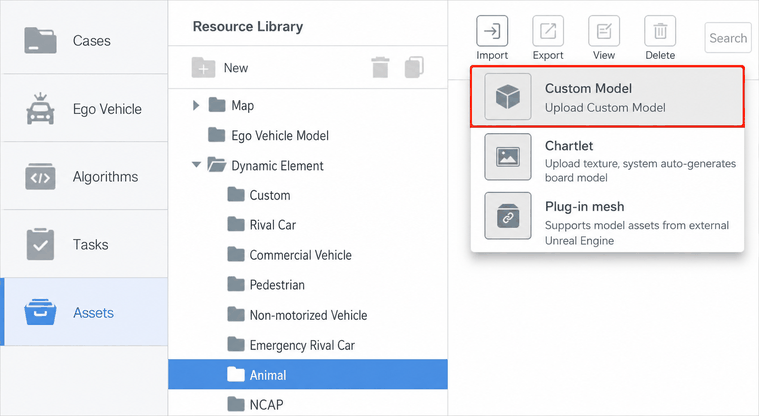
(1) Open the Resource Library, navigate to Dynamic Elements or Static Elements, select the corresponding subcategory, click Import, and select Custom Model.
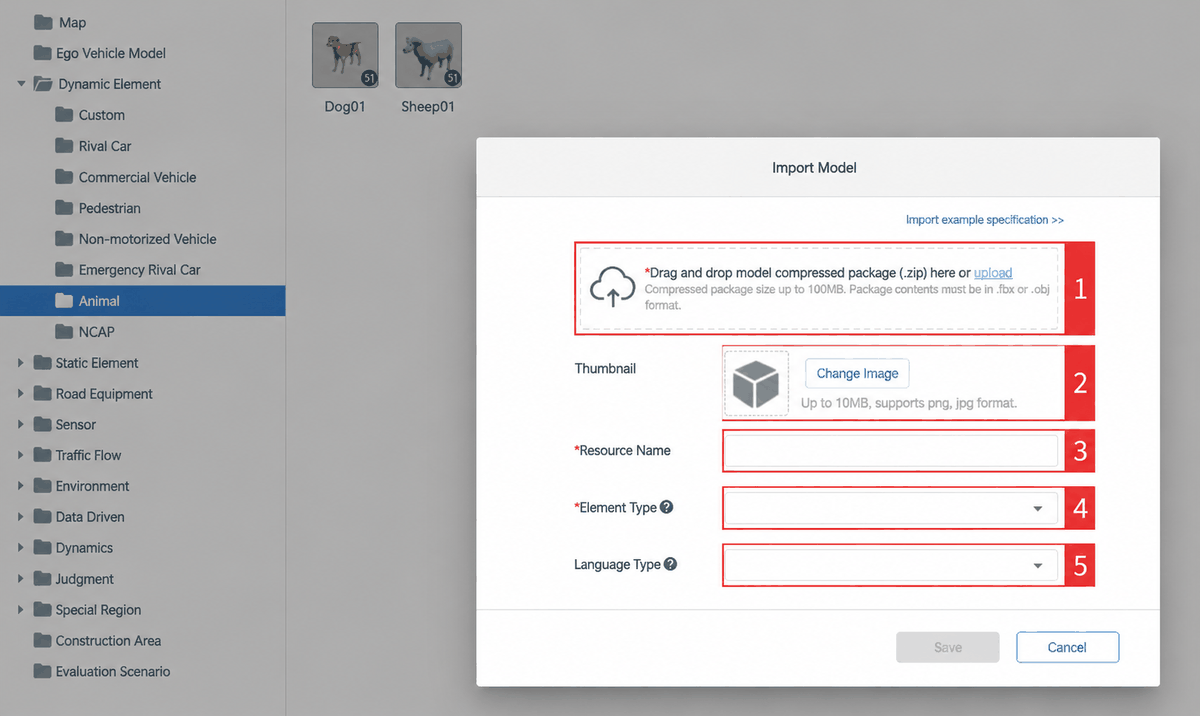
(2) The import settings dialog appears. Fill in the information and click Create.
| ID | Item | Description |
|---|---|---|
| 1 | Upload Model Archive | Supported model formats: fbx, obj. Maximum archive size: 100 MB. |
| 2 | Upload Thumbnail | Supported image formats: png, jpg. Maximum image size: 10 MB. |
| 3 | Enter Element Name | The text entered here will be used as the element's name. |
| 4 | Select Element Type | Supports the element types defined in the ASAM OpenSCENARIO standard. |
| 5 | Select Semantic Type | A semantic class categorized by language expression; used for perception simulation. |
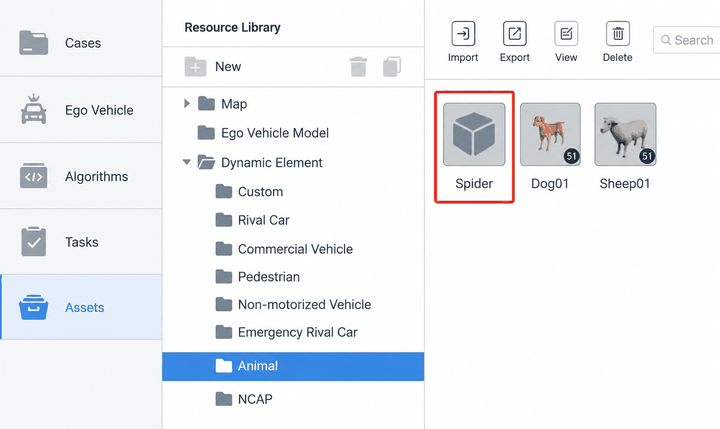
(3) After a successful import, a new element appears in the corresponding directory.
Add Element to Test Case
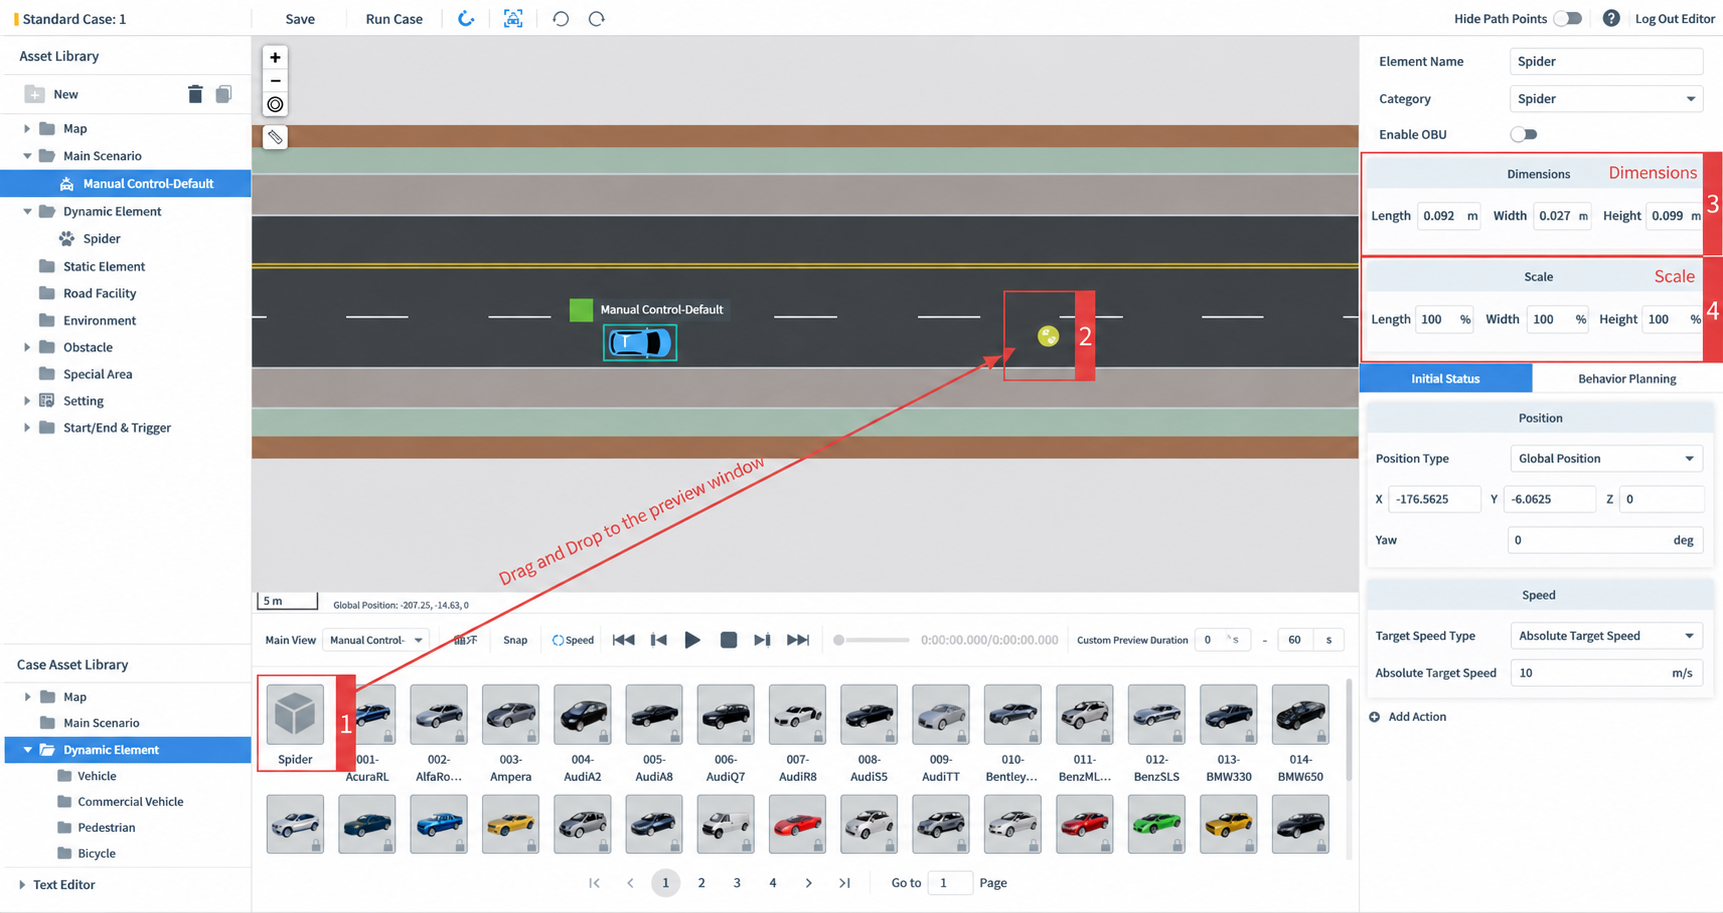
Open the test case editor, drag the imported model into the preview viewport, and customize the dimensions and scale as needed.
Viewing the Result
Save and run the test case to see the imported model in the test case monitoring window.